Are you looking to create a professional portfolio website to showcase your work and build your online presence? A well-designed portfolio website can help you attract potential clients and employers and make it easier to land new opportunities.
In this guide, we’ll walk you through the process of creating a portfolio website with WordPress using Blocksy Theme, from installation to customization and beyond.
Why Blocksy Theme?
Blocksy is a fast and lightweight WordPress theme designed for building modern websites. It is compatible with popular page builders and has many customization options. Blocksy is responsive and optimized for search engines and can be used to create a range of websites, including portfolios. It is also WooCommerce ready. Blocksy also provides customization options for custom post types. You can easily create a filterable portfolio by using the available options in the customizer.
How to Create a Portfolio Website Using Blocksy Theme
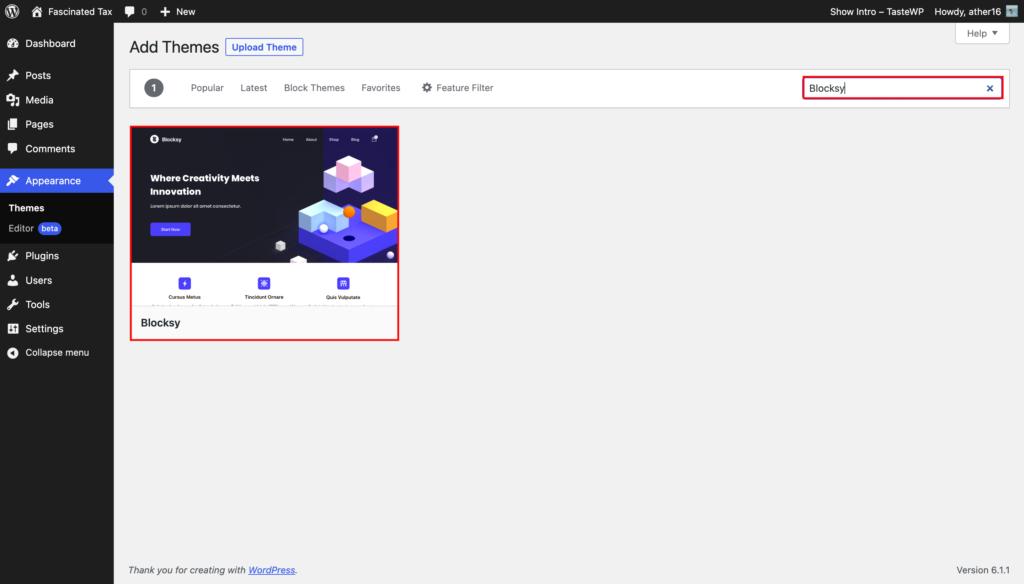
To start creating your portfolio website using the Blocksy theme, you need to first install and activate it on your WordPress site. This process is easy to follow and can be completed in a few simple steps.
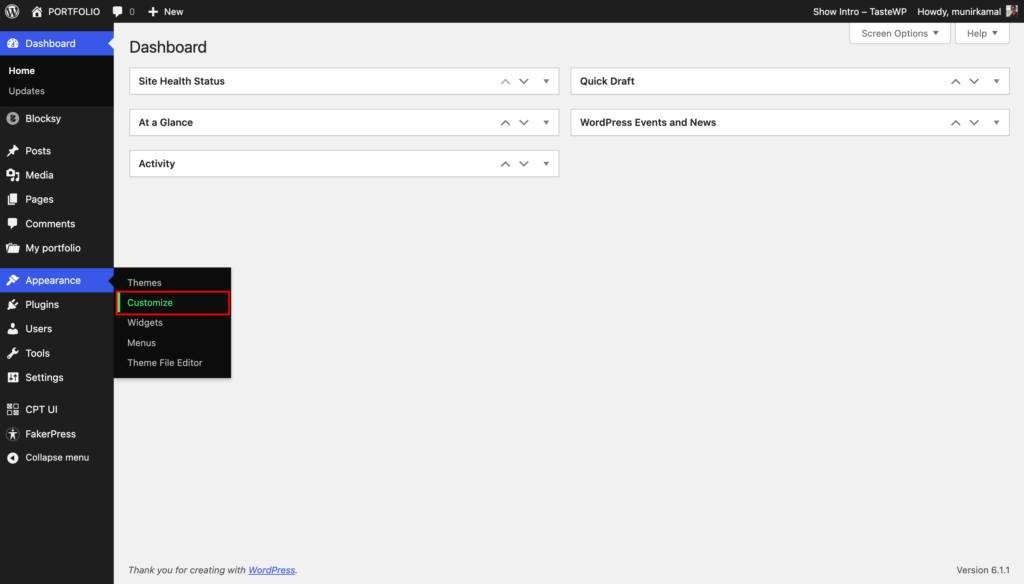
To start, log in to your WordPress dashboard and navigate to the “Appearance” section. From there, click on “Themes” and then the “Add New” button. You can then search for the “Blocksy” theme using the search bar, and once you find it, click on the “Install” button. Once the theme has been installed, you can activate it by clicking on the “Activate” button.
After you’ve installed and activated the Blocksy theme, it’s time to create your portfolio. One option is to use the default post type, but if you want a specific post type for your portfolio, you can create a custom post type. There is a step-by-step guide available on how to create a custom post type that you can learn from.
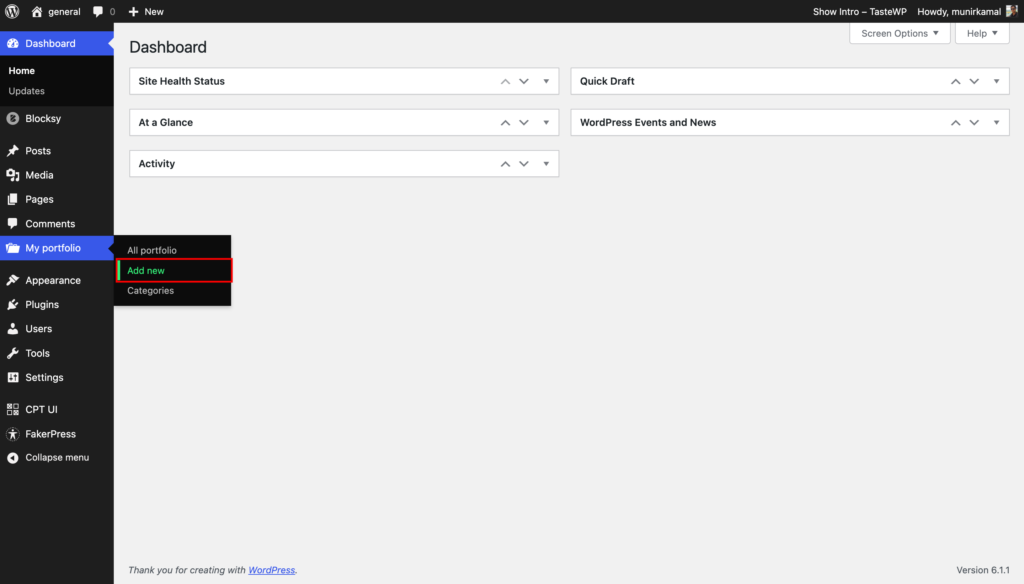
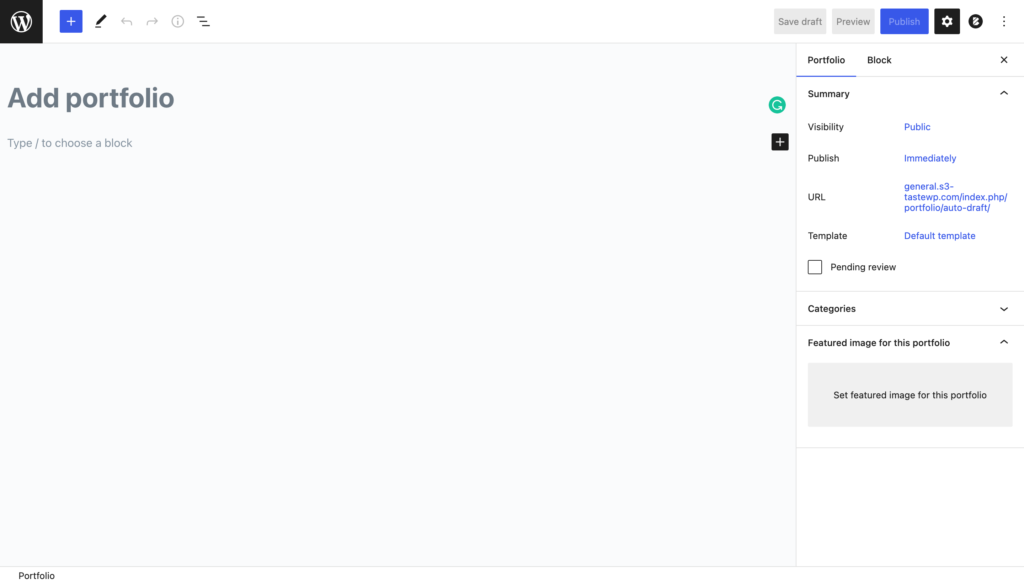
Assuming that you’ve already created a portfolio post type, you can now start adding your portfolio items. To do this, simply go to the “Portfolio” section in the WordPress dashboard, and click on “Add New.”
The process of adding portfolio items is similar to adding posts or pages. You can add the title, content, images, and any other relevant information for each portfolio item.
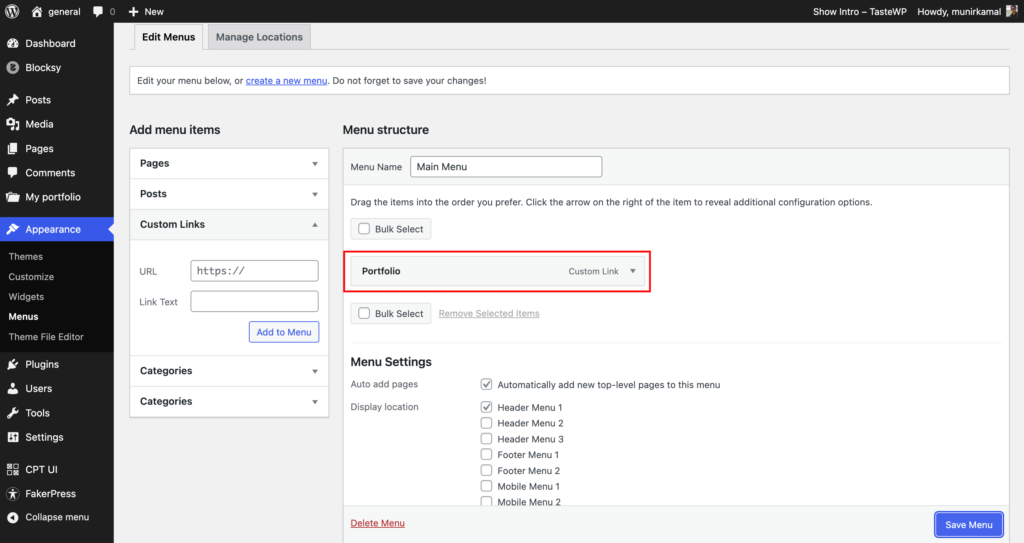
Now that you have added your portfolio items, it’s time to display them on your website. To do this, go to the Appearances menu and select the “Menus” option.
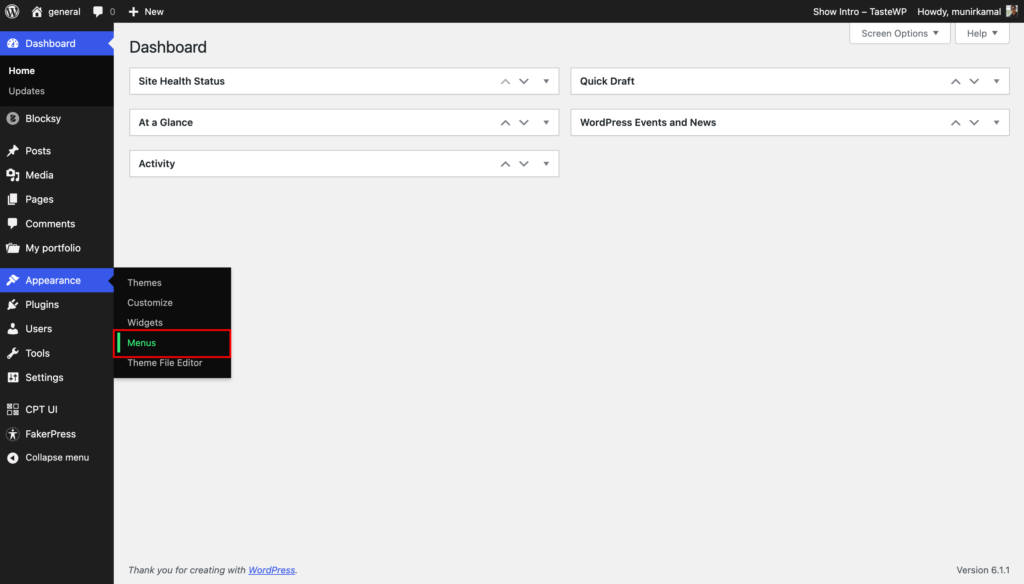
From here, you can add a custom menu item that links to your portfolio post type. To do this, simply add the URL of your website followed by the custom post type name. For example, it could be https://www.example.com/portfolio.
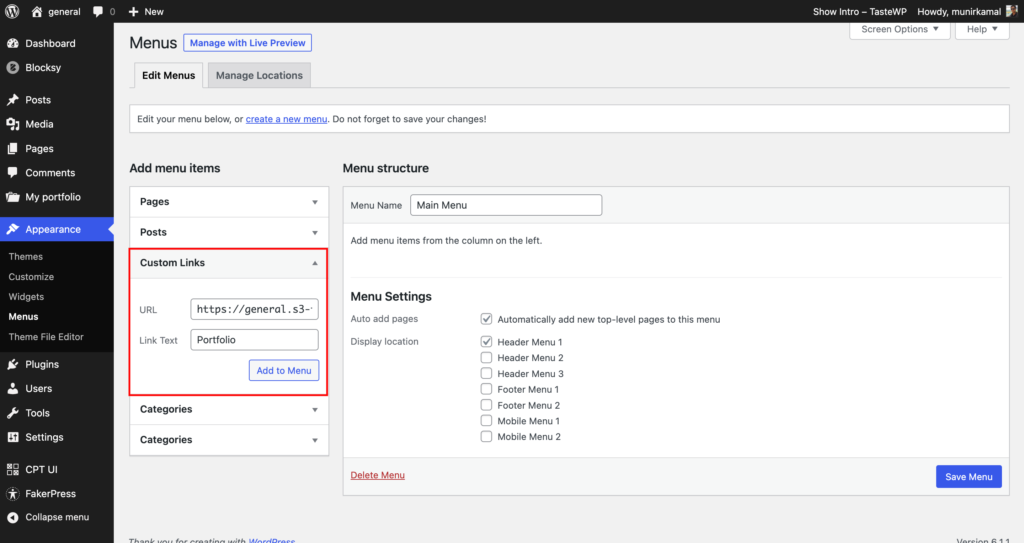
If your website is not using an SEO-friendly URL, you can use the following format: https://www.example.com/?post_type=portfolio. Once you have added the URL, give the menu item a name that accurately describes what it links to, such as “Portfolios” or “Portfolio Items”. Finally, add the menu item to your website’s menu. This will enable visitors to access your portfolios directly from your menu.
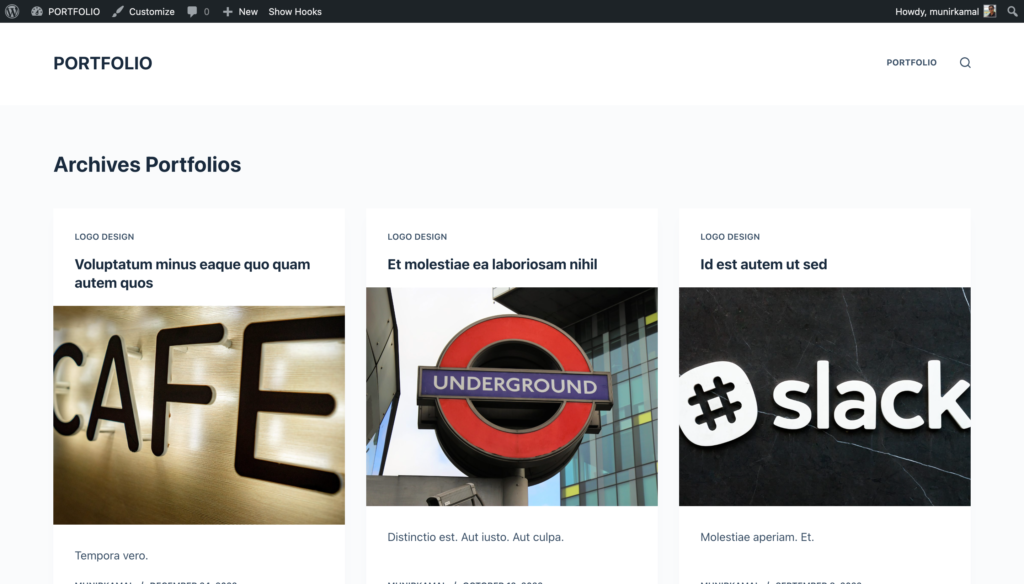
Once you have added the menu item for the portfolio, you can now visit the website and click on the menu item. This will take you to the portfolio archive page and the single portfolio page. By default, the archive page will look like this.
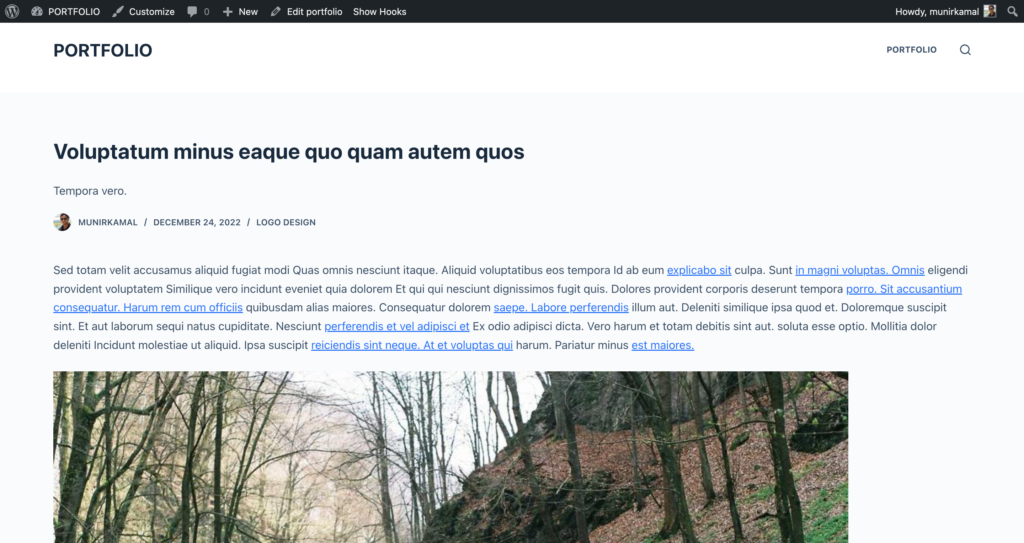
while the single portfolio page will look like this.
But don’t worry, Blocksy provides a wide range of customization options that you can use to personalize these pages to your liking. To access these customization options, simply go to the customizer under the appearance section in the WordPress dashboard.
After accessing the customizer, you will have access to all the options to customize your overall website. Feel free to play around with the options to make your site look the way you want it to.
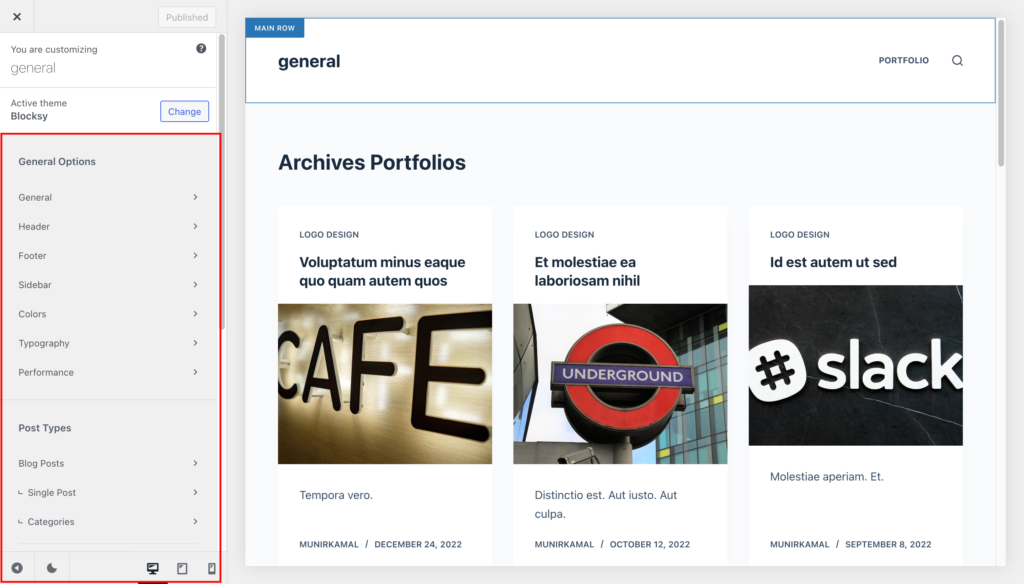
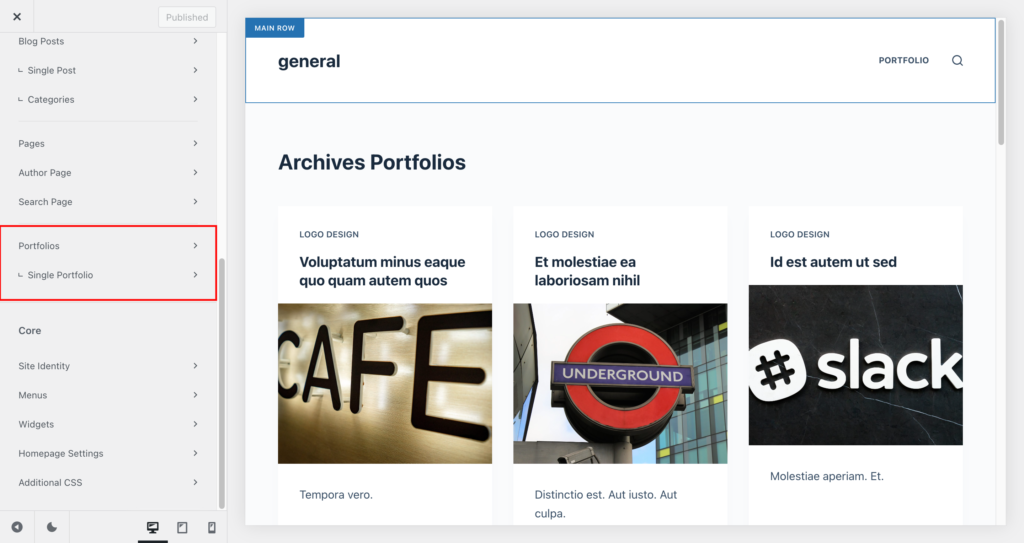
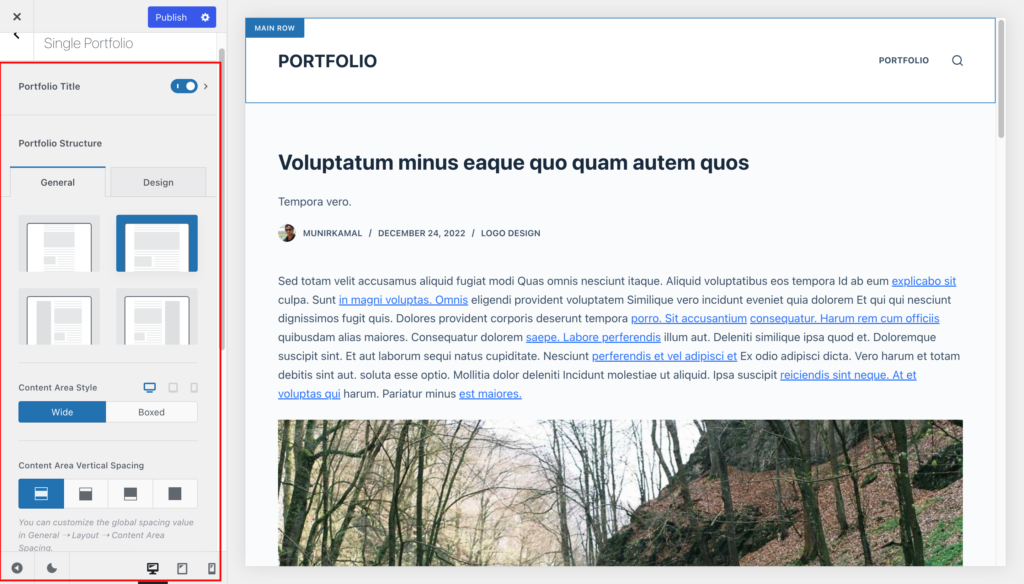
Additionally, if you scroll down, you will find options specifically for your portfolio post type. Simply click on the “Portfolio” option to see the customization options for your portfolio pages.
After clicking on the “Portfolio” option in the customizer, you will be presented with customization options for your portfolio archive page. Here, you have the ability to change the layout of the archive page, adjust the number of columns, and specify the number of posts to display.

Tip
Visit the archive page before making any changes in the customizer to see the live preview of your customizations.
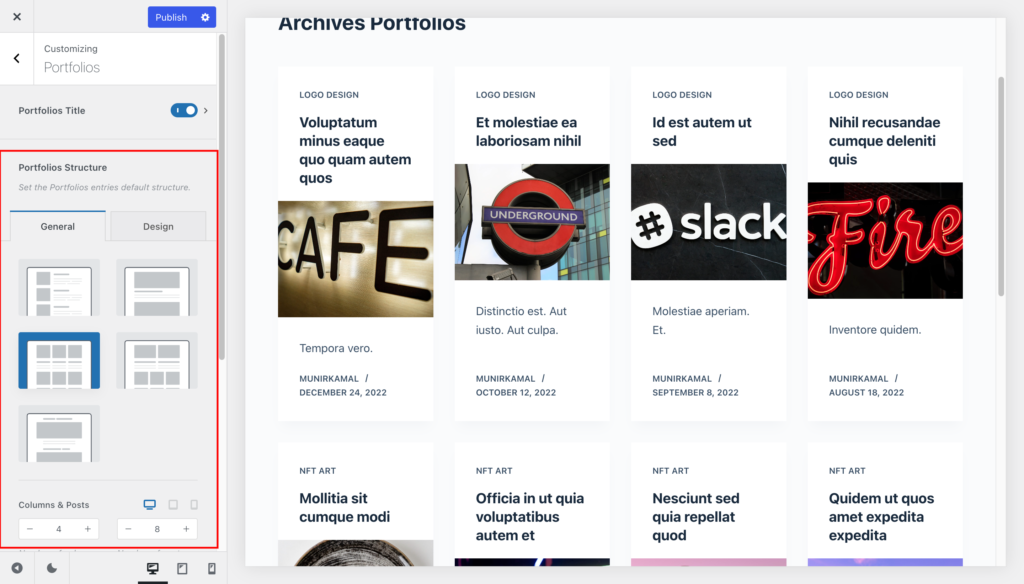
By scrolling down, you will find the card panel where you can choose different card designs and customize the card elements, such as the position of the elements and enable or disable them.
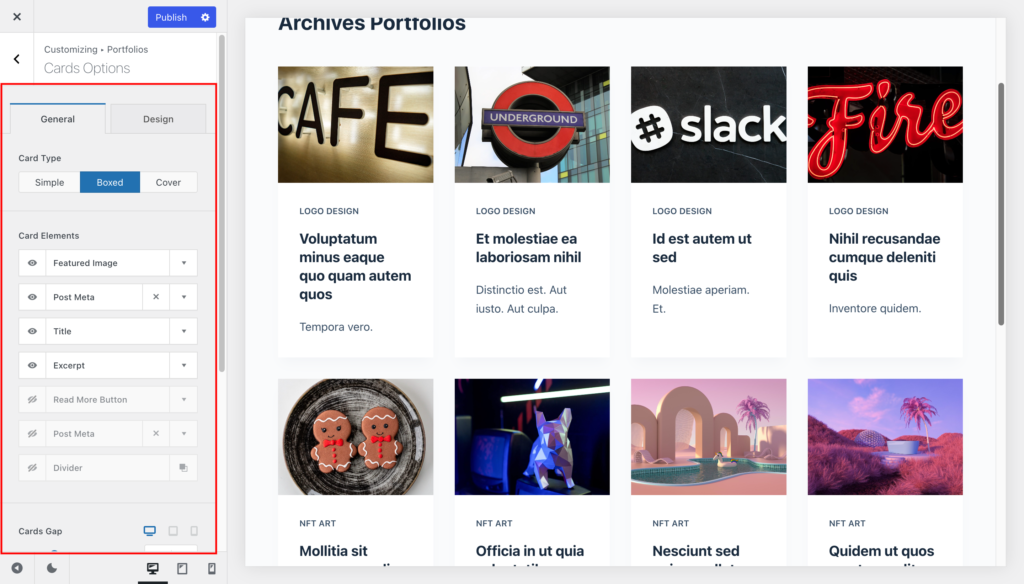
By clicking on a specific card element, you will have access to more options for that element.
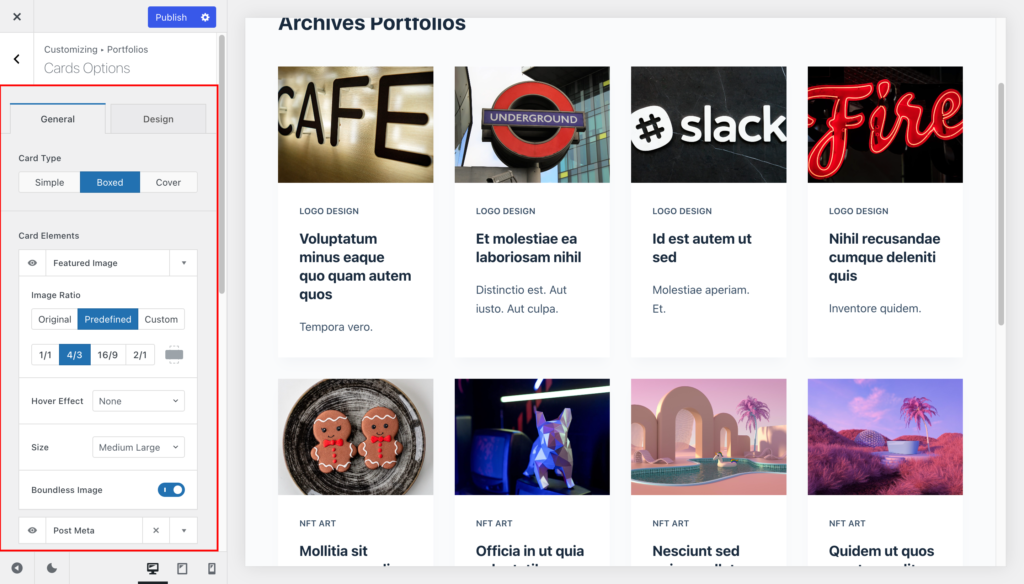
Additionally, there are alignment and card spacing options available, and in the design tab, you can make adjustments to the typography, background, text colors, shadows, and more.
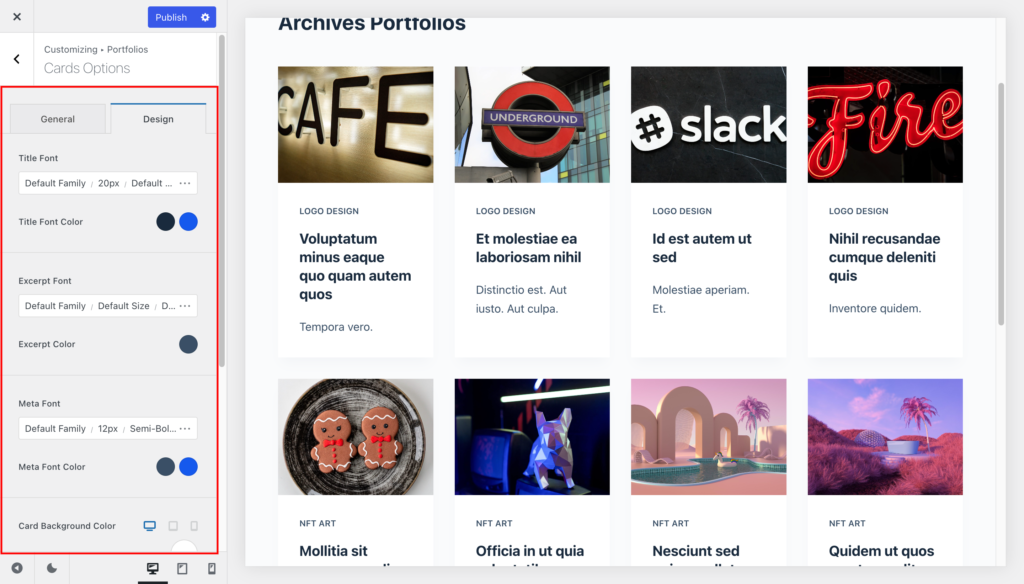
With all these customization options, you can create a unique and personalized archive page for your portfolio.
After styling the archive page, go back to the customizer and click on the “single portfolio” section.
Tip
Visit the single page before making any changes in the customizer to see the live preview of your customizations.
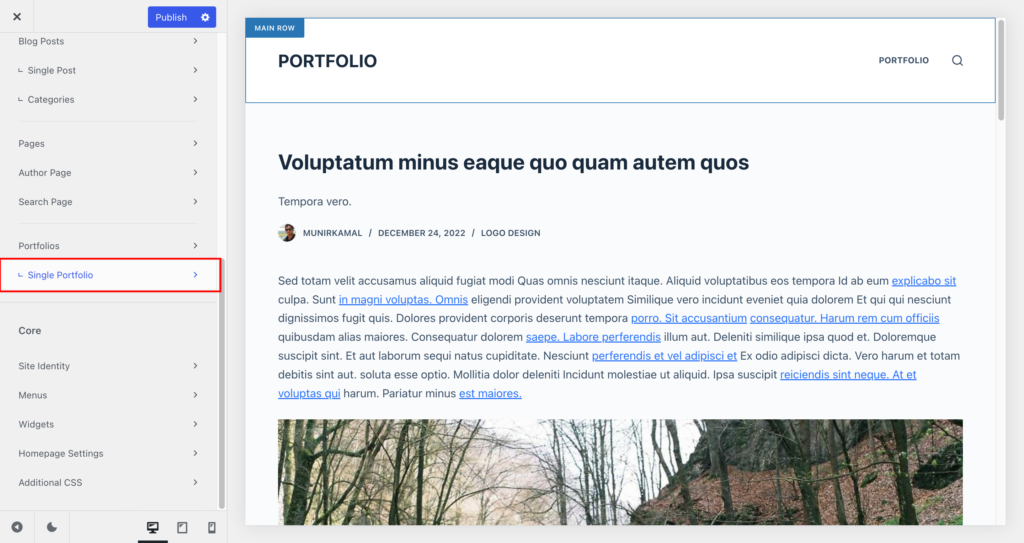
Here, you will find a variety of options to style the single portfolio page. You can choose from different layout options and customize the various elements on the page.
So, take some time to play around with these options, and create a unique and eye-catching single portfolio page that perfectly showcases your work.
After designing the single page, your portfolio website is now ready for the world to see! However, you can add an extra touch of personalization by adding a filter to the archive page. This feature allows your users to filter through your portfolio items based on specific categories, making it easier for them to navigate and find the items they are interested in.
How to Create Filterable Portfolios
To create a filterable portfolio, you will need to install Blocksy Pro plugin. It offers several extra features for your website, one of which is the filterable portfolio. You can visit their website for more details.
To activate filter post feature, follow these steps:
Once you install and activate the plugin you have the Blocksy menu in the dashboard click on it.

Then go to the “Extensions” section and click on “Pro Extensions.”
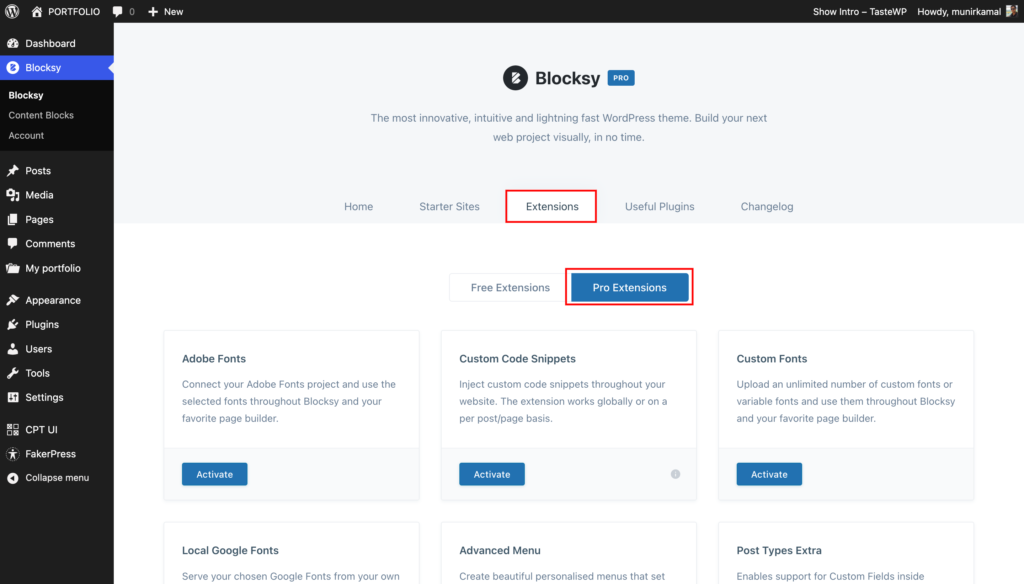
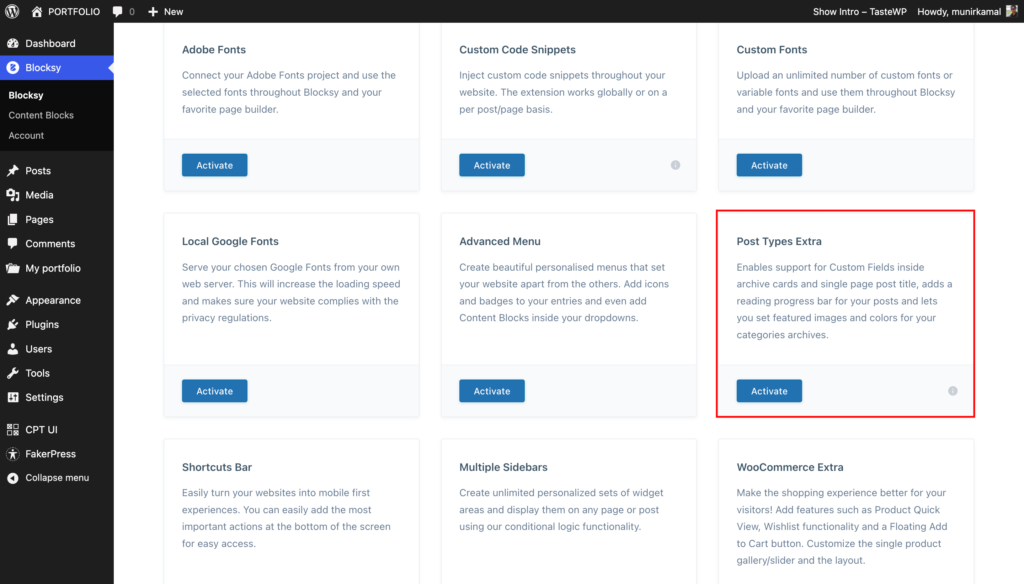
Scroll down until you see the “Post Types Extra” option and activate it.
Once you have activated the “Post Types Extra” feature, head over to the customizer, select the portfolio section, and scroll down until you see the post filter option.
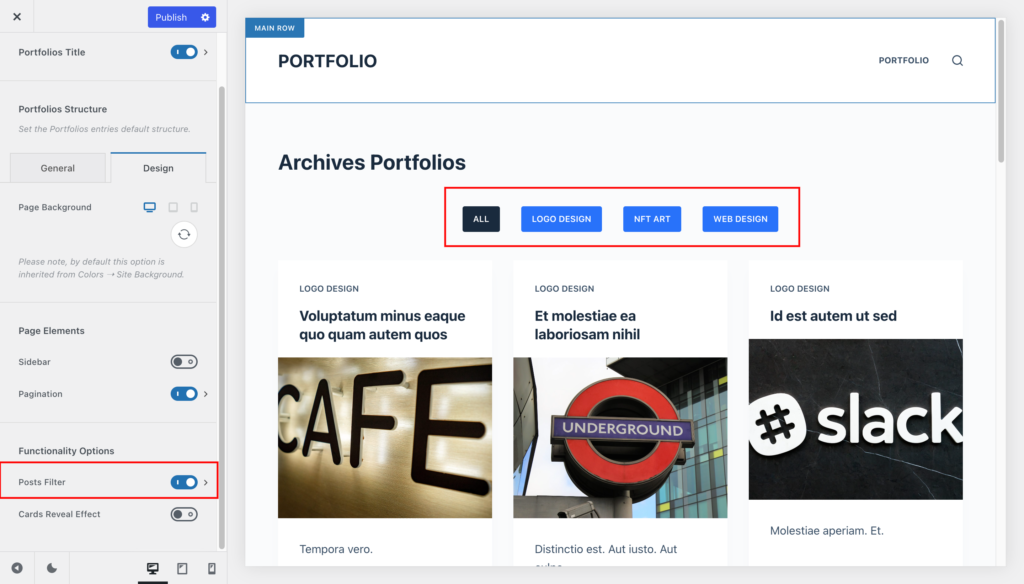
Enable the post filter and voila! You now have a fully functional filterable portfolio that makes it easier for your users to navigate and find the items they are most interested in.
Note: The filter will only work if you have already categorized your portfolios into categories or tags.
Conclusion
In conclusion, creating a visually appealing portfolio website is easier than ever with the right tools and plugins. By utilizing the customizer options in the Blocksy theme and the Blocksy Companion (Premium) plugin, you have the power to design the single and archive portfolio pages that showcases your work in a unique and captivating way. And, by adding a categories filter to the archive page, you can provide a more user-friendly and organized experience for your visitors. By following the steps outlined above, you can create a custom portfolio website that will help you stand out and get noticed by your potential clients and audience.


Leave a Reply