The Preferences feature allows you to customize the options by turning them on or off according to your preferences. This can help you eliminate distractions in the layout that may interfere with your writing and create a more personalized editing experience.
1
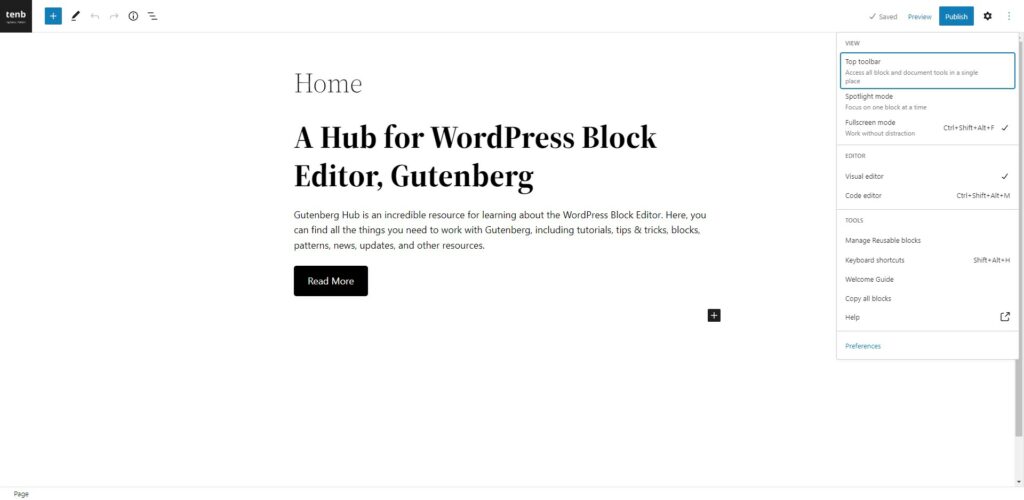
In the WordPress Block Editor, click the three dots icon in the upper-right corner of the top toolbar. This opens up a drop-down menu. Click Preferences to open the Preferences panel.
General
2
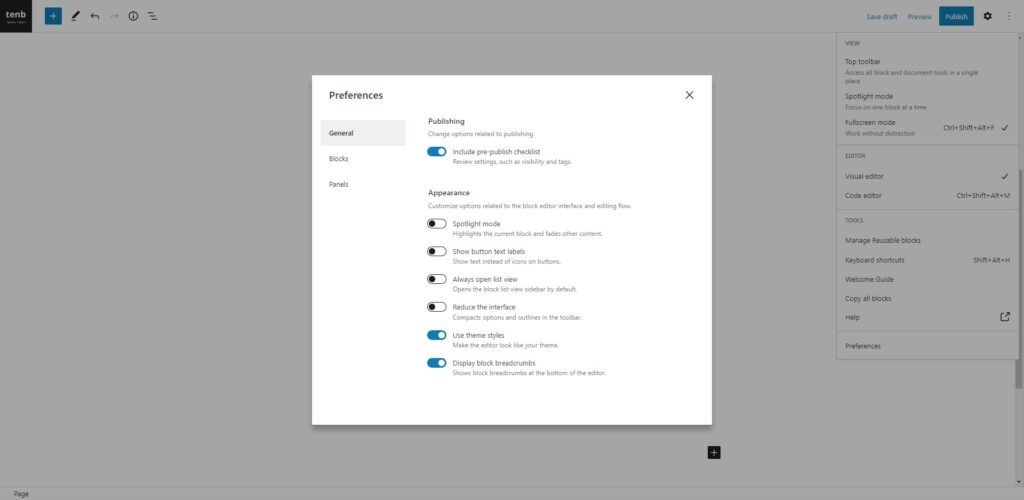
In the general section, you can find some useful settings related to publishing and appearance.
Publishing
Change options related to publishing.
3
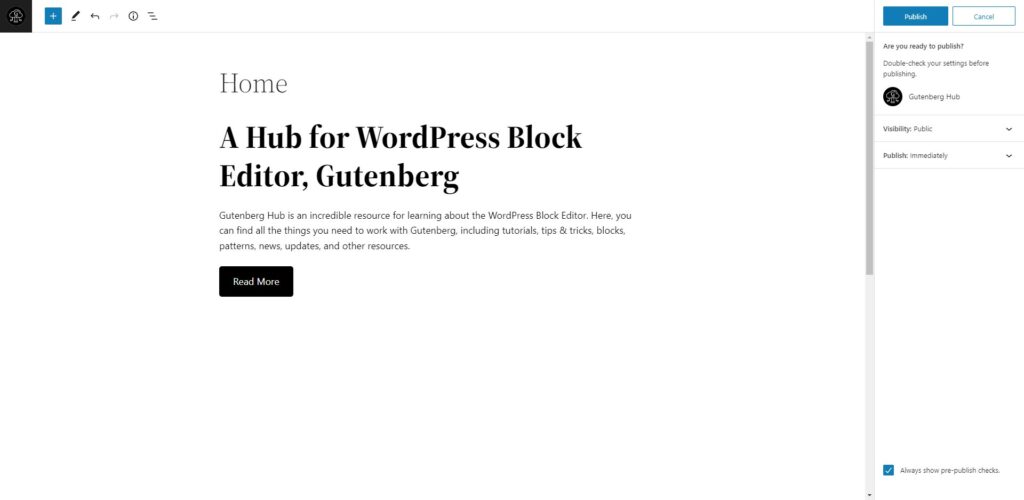
Include pre-publish checklist: This feature adds steps before publishing a post or page. When you click “Publish,” you will be shown a checklist to review the settings for Visibility, Publish date, and to add categories and tags. You can make any necessary changes and then click “Publish” again to finalize the publication of the post or page.
Appearance
Customize options related to the block editor interface and editing flow.
4
Spotlight mode: Activating this option will set the WordPress Block Editor to Spotlight mode, where all blocks except the one you are currently working on will be greyed out. This allows you to focus on a single block at a time.
5
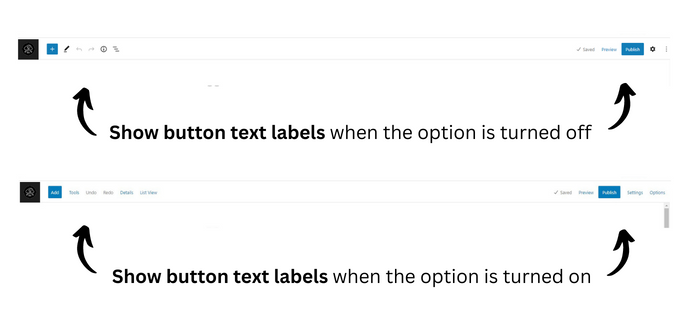
Show button text labels: Enabling this feature will display text rather than icons in the Toolbar, both in the Top Toolbar in the Block Editor and the individual Block Toolbar.
6
Always open list view: Activating this option will cause the block list view sidebar to open by default each time you open the Block Editor. This is useful for those who frequently use the list view.
7
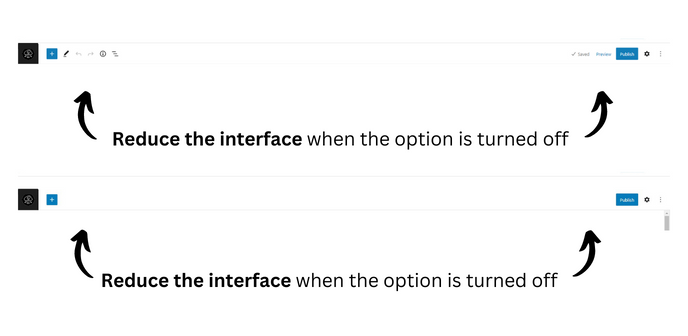
Reduce the interface: Enabling this option creates a simpler interface with fewer distractions while you write. WordPress will disable certain options and panels in the toolbar and remove breadcrumbs from the bottom of the editor.

Tip
It’s important to note that these options are not permanently removed; they are just hidden while you write. If you need them, they will become visible when you hover over the Toolbar.
8
Use theme styles: This feature allows the editor to mimic the appearance of your theme, giving you a better idea of how your content will look when it is published. If you prefer to focus on the content itself rather than its appearance, you can disable this option to remove your theme styles from the editor.
9
Display block breadcrumbs: Block breadcrumbs are a WordPress editor feature that displays a trail of the blocks within your content at the bottom of the editor. They can be useful for navigating through nested blocks and understanding the structure of your content. However, if you prefer a cleaner interface or do not find the breadcrumbs helpful, you can disable them in the editor’s settings.
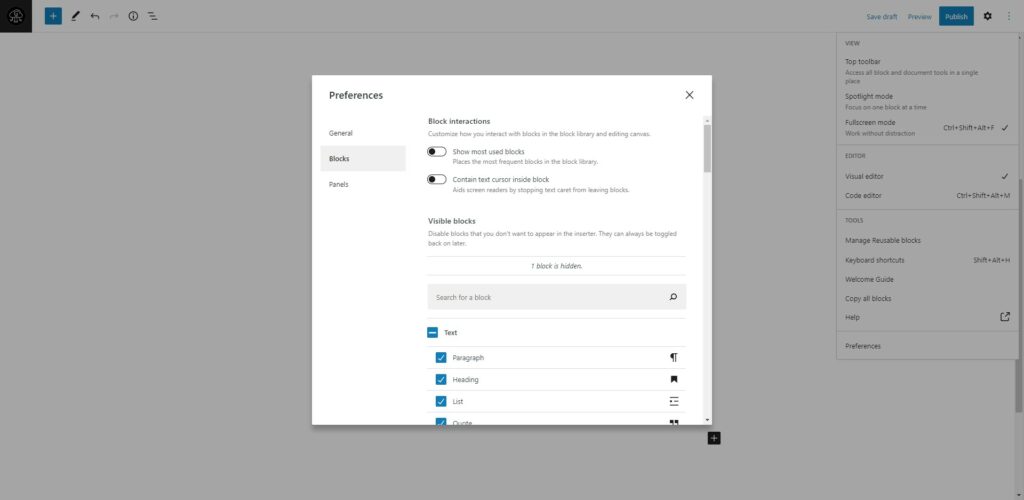
Blocks
10
Under the block setting panel, you can find options for block management and some other block-related settings.
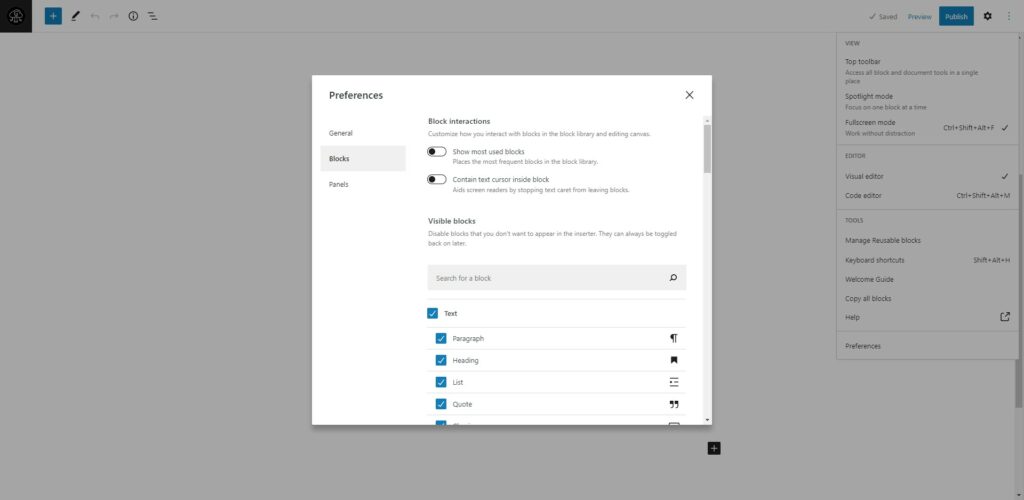
Block interactions
Customize how you interact with blocks in the block library and editing canvas.
11
Show most used blocks: Toggle this option to enable a section in the Block Inserter that shows all the blocks you use the most. This can be helpful to easily find the blocks you frequently use to build your page or post content.
12
Contain text cursor inside block: This option helps screen readers by preventing the text caret from leaving blocks.
Visible blocks
Disable blocks that you don’t want to appear in the inserter. They can always be toggled back on later.
13
Visible blocks: This section allows you to disable blocks from appearing in the inserter. They can be re-enabled at any time.
- To search for blocks, type the name in the search box.
- You can use the checkboxes to show or hide blocks from the list.
- As you hide blocks, a message at the top will indicate how many blocks have been hidden.
Panels
14
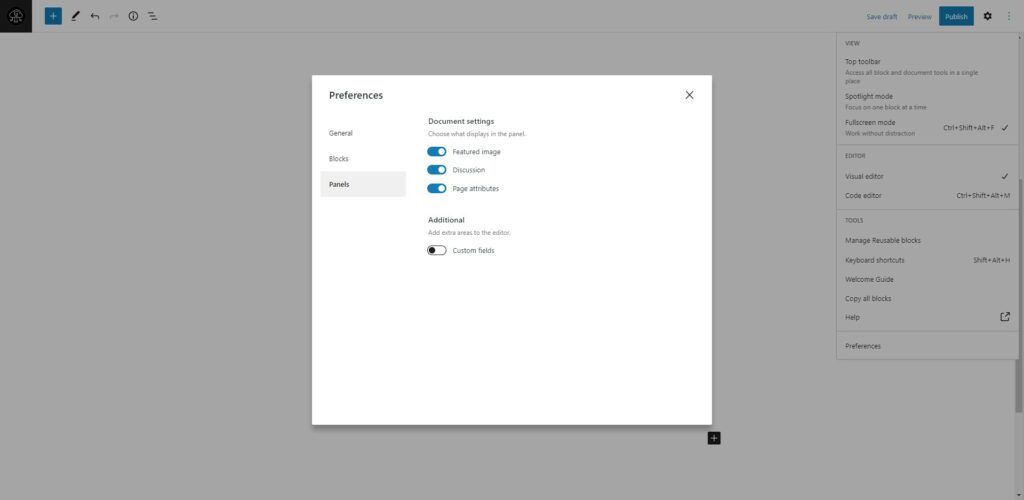
The panel’s section, under preferences, lets you configure some document-level/page-level settings.
Document settings
Choose what displays in the panel.
15
Document settings: The WordPress editor’s Page/Post Settings Sidebar allows you to customize various options for your pages and posts. This section of the Preferences panel lets you choose which options are visible in the sidebar. By toggling an option off, you can hide it from the sidebar, simplifying your editing experience if you don’t need to use a particular option. This feature is particularly useful if you have many options in your sidebar and want to declutter it.

Additional
Add extra areas to the editor.
16
Custom fields: In the WordPress editor, you can turn on the Custom Fields panel in the Page/Post Settings Sidebar. To do this, you can toggle the Custom Fields option in the Preferences panel. Once you have enabled the Custom Fields panel, click the “Enable & Reload” button to apply the changes and refresh the page. Remember that this will reload the post or page you are currently working on, so it is important to save your content before making this change.
Tip
The settings under the preferences window may vary depending on your WordPress theme and the plugins installed on your website.


Leave a Reply