In this tutorial, we’re going to create a dynamic Gutenberg server-side block.
Pre-requisites
As always, Here are some recommended pre-requisites that’ll help you get the best out of this tutorial:
- An already Scaffolded Block: You should have an already scaffolded Gutenberg block, You can follow our tutorial How to Create Custom Gutenberg Block for WordPress – The Beginners Guide If you’re new to Gutenberg development.
- Some Basic Know-how: You should have some basic know-how about Gutenberg development.
Different types of Gutenberg blocks
From a high-level perspective, there are 2 types of Gutenberg blocks
- Static Gutenberg Blocks
- Dynamic Gutenberg Blocks
Let’s go through both of them sequentially
Static Gutenberg Blocks
Static Gutenberg blocks are types of blocks, when published to the website, do not change their output on the frontend. Most of the Gutenberg blocks are static. Here are some examples from the core blocks:
- Paragraph Block
- Heading Block
- Image Block
- …etc
Dynamic Gutenberg Blocks
Dynamic Gutenberg blocks, when published, often change their output based on certain server-side factors (which can vary according to the dynamic block). These factors are usually some data pieces from the website like post metadata, post excerpt, and much more. Dynamic blocks are useful when you want to display some data information that can change over a respective time period. Here is a few dynamic Gutenberg blocks example from the core along with their dynamic factors.
| Block | Dynamic Factor |
| Latest Comments | The current latest comment on the post |
| Calendar | The current month |
What are we going to create?
Now that you’ve some basic understanding of static and dynamic blocks. We will be creating a simple dynamic block that will display the most recent post along with its excerpt. This will be a server-side block that can change its output based on the recent post (which is a dynamic factor for this block).
How SSR works in Gutenberg
Before actually diving into the process of creating the server-side block. It’s crucial to understand the fundamentals of SSR rendering in Gutenberg and how it works. Server-side blocks differ from static blocks in the sense that all the computation and data-fetching (dynamic factors) happens on the server side. Therefore, frontend rendering is quite straight-forward as it’s directly handled by the server.
But, the backend (Gutenberg) needs to send a rest request to the server in order to process the block response according to the provided attributes. The server then provides the computation result as block output which can be rendered inside gutenberg.
Here’s a process flow explaining the steps it takes to render the output of a dynamic block in gutenberg:
Send a rest request with necessary attributes
↓
The server computes the result
↓
The server sends back HTML output
↓
Renders the output in Gutenberg
Getting Started
Assuming you’ve already scaffolded a new Gutenberg block, If not, You can follow our tutorial “How to Create Custom Gutenberg Block for WordPress – The Beginners Guide” to get started.
Working on server side
Because we’re creating a dynamic gutenberg block. This is where we mostly work in this tutorial. Head over to the main php file of your plugin
// main plugin php file.
register_block_type( __DIR__ . '/build', array(
		'render_callback' => function() {

			$recent_post = wp_get_recent_posts( array(
				'numberposts' => 1,
				'post_status' => 'publish',
				'post_type' => 'post',
			) );

			$recent_post = reset( $recent_post );

			if ( empty( $recent_post ) ) {
				return "";
			}

			$recent_post_title = $recent_post['post_title'];
			$recent_post_excerpt = $recent_post['post_excerpt'];
			$recent_post_permalink = get_permalink( $recent_post );

			return "
				<div class='wp-block-gutenberghub-latest-post-intro'>
					<a target='_blank' href='$recent_post_permalink'>$recent_post_title</a>
					<p>$recent_post_excerpt</p>
				</div>
			";
		}
) );
Let me explain the code above sequentially
- We’re obtaining recent posts using the core wordpress method “wp_get_recent_posts“.
- Now we’re setting the array pointer to the first recent post (making it easier to read the latest post later).
- Now we’re adding a safe check that renders nothing when the website does not have any recently published post.
- Now we’re generating an output and providing the output that needs to be rendered.
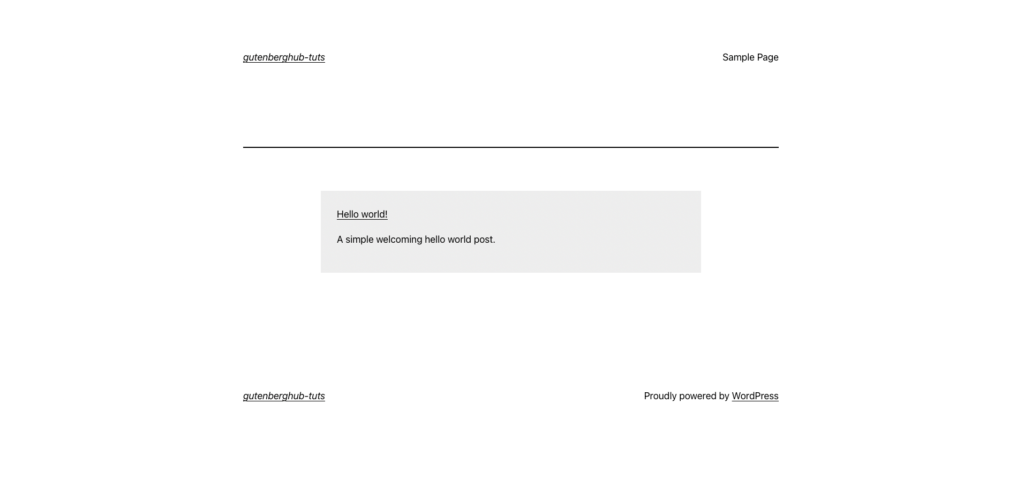
Styling the output
Now, let’s add some basic necessary styles for our block
/** src/style.scss **/
.wp-block-gutenberghub-latest-post-intro {
    padding: 30px;
    background-color: #eeeeee;
}
If you’ve followed everything correctly. This is how our block should look like on the frontend when published.
Working on the backend
Now let’s work on the backend of the block in gutenberg editor. We’re going to use the built-in “ServerSideRender” component that’ll help us render server side blocks in gutenberg.
// src/edit.js
import ServerSideRender from '@wordpress/server-side-render';
// src/edit.js
export default function Edit() {
return (
<div { ...useBlockProps() }>
<ServerSideRender
block="gutenberghub/latest-post-intro"
/>
</div>
);
}Now you should be able to preview the server side results when inserting your dynamic block
Wrapping Up
Let’s wrap up this tutorial here with some usefull resources below. If you have any queries regarding this tutorial please feel free to comment below
- ServerSideRendering Component: Learn more about this component in the official WordPress handbook.
- Join Gutenberg Community at Facebook: Be a part of our community on Facebook
- Follow Us On Twitter: Follow us on Twitter to get the latest updates.


Leave a Reply