Welcome to our comprehensive guide on creating custom post types in WordPress without writing any code. If you’re looking to take your website to the next level and improve the way you manage and present your content, custom post types are the solution you’ve been looking for.
What Are Custom Post Types?
Custom post types are a powerful feature in WordPress that allow you to create and manage specific types of content in a unique and meaningful way. Whether you want to showcase your products, events, portfolios, testimonials, or any other type of content, custom post types give you the flexibility to do so in a way that’s tailored to your needs.
How to a Create Custom Post Type?
There are two methods for creating custom post types in WordPress, either by writing code or using a plugin.
In this guide, we’ll show you how to create custom post types using the Custom Post Type UI plugin, a user-friendly tool that makes it easy to create custom post types without writing any code.
Whether you’re a beginner or an experienced WordPress user, this guide will provide you with all the information you need to create custom post types that are functional, organized, and engaging. So, let’s get started!
Step 1: Install Plugin
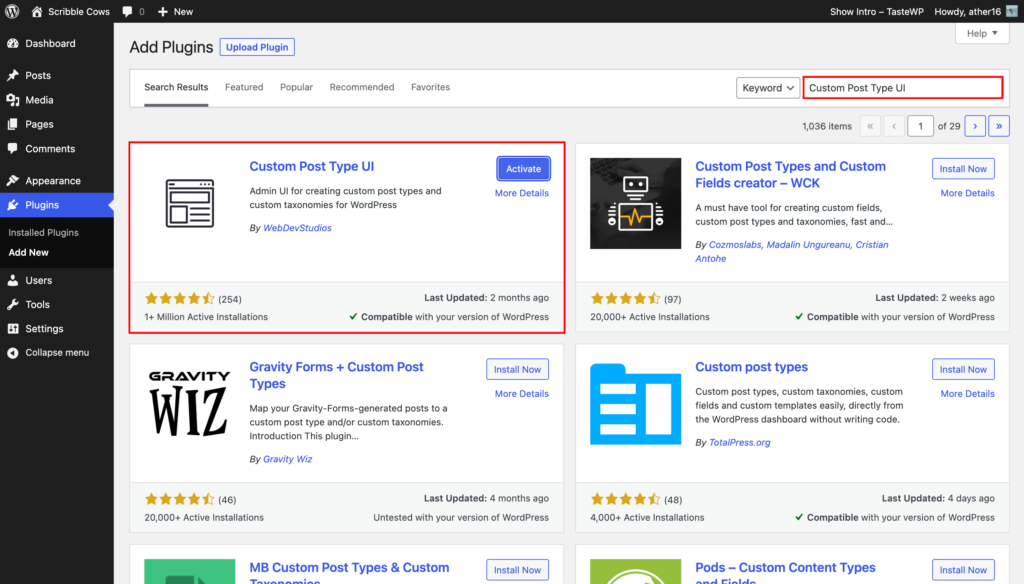
The first step in creating custom post types with Custom Post Type UI is to install and activate the plugin. You can do this by navigating to the “Plugins” section of your WordPress dashboard and clicking “Add New.” From there, search for “Custom Post Type UI” and click “Install Now.” Once the plugin is installed, activate it by clicking “Activate.”
Step 2: Create a new custom post type
Once the plugin is activated, you can start creating custom post types. To do this, navigate to “CPT UI” in the WordPress dashboard and click “Add/Edit Post Types to create a new custom post type.
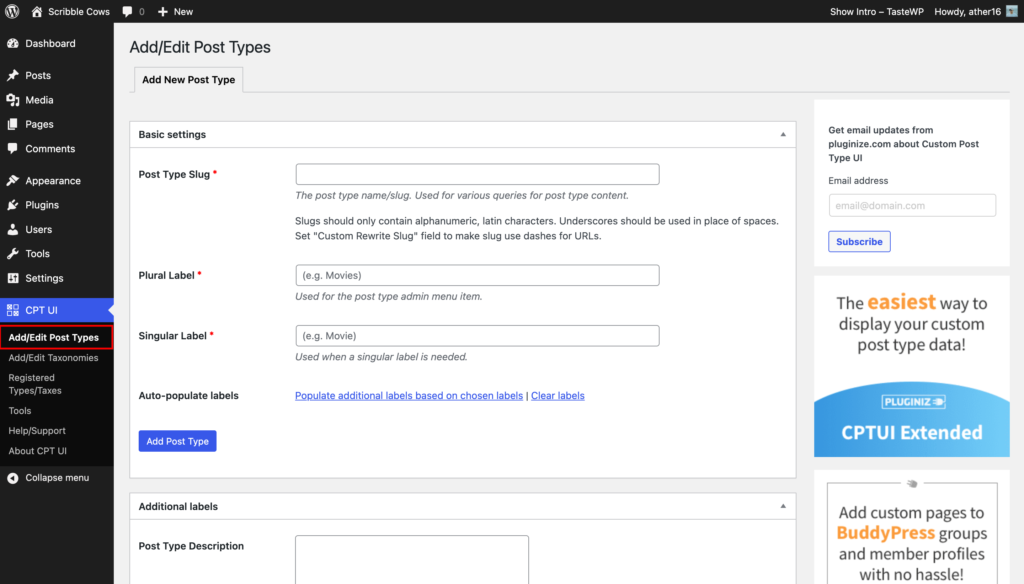
Step 3: Fill out the details
In this step, you’ll need to fill out the details of your custom post type. You’ll see fields for the post type name, plural name, and slug. You’ll also see options for setting the capability type, labels, and menu icon. Be sure to fill out these fields as accurately as possible, as they will help you easily identify your custom post type in the future.
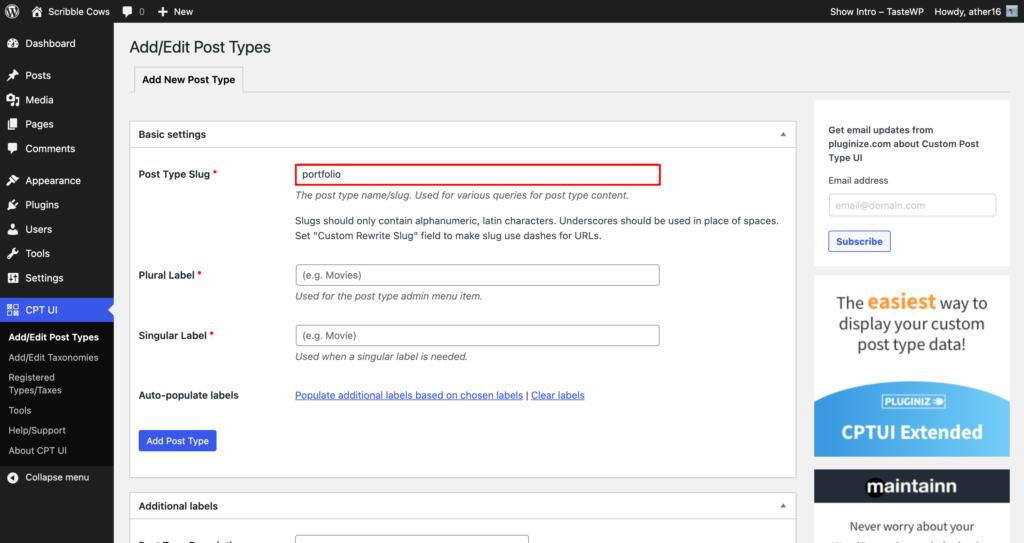
Start by providing a slug for your custom post type. This slug, for example “portfolio”, will be used in the URL and in WordPress queries, so it must only contain letters and numbers.
Next, provide the plural and singular names for your custom post type.
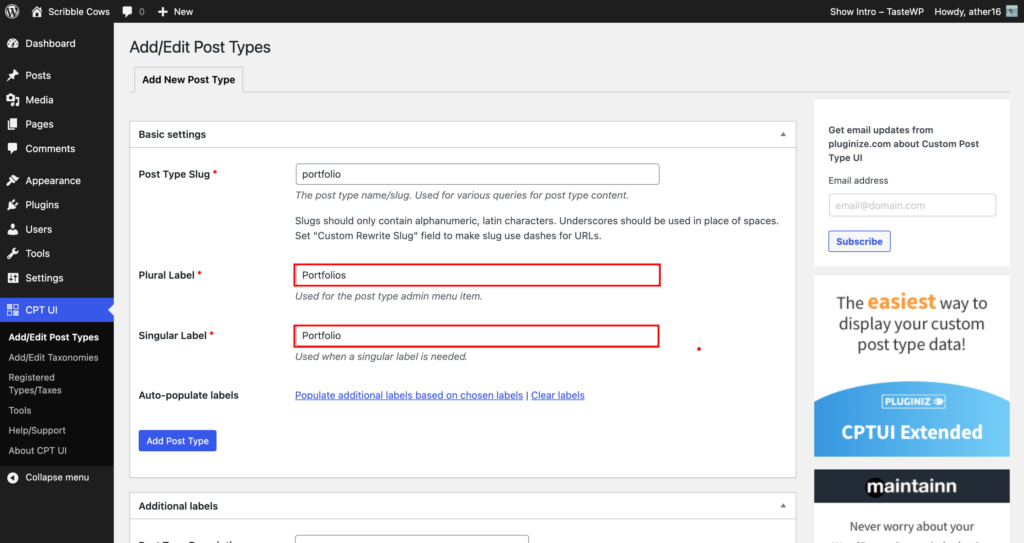
For convenience, you can use the link that says “Populate additional labels based on chosen labels” to fill in the additional label fields below automatically.

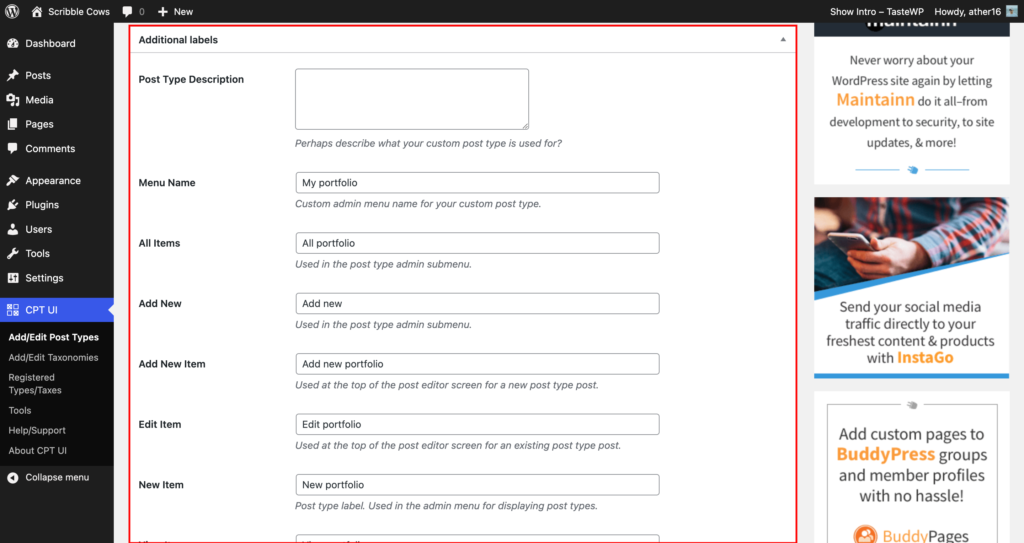
In the Additional Labels section, you need to provide a description and change the labels for your post type. These labels will be used throughout the WordPress user interface when managing content in that particular post type.
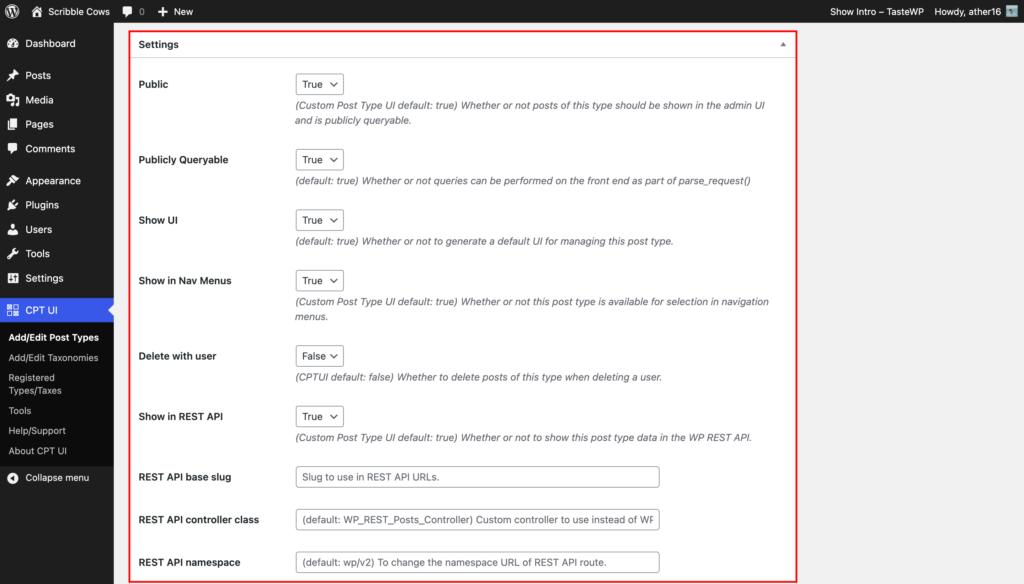
The next step is to set up the post type settings. From here, you can choose different attributes for your post type. Each option comes with a brief description explaining what it does.
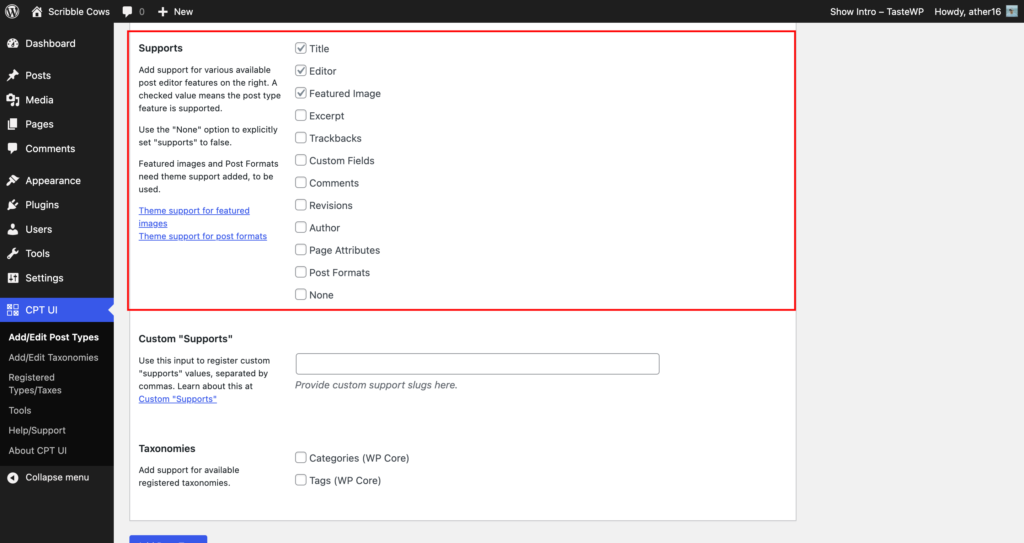
Finally, you have the option to select which editing features this post type would support. Simply check the options that you want to include.
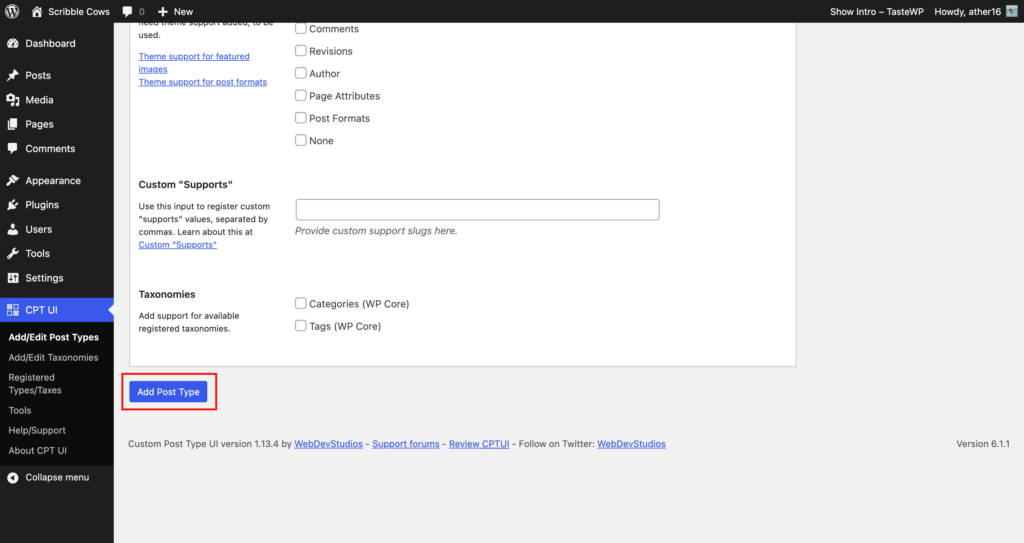
Once you have selected the options you want, click on the “Add Post Type” button to save and create your custom post type.
And that’s it! You have successfully created your custom post type and can now start adding content.
Additionally, you can enhance the functionality of your custom post type by adding taxonomies to it.
What are Taxonomies?
Taxonomies are categories or tags for your content that allow you to organize and classify it in a way that makes sense for your website. For example, you could add a “Templates” taxonomy to your “Portfolio” custom post type, allowing you to categorize each template as Yoga, Fitness, Realtor, etc. This not only makes it easier for you to manage your content but also for your users to find and browse content on your website.
How to Create Taxonomies
To create a taxonomy, navigate to the “Taxonomies” section of the Custom Post Type UI plugin and click on the “Add New Taxonomy” button.
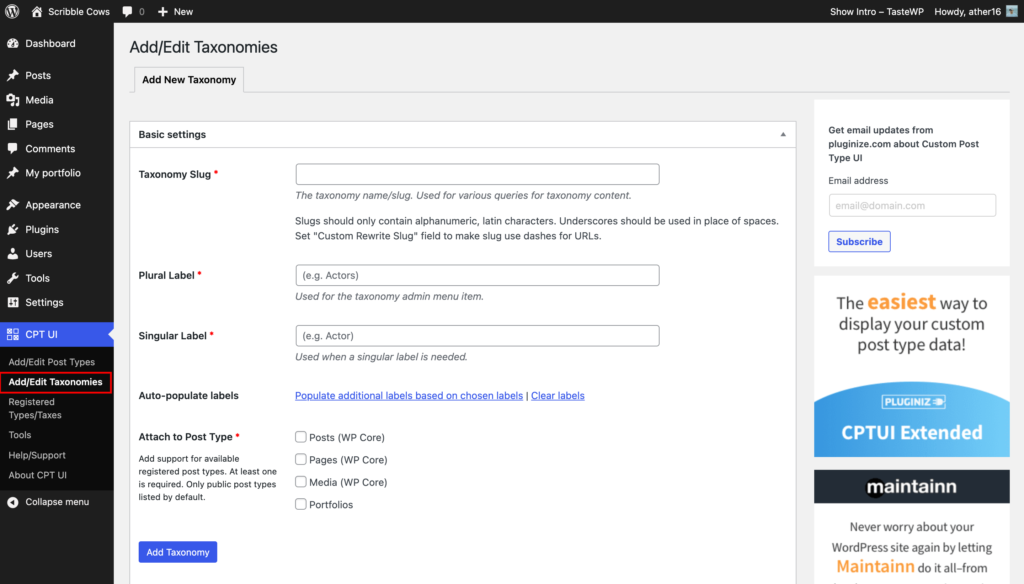
Next, you will need to provide a slug, plural, and singular name for your taxonomy, just like you did for your custom post type.

Then you can choose what post types this taxonomy should be assigned to, whether it be one post type or multiple.

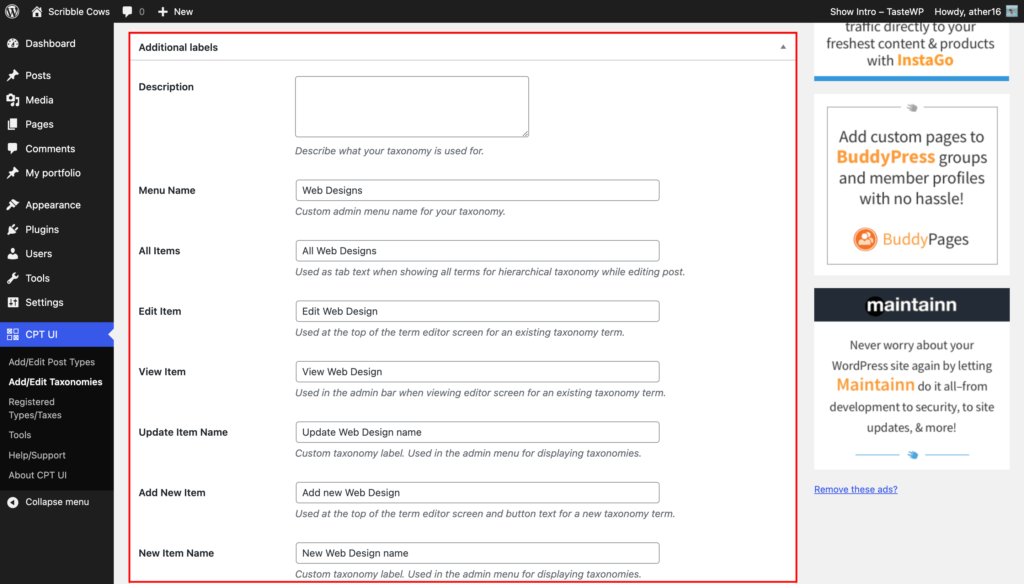
In the Additional Labels section, you have the option to fill these fields by clicking on the “Populate additional labels based on chosen labels” link above or you can manually write them and adjust them after filling them automatically.
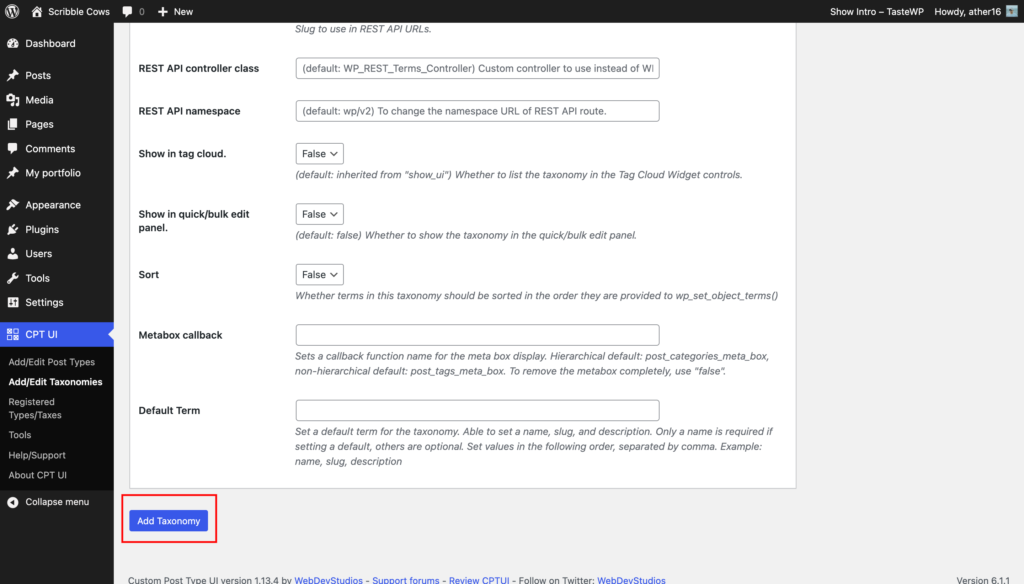
In the Taxonomy Settings section, you can set up various attributes for your taxonomy. Each option has a brief description that explains its purpose.
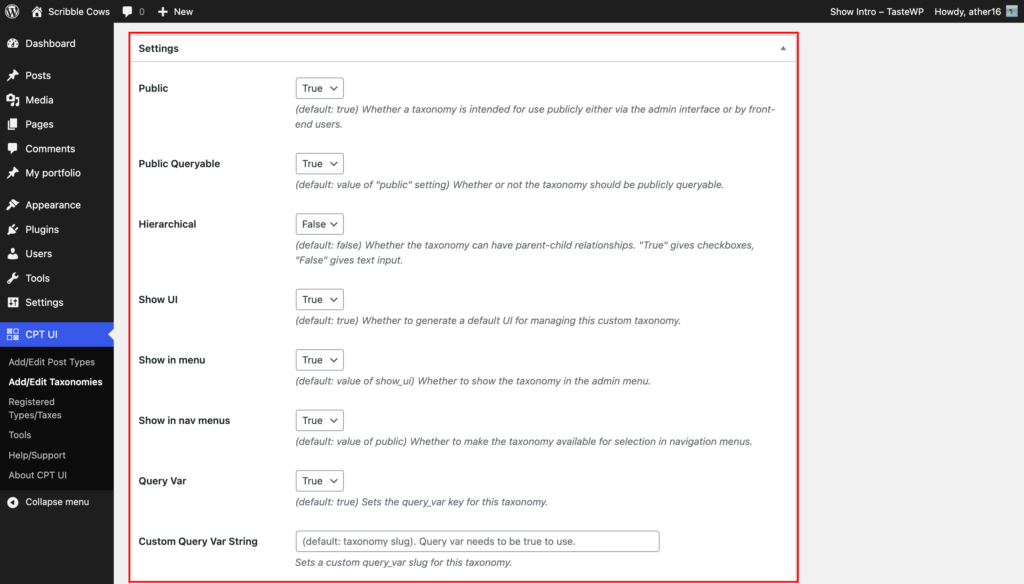
Once you have made all your selections, click the “Add Taxonomy” button to save your changes.
Your new taxonomy will now be available and ready to be used. You can start adding content to your post type by creating new posts and assigning them to the relevant terms within your taxonomy.
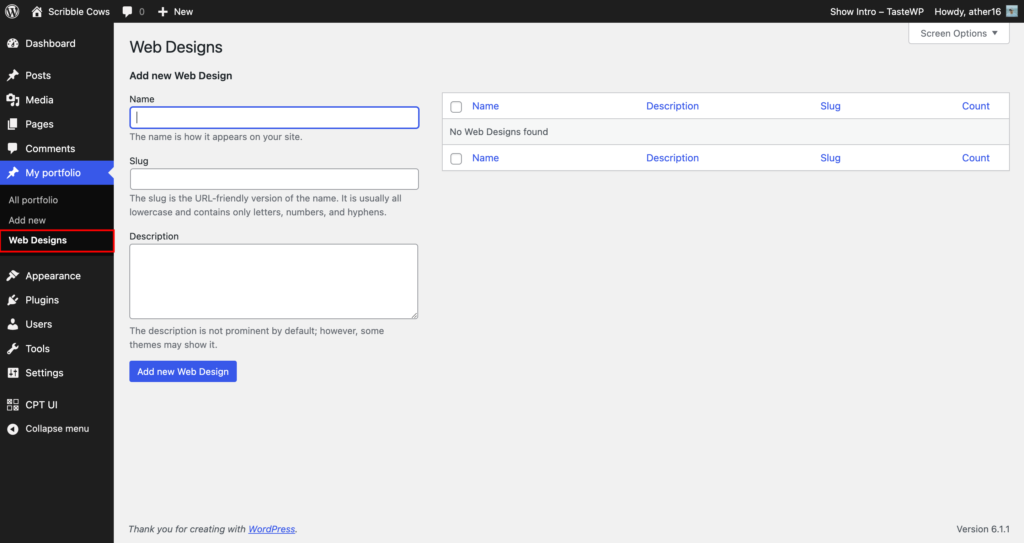
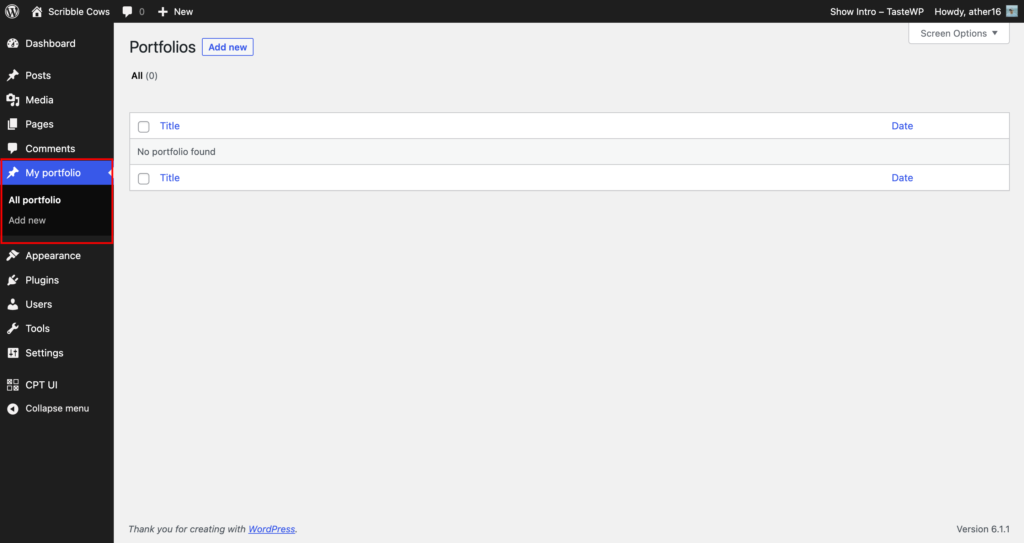
How to Add Content to your custom post type
This process is similar to adding content to regular posts or pages in WordPress. You can access the custom post type from the WordPress Dashboard, usually located in the left-side menu. Click on the custom post type and you will be taken to the editing screen where you can start adding content. You can add a title, text, images, videos, and other media, just as you would with a regular post or page.
Displaying Custom Posts on Your Website
To display your custom post type on your website, you have several options. One of the simplest is to use the default archive template.
To do this, navigate to the Appearances menu and add a custom menu. Give the menu a name and paste the website URL with the name of your custom post type.
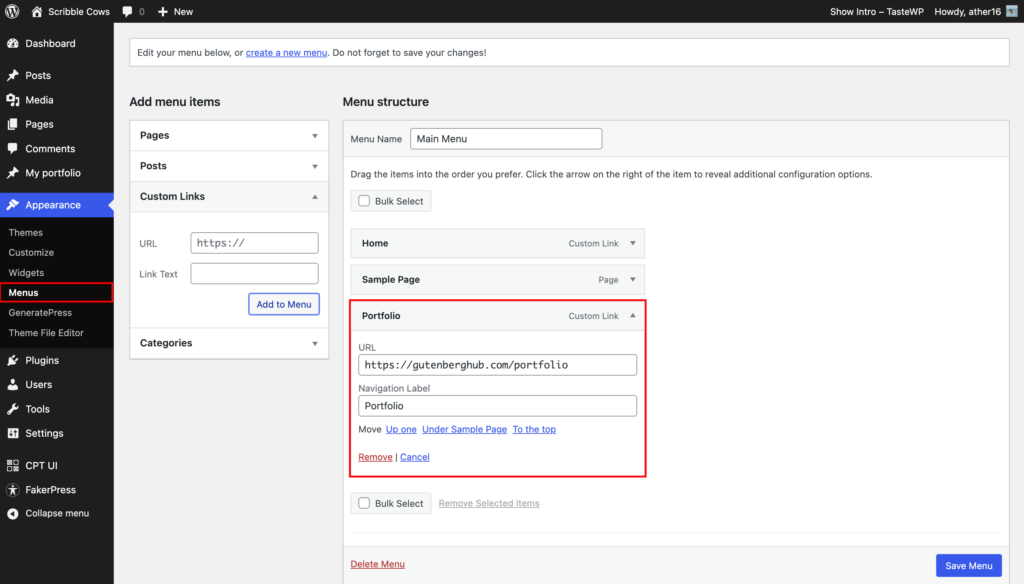
For example, if your website is “https://xyz.com” and your custom post type is named “portfolio”, then the URL to access the archive page would be “https://xyz.com/portfolio“.
However, if your website is not using SEO-friendly URLs, then you need to add “?post_type=” before the name of your custom post type. For example, the URL would be “https://xyz.com/?post_type=portfolio“.
It is important to note that if the menu item leads to a 404 page, you should go to the Permalinks settings and regenerate the permalinks. This should resolve the issue and allow the archive page to display properly.
Conclusion
Creating custom post types in WordPress can be a daunting task, but with the help of Custom Post Type UI, it’s a breeze. Simply follow these steps, and you’ll be able to create custom post types without writing any code. Whether you’re a beginner or an experienced WordPress user, Custom Post Type UI is a great plugin for anyone who wants to create custom post types with ease.


Leave a Reply