Sharing your content across different websites can be a game-changer, and the Distributor plugin is here to make that process as simple as possible. Whether you’re a blogger, business owner, or just someone who loves to share, this plugin streamlines the distribution of your content across various platforms. Now, let’s explore how easy it is to use the Distributor plugin and some practical scenarios where it can significantly enhance your online presence.
Use Cases
- Multi-Site Blogging: Imagine managing multiple blogs or websites. With the Distributor plugin, you can publish a post on one site and effortlessly distribute it to others with just a few clicks. No need to log in to each site separately.
- Collaborative Content Creation: If you’re working with a team and each member has their own WordPress site, Distributor simplifies collaboration. One member publishes content, and it instantly appears on other team members’ sites, ensuring everyone is on the same page.
- Centralized Content Hub: Suppose you have a primary website that serves as your content hub. With Distributor, you can easily pull relevant content from other connected sites, creating a centralized hub without the need for manual content updates.
How to Use the Distributor Plugin
To get started, visit the Distributor website or their GitHub page to download the plugin. Once downloaded, head to your WordPress dashboard, navigate to Plugins > Add New, select “Upload Plugin,” and upload the Distributor plugin. After the upload, activate the plugin.
Set up External Connections
Ensure that the Distributor plugin is active on both sites, which we’ll refer to as mainsite.com and remotesite.com. On mainsite.com, go to Distributor > External Connections and click “Add New.” Provide a label (e.g., remotesite) and the URL (e.g., https://remotesite.com). Click “Authorize Connection” and enter the administrative credentials for remotesite.com. Approve the connection on the Authorize Application screen and update connection details, including roles if necessary.
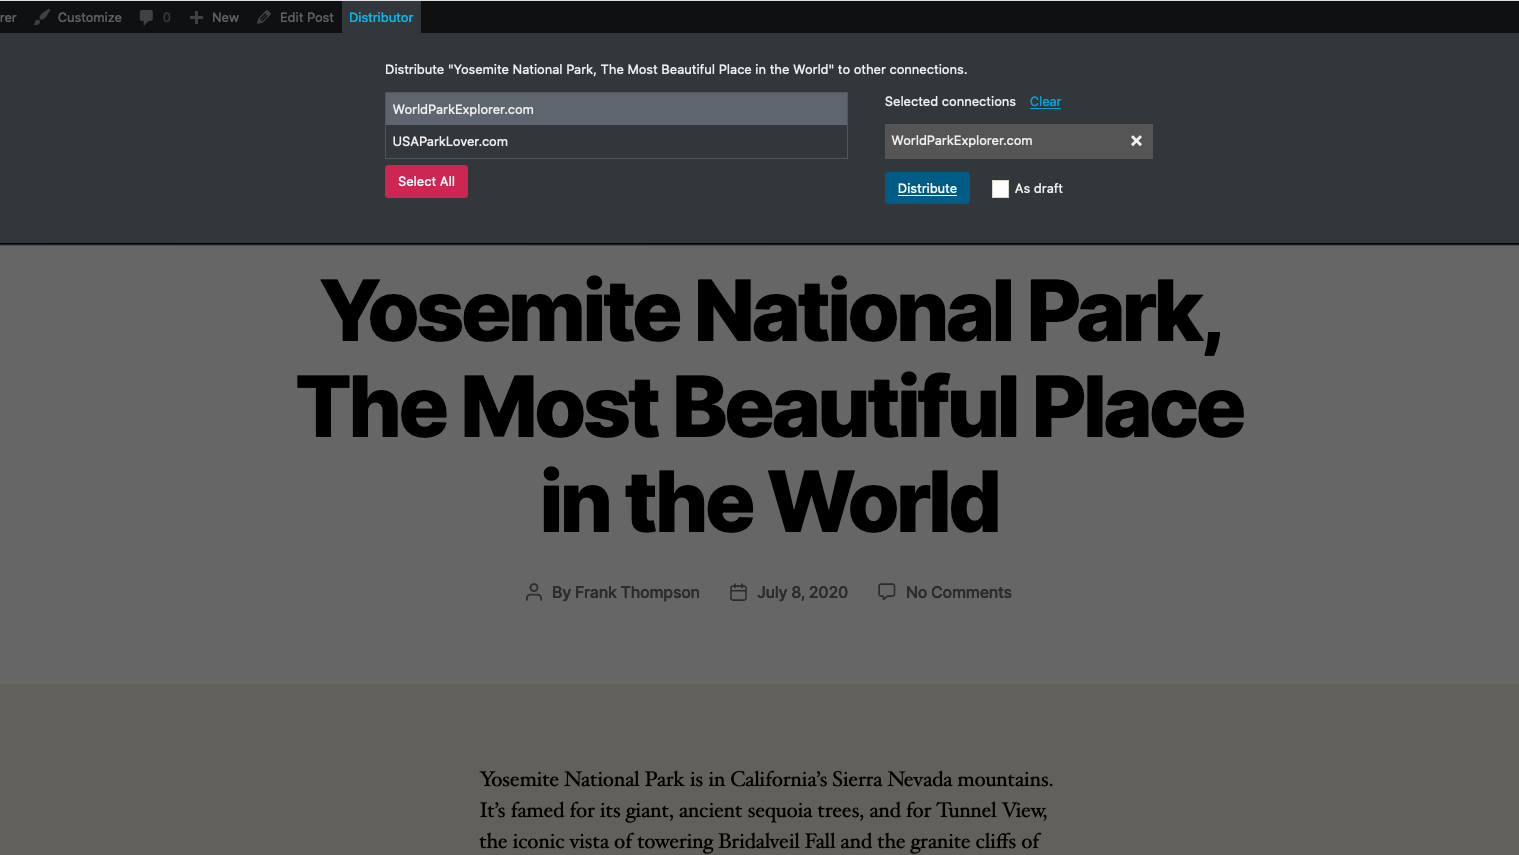
Distributing Content
Pushing Content
After publishing a piece of content, the Distributor menu appears in the WP Admin Bar. Hover over the menu to expose the Push menu. Choose connected sites on the left, where you want to push the content, and click the “Distribute” button. A success message will appear after completion.
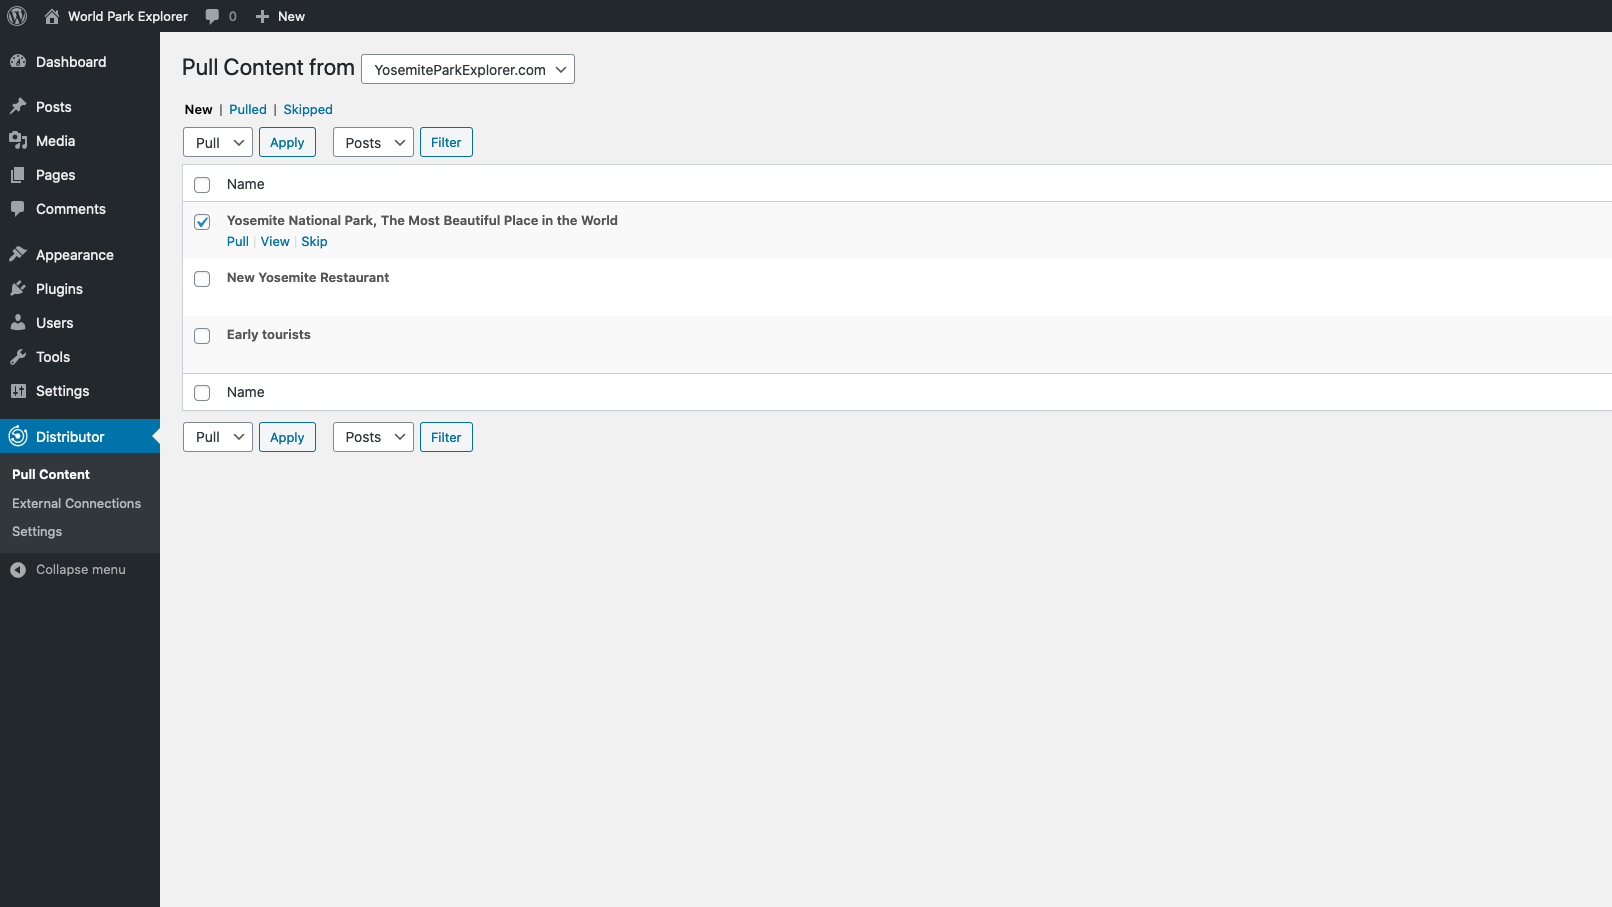
Pulling Content
Navigate to Distributor > Pull Content in the WP Admin. Select a connected site from the dropdown, filter content types (Posts, Pages, etc.), and use Bulk Edit to pull or skip multiple pieces at once. Use individual row actions to pull, view, or skip each piece. Receive a confirmation message after a successful pull action.
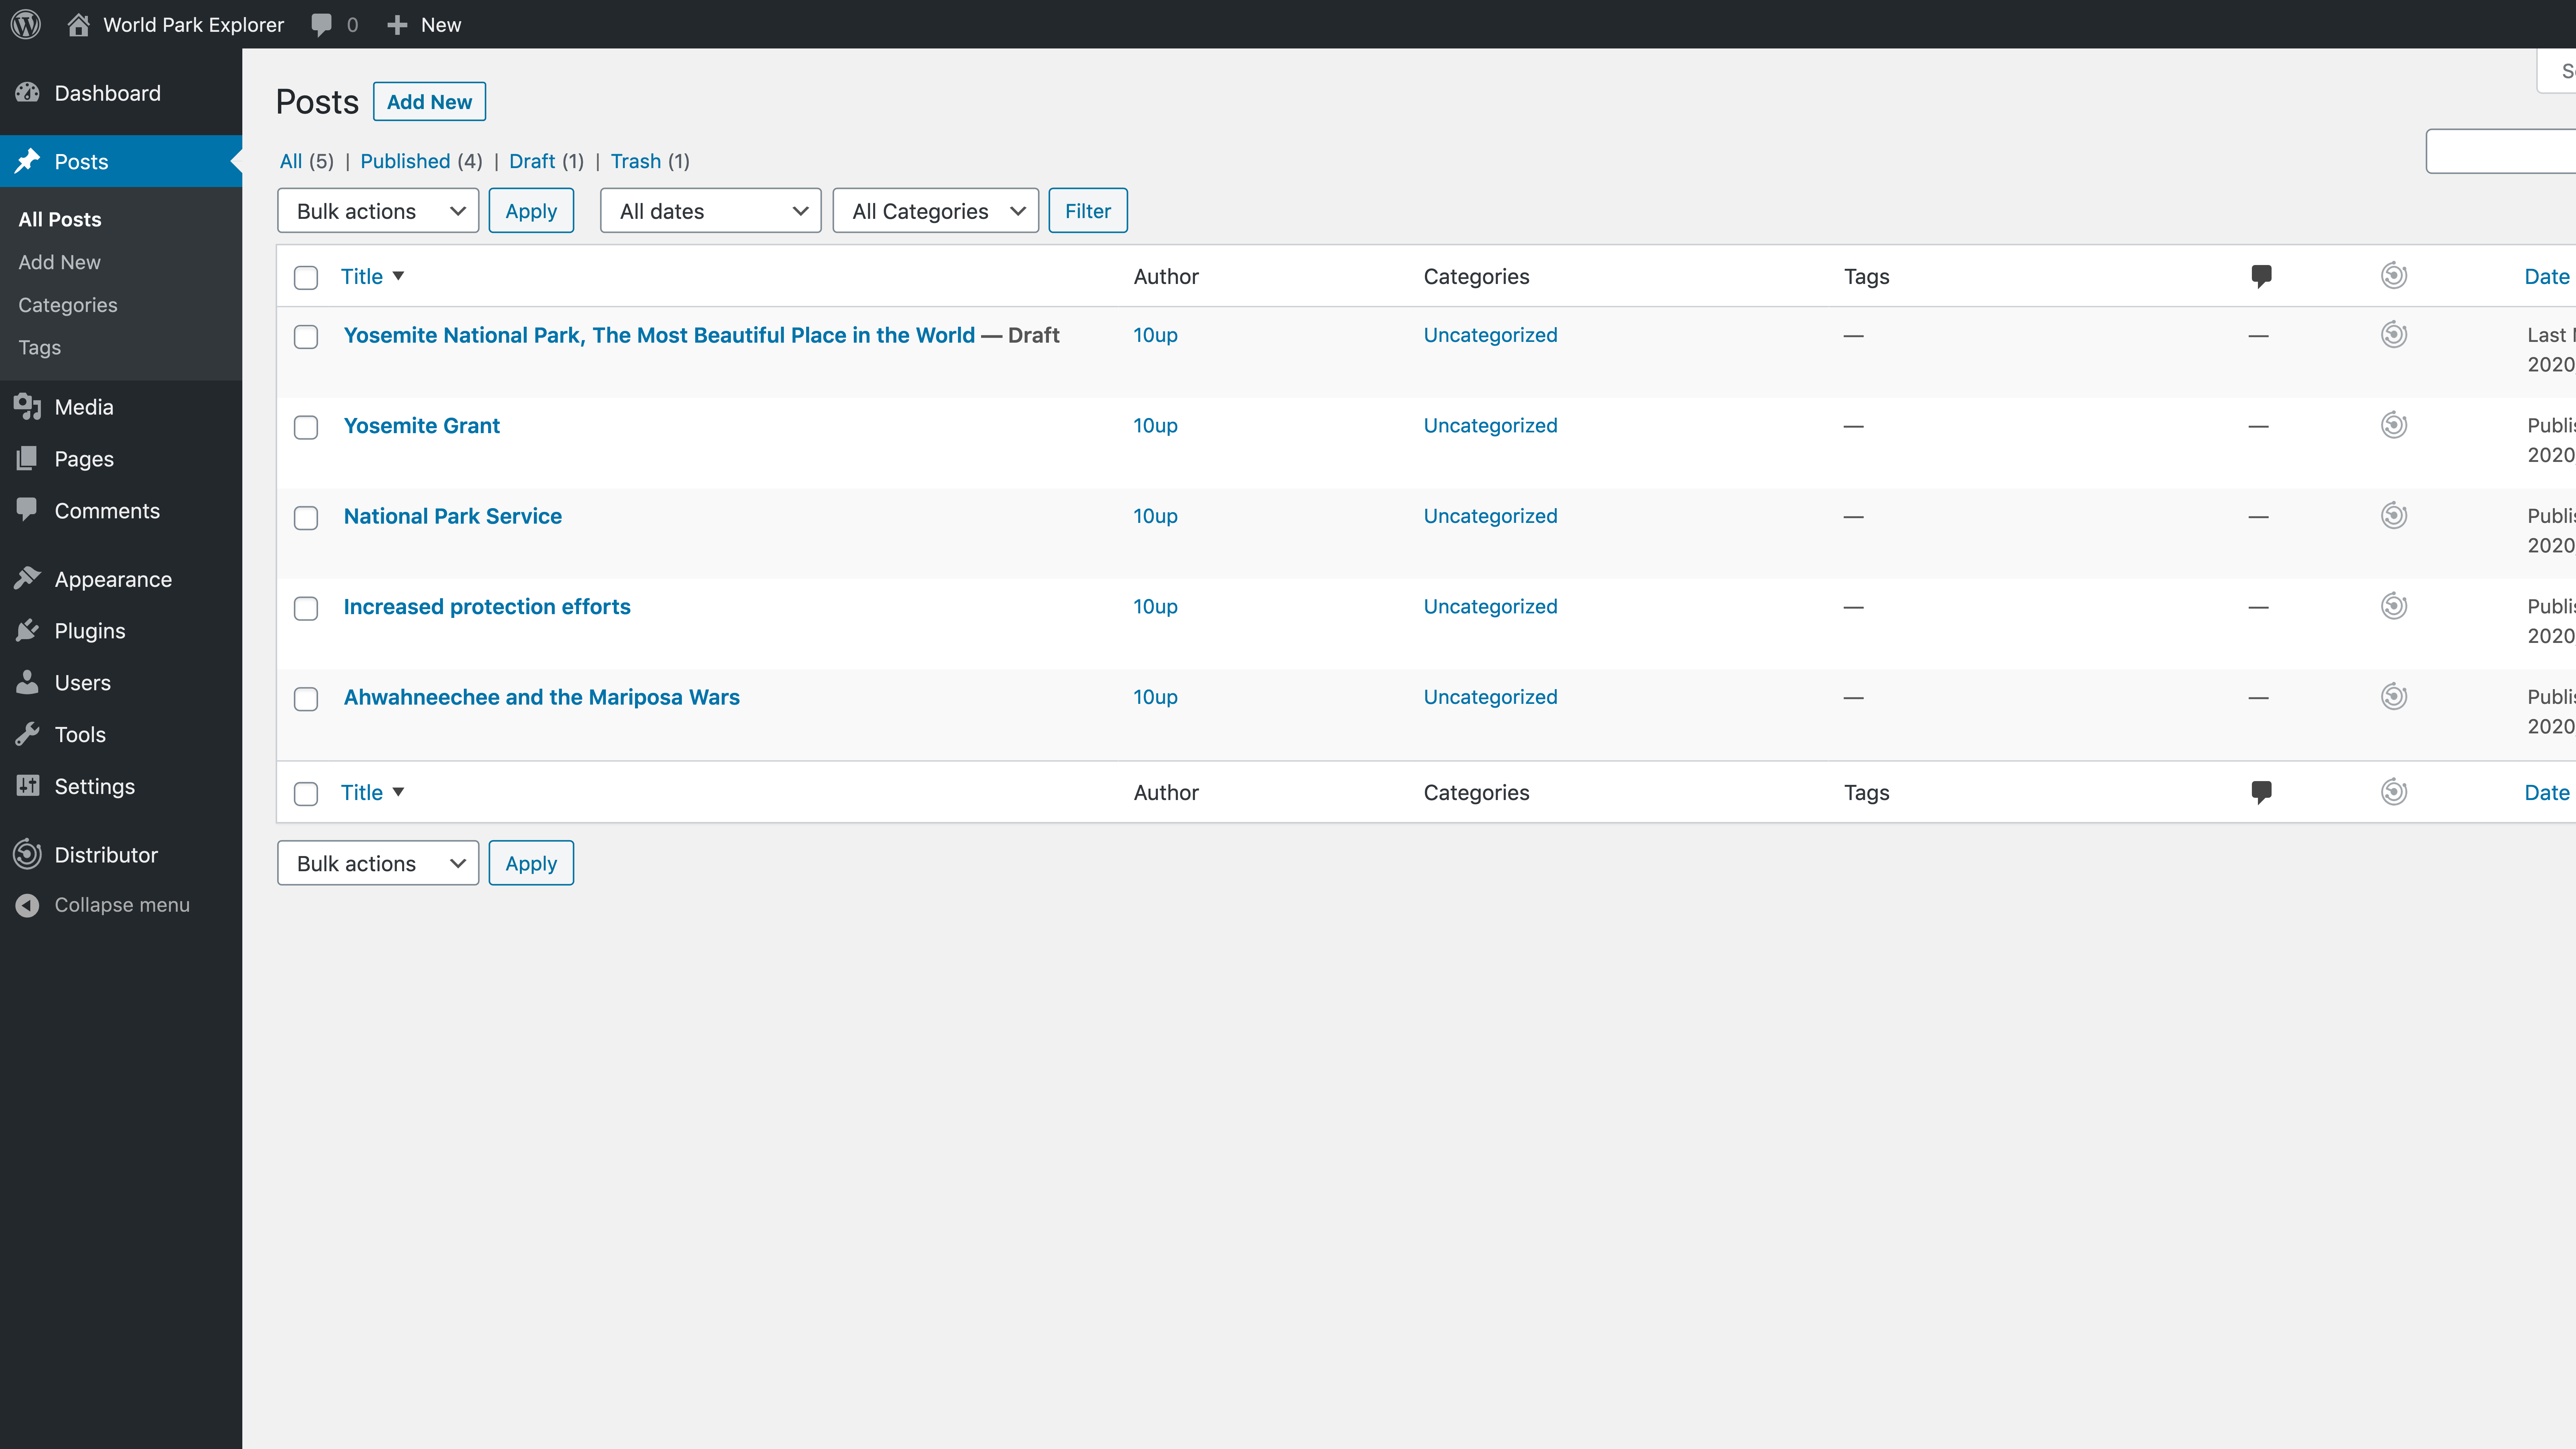
Check Pulled Content
Check the Pulled list view to see all items pulled into the current site. In Posts > All Posts, the Distributor column shows content pushed or pulled, providing links to the origin site.
Now, you’re all set to effortlessly distribute and manage your content using the Distributor plugin! Whether pushing or pulling, this step-by-step guide ensures a smooth content distribution process across your WordPress sites.


Leave a Reply