In this tutorial, you’ll learn how you can create your first simple block in Gutenberg. In recent years, the progress of Gutenberg API has been remarkable. It’s much simpler to get started with Gutenberg block development now than before thanks to @wordpress/create-block.
Pre-requisites
I assume that you have installed/setup and have basic knowledge of the following pre-requisites listed below:
- Node.js version 12.0.0 (or above).
- NPM (Node Package Manager) version 6.0.0 (or above).
- A Code Editor (recommended Visual Studio Code).
- Some basic knowledge about how CLI scripts work.
- Some basic knowledge about react.js, javascript.
How can you scaffold your Gutenberg block?
Scaffolding generally refers to quickly setting up a skeleton for an app/project. @wordpress/create-block is the official scaffolding tool that allows us to quickly generate Javascript/PHP/CSS code with everything you may need to start developing your own Gutenberg block. We will be using @wordpress/create-block for scaffolding in this tutorial. There are 2 particular modes you can use to scaffold your Gutenberg block.
- Interactive Mode
- Quick Mode
How do you trigger interactive/quick mode?
Unfortunately, there are no particular flags in @wordpress/create-block that simply allow us to specify the scaffolding mode.
Let’s look at the following command as an example
npx @wordpress/create-block [slug]The slug is optional here, when the slug is not provided, The @wordpress/create-block will trigger interactive mode, otherwise quick mode is triggered.
You may want to run these scaffolding commands within your WordPress installation → wp-content → plugins directory. So that we can test the block plugin in WordPress later in this tutorial.
Let’s scaffold our block with each mode in order.
Scaffolding the Gutenberg block in Interactive Mode
Interactive mode allows you to thoroughly configure your block in a step-by-step process. This can be great when you’re new to Gutenberg API.
Let’s scaffold a new Gutenberg block, Suppose we’re creating an “awesome button block” (cause why not? 😎) for this particular example.
The scaffolding may take a couple of minutes. In order to verify if everything went right this is what you should be seeing on completion.
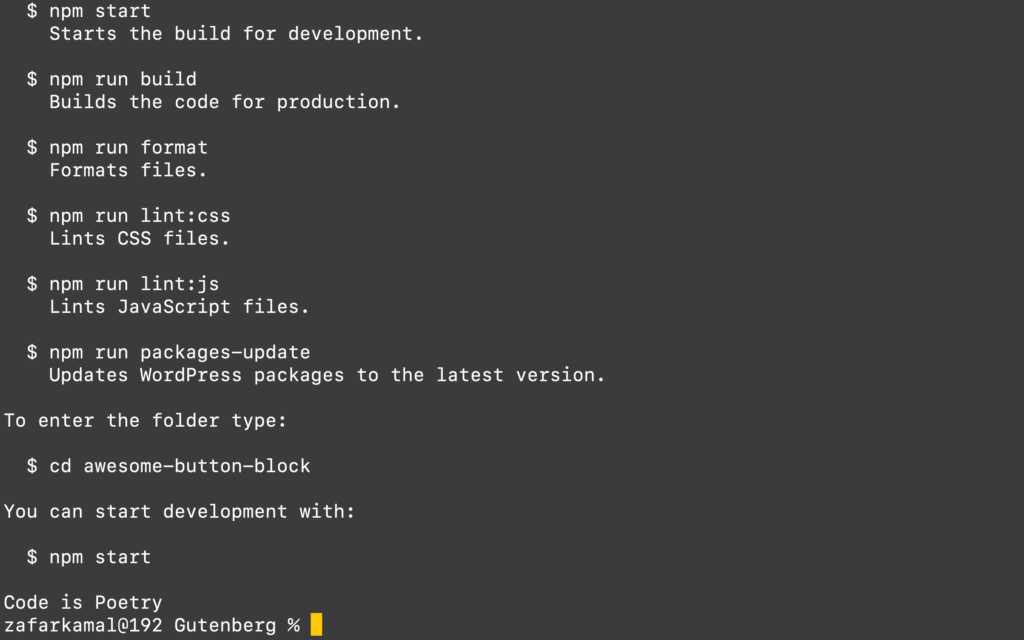
After scaffolding, there should be a newly created directory for your block. The name of the block should be “awesome-button-block” in our case (because of the slug we provided).
Scaffolding the Gutenberg block in Quick Mode
The task above can be much quicker with some additional flags. Instead of configuring the block in a step-by-step process, You can provide some flags to the script in a single command.
Let’s scaffold a similar block (as we did above) but in a quicker way.
npx @wordpress/create-block awesome-button-block --title "Awesome Button Block" --short-description "This is an awesome button block" --category "theme"Available Flags
Command-line flags are a common way to specify options for command-line programs. Here is a list of flags you can use when scaffolding with @wordpress/create-block.
Replace the values inside <> with your desired values before using the flags.
| Flag | Description |
-v or --version | Outputs the current version number of @wordpress/create-block |
-t <name> or --template <name> | Project template to use, Available values are “static” (default template), “es5”. Aside from these templates, You can also assign the name of an external npm package or a path to a local directory. |
--namespace <name> | Internal namespace for the block. |
--title <title> | Display title that is used for the block and the WordPress plugin. |
--short-description <description> | A short description, describing your block and WordPress plugin. |
--category <name> | Category for your block, By default core, provides the following categories: – text – media – design – widgets – theme – embed In addition to these core categories, You can also create your own custom block category, That’s something we will cover in future tutorials. |
--wp-scripts | Enables the Integration for @wordpress/scripts package |
--no-wp-scripts | Disables the Integration for @wordpress/scripts package |
--wp-env | Enables the integration for @wordpress/env package, which lets you easily create a WordPress instance for testing/developing your plugin. |
File Structure
Assuming you’ve scaffolded the block, Open the recently created directory in a code editor. This is how the block plugin structure is currently (at the time of writing this tutorial).
/build
/node_modules
/src
   block.json
   edit.js
   editor.scss
   index.js
   save.js
   style.scss
.editorconfig
.gitignore
awesome-button-block.php
package-lock.json
package.json
readme.txt
Now that we’ve taken a look at the broad overview of the file structure, Let’s dive into some details regarding each file and its usage.
awesome-button-block.php
Main plugin PHP file. Currently, it should only contain server-side block registration.
The name of this file depends on what slug you’ve provided when scaffolding the block.
/build
This directory holds all of your transpiled assets. For example, it contains the compiled CSS code from your SCSS (a CSS pre-processor, usually used in Gutenberg blocks for styling purposes) which can be understood by a browser.
/node_modules
A node_modules directory is a place where all of your block node dependencies are stored. It is recommended to exclude this directory from any version-controlled repository.
package.json
Package.json is a JSON-formatted file that is used by Node.js to keep track of the dependencies of a project in order to manage and run the project. It specifies the dependencies needed to build a Node.js project and is often used to manage the project’s dependencies. The file is usually located in the root directory of the project.
package-lock.json
This file is automatically generated for any operations where npm modifies either the node_modules tree or package.json. This file allows users to lock their dependencies to a specific version, reducing the risk of breaking code when upgrading npm packages.
block.json
This JSON file includes basic metadata regarding the block. block.json was introduced recently and provides many benefits out of the box when used. I think “block.json” is something that we’ll cover in our future tutorials, but here are some top benefits of using block.json:
- Conditional Enqueuing: The frontend assets for the block will only be enqueued when a particular block is used.
- Lazy Loading: When a theme supports lazy loading assets, blocks registered with block.json will have their asset enqueuing optimized out of the box.
- Code Sharing: Block.json makes it easier to share code between different languages like PHP, Javascript, resulting in a more organized and better solution.
edit.js
Includes an edit component, that represents how a block will behave in Gutenberg editor.
save.js
Includes a save component, that represents how a block should render in the frontend.
The save component should only be dependent on block attributes, and should not contain any dynamic react implementations, otherwise, a block validation error may occur.
index.js
This is where the block registration takes place in the client-side Gutenberg API.
editor.scss
A stylesheet that will be enqueued/applied in the Gutenberg editor.
style.scss
A stylesheet that will be enqueued/applied in on the front-end (only when the block is used).
.gitignore
A .gitignore file can be used to tell Git which files to ignore when committing your project to a version-controlled repository.
.editorconfig
.editorConfig helps maintain consistent coding styles for multiple developers.
readme.txt
Includes basic description regarding the plugin, Used by WordPress to display plugin information.
Testing the block
Now that we’ve covered how to scaffold a Gutenberg block with some basic overview, let’s test how the block currently looks in the Gutenberg editor and frontend.
Testing the block in Gutenberg editor
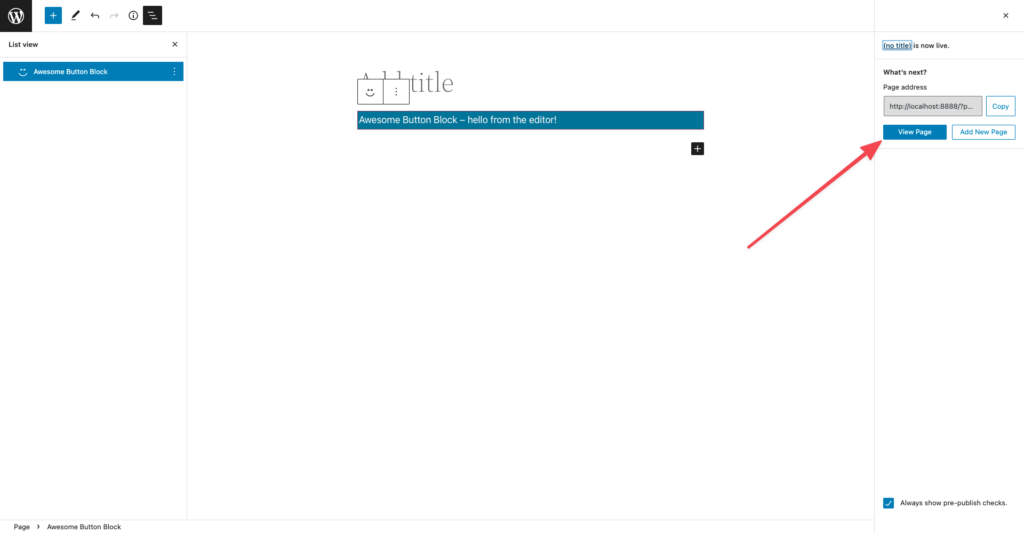
This is how you can insert the block in the Gutenberg editor.
In case you wonder, why there is “Awesome Button Block – hello from the editor!” written in the block? well, that content is generated automatically by the scaffolding script (@wordpress/create-block).
Testing the Gutenberg block in frontend
Now, let’s test how the block currently appears on the frontend, in order to test the block on the frontend, save the post first like so
After saving, visit the newly created post like so:
This is how the block should currently appear on frontend:
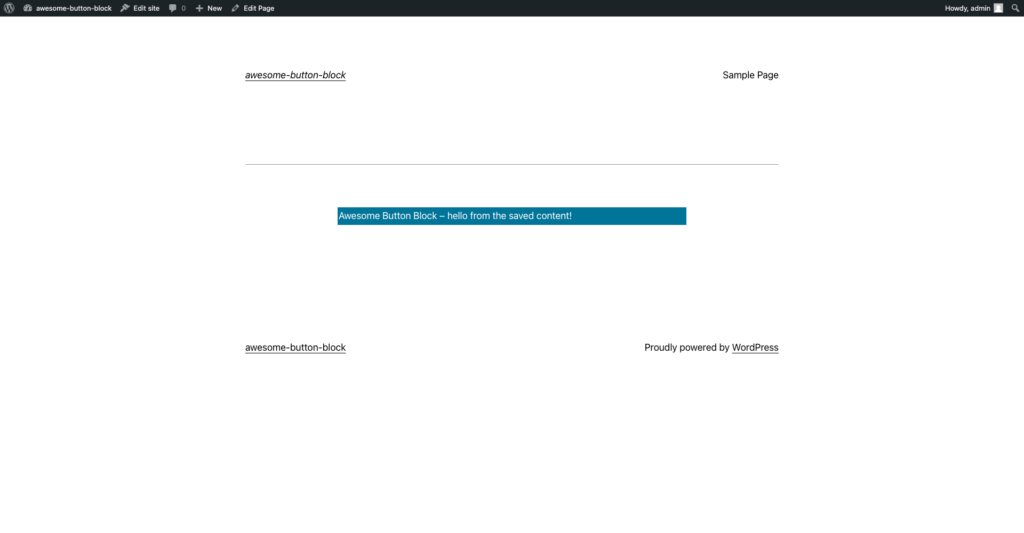
Again, there is dummy content generated from the scaffolding script.
Useful Resources
Here are some useful resources you might want to check out
Official Block API Handbook: Official handbook for creating Gutenberg blocks.
WordPress Environment: Let’s you quickly set up a WordPress instance for testing and developing plugins.
WordPress Scripts: A collection of useful scripts created specifically for WordPress development.
Example Gutenberg Blocks: This repository contains example Gutenberg blocks.
Package.json: Learn more about package.json
Package-lock.json: Learn more about package-lock.json


Leave a Reply