Forms on websites help us collect information from visitors. But long forms can be boring and tiring. That’s where step-by-step forms, also known as multi-step forms, come in. They break down big forms into smaller, friendlier parts. In this guide, we’ll learn how to make these cool forms using Kadence Advanced Form Block.
What’s a Step-by-Step Form, and Why Do We Want It?
A step-by-step form is like a journey. Instead of one big form, it’s split into smaller parts. Each part feels like a mini-form. This is helpful because:
- Easier for Visitors: Small steps feel less overwhelming. People are more likely to finish the form.
- Better Looking: It looks neat and tidy, like a story unfolding.
- Less Mistakes: Smaller steps mean fewer mistakes and better data.
Let’s start making these forms with Kadence!
Setting the Foundation: Form Structure
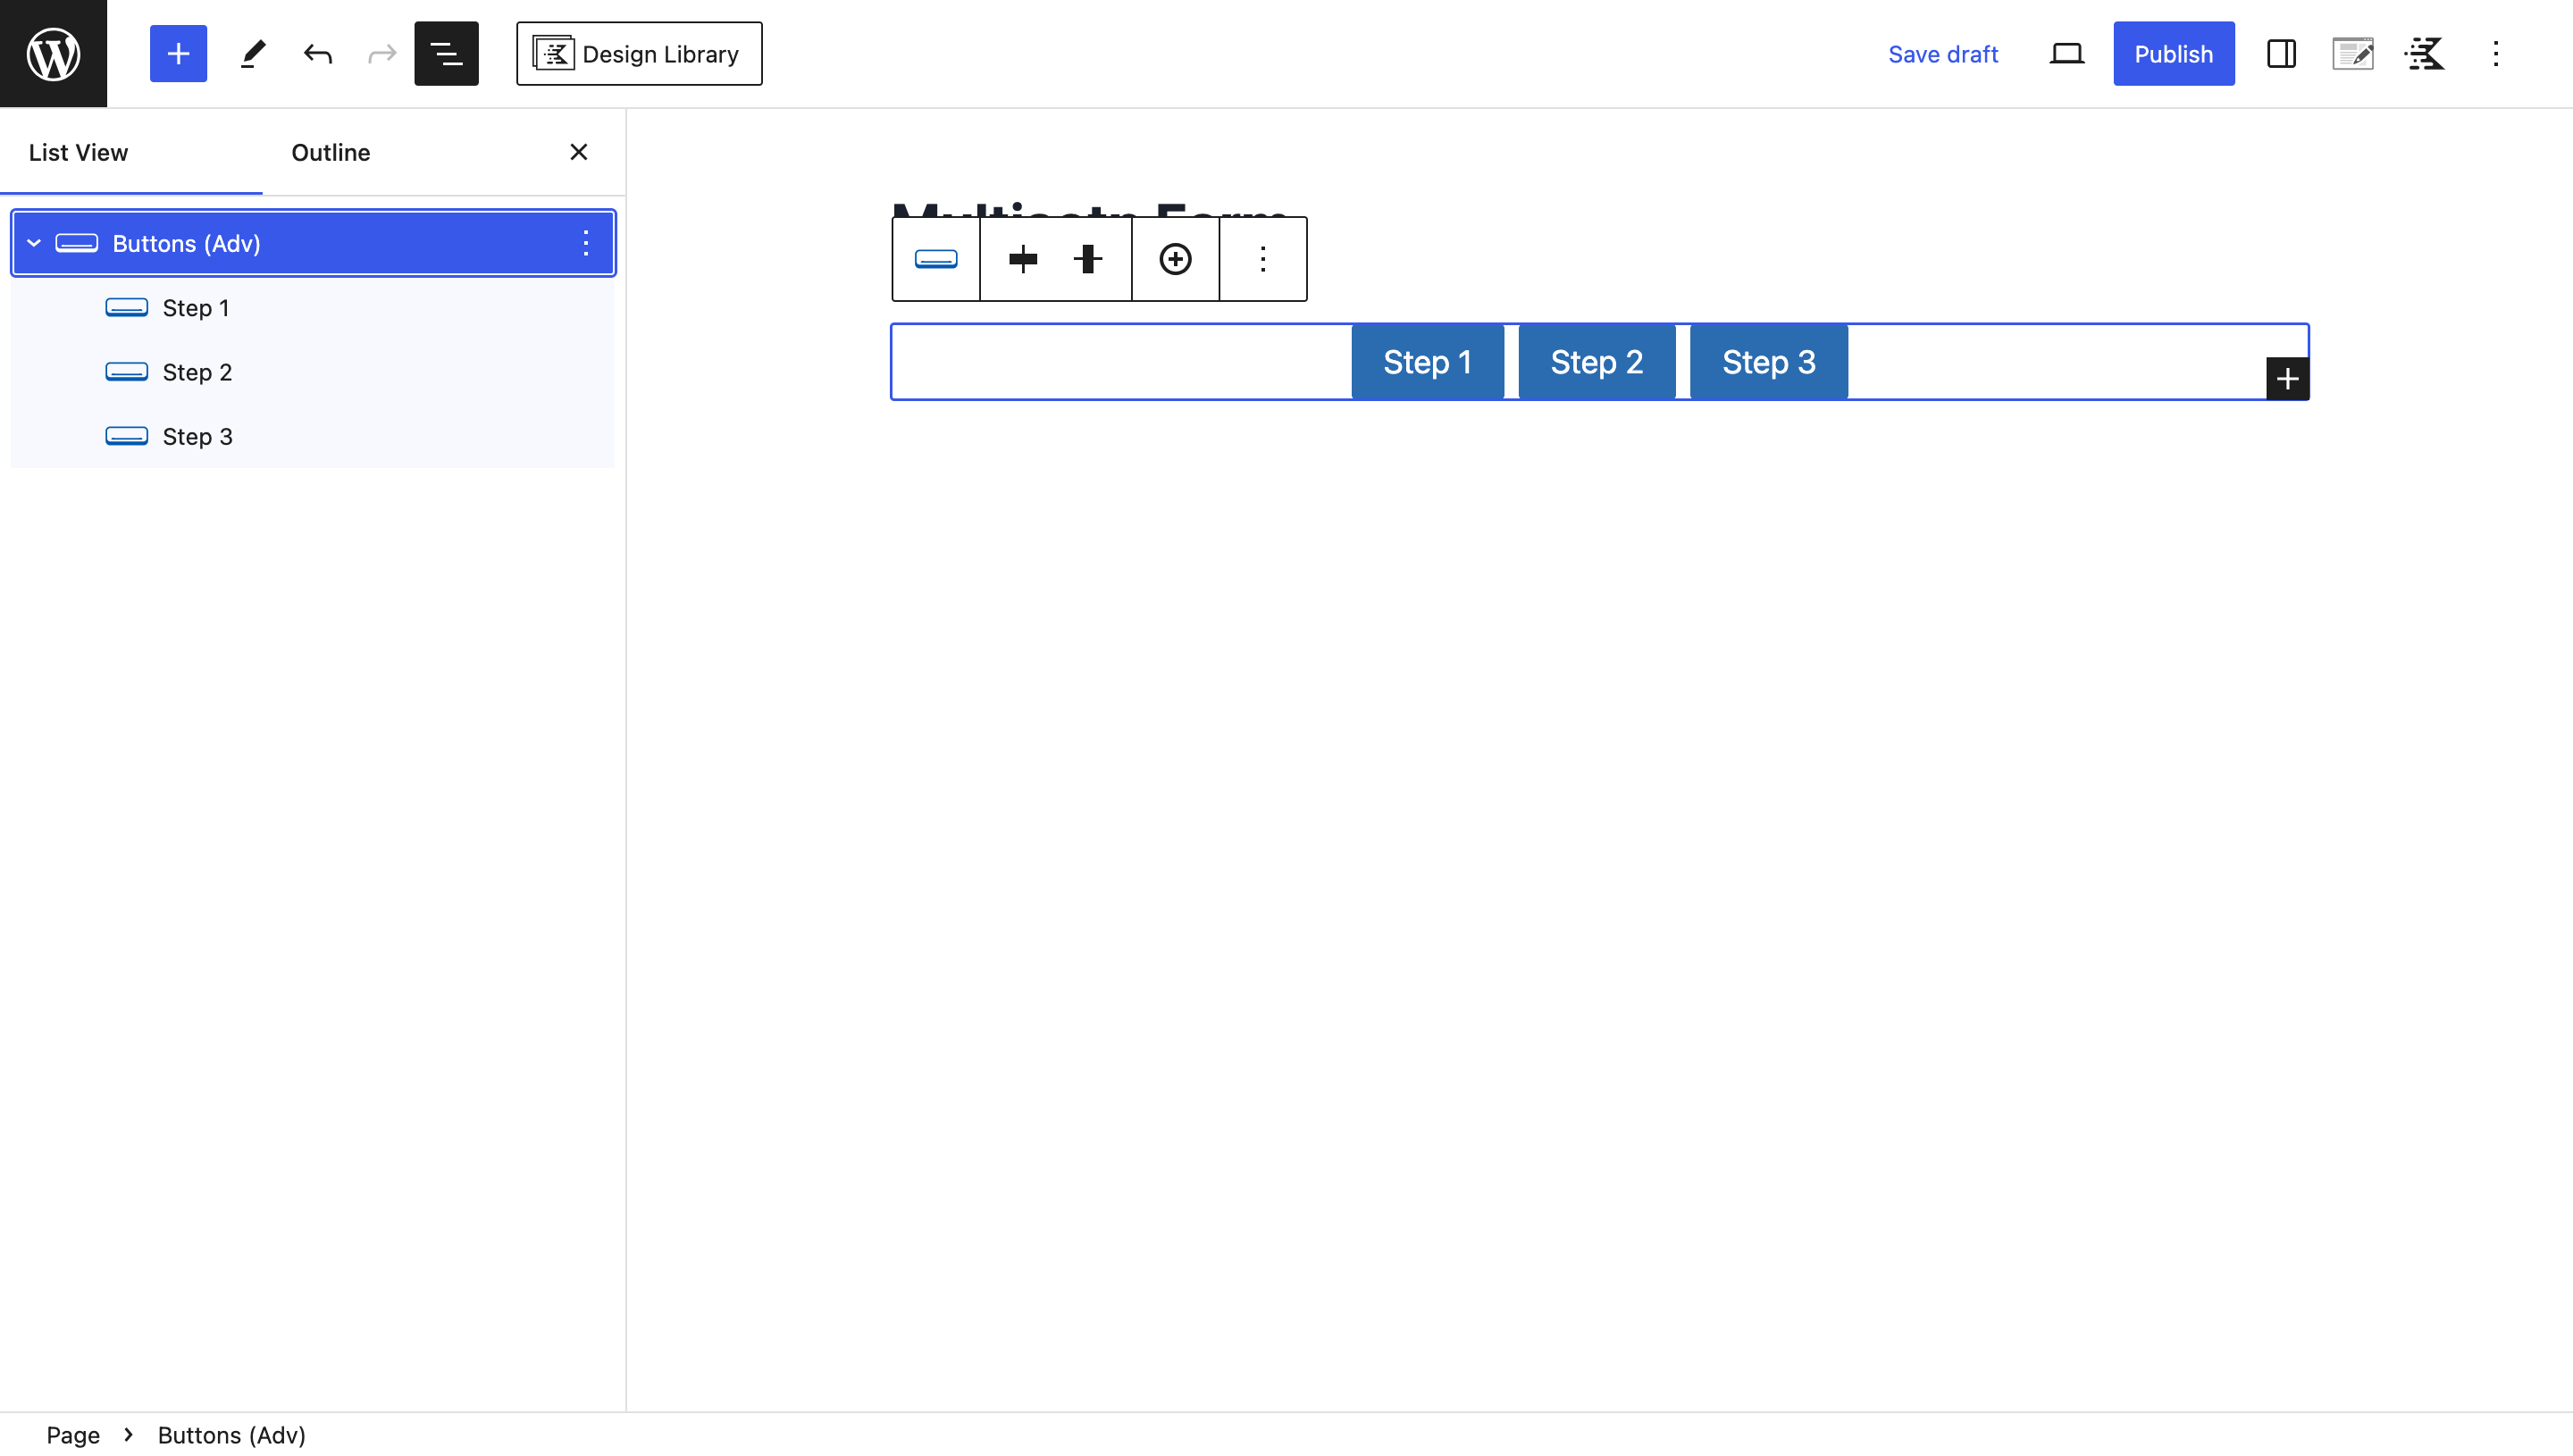
Start by adding an Advanced Button Block. These buttons will serve as markers for the user’s progress. Create a button for each step of your multi-step form.
Below the progress buttons, insert the Kadence Advanced Form Block. You can either select an existing form from your website or build a new one. For this guide, we’ll start from scratch.
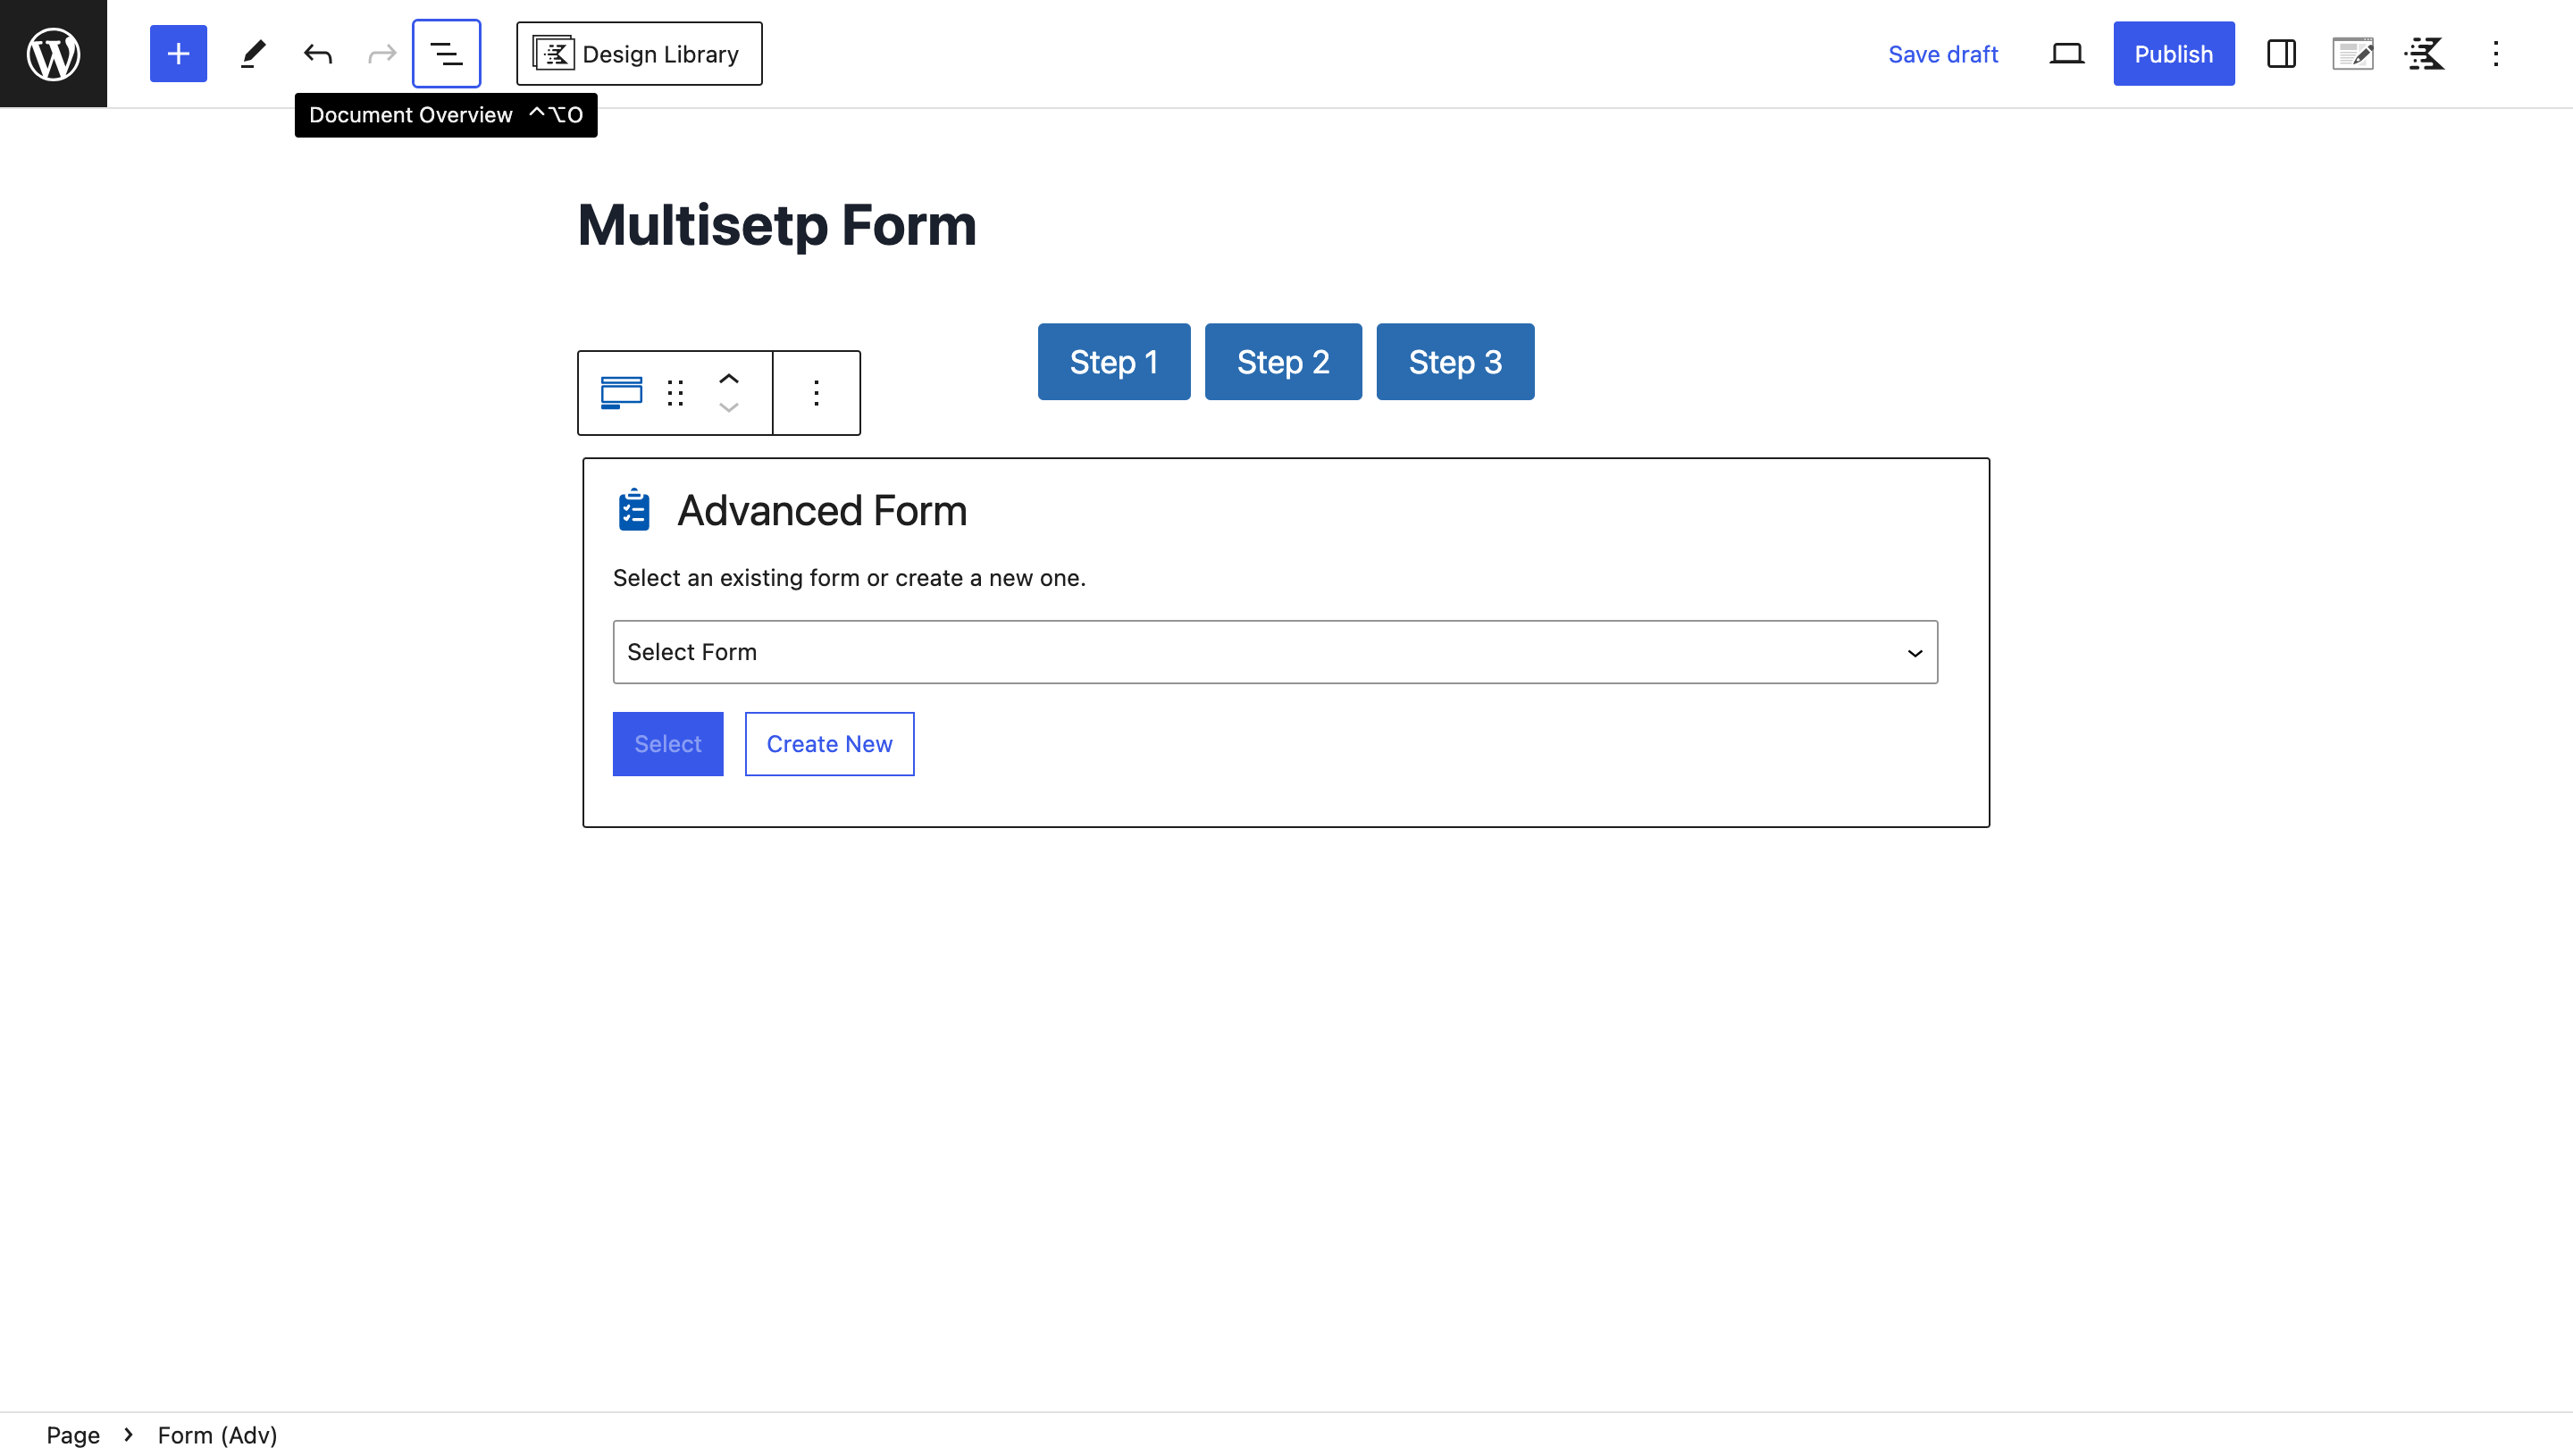
Upon creating a new form, you’ll be presented with a blank canvas. Give your form a title and structure it using section blocks. Each section will represent a step in the multi-step process.
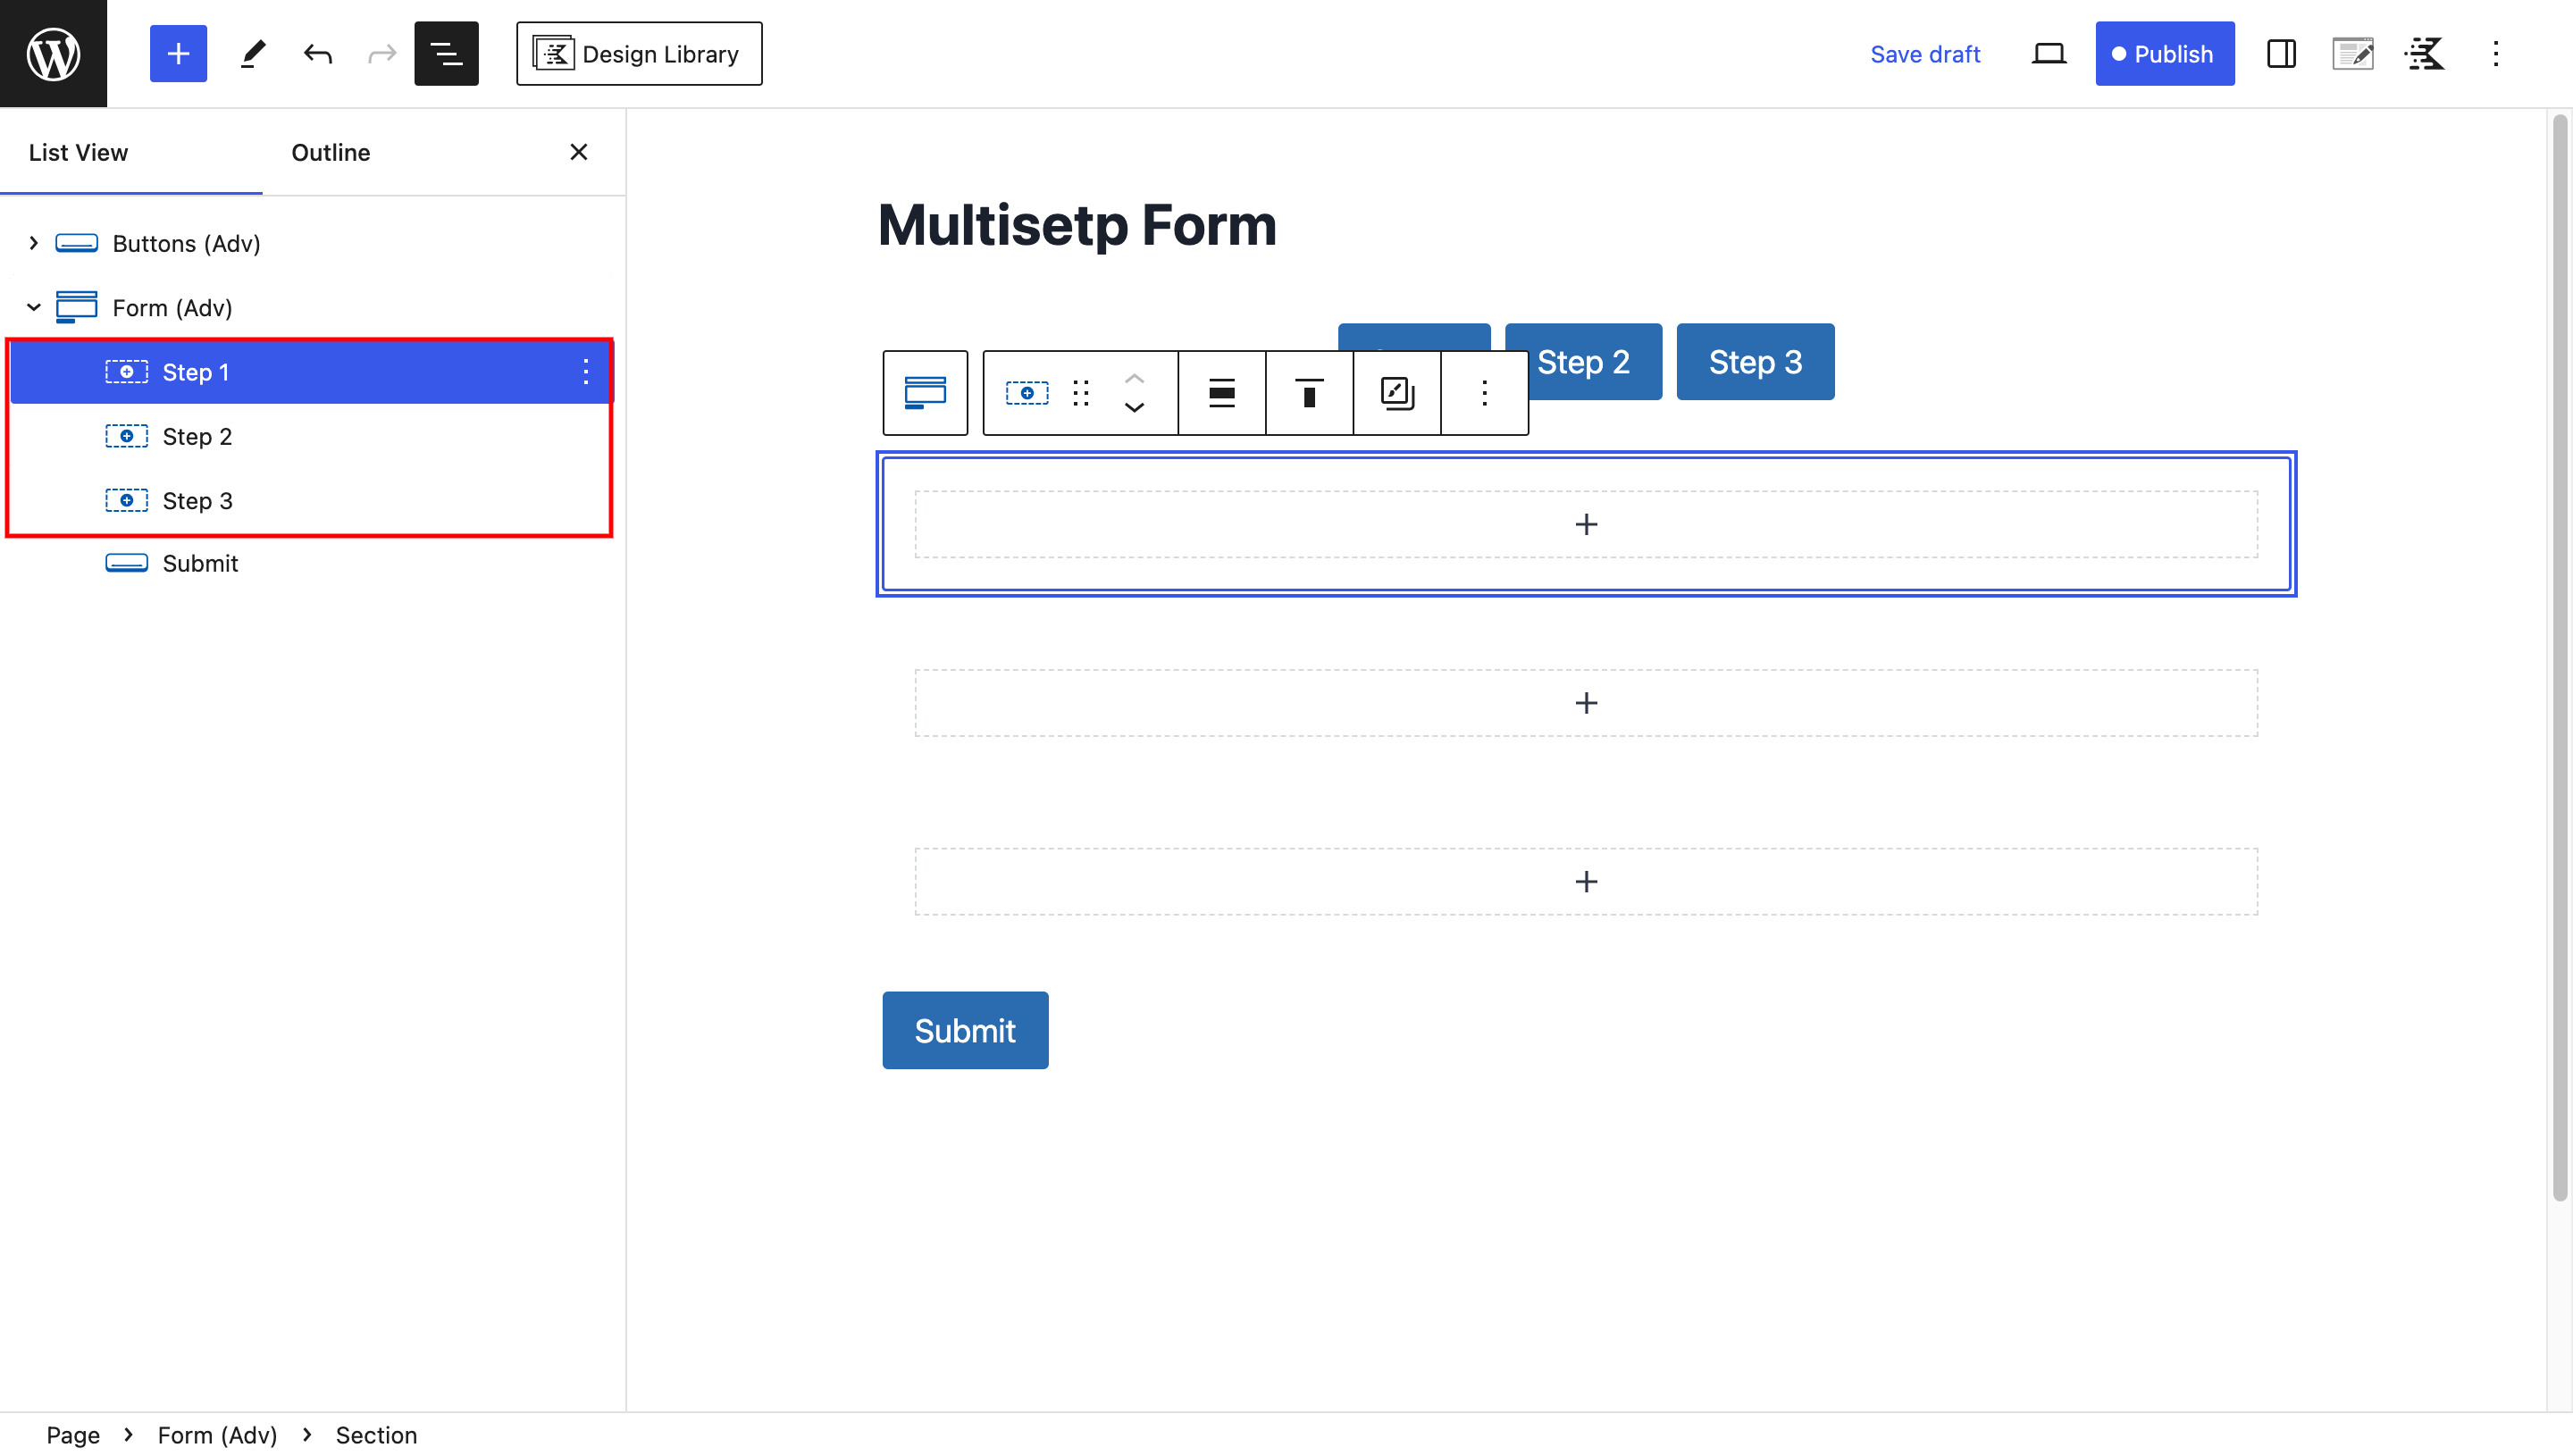
Within each section, add the form fields relevant to that specific step.
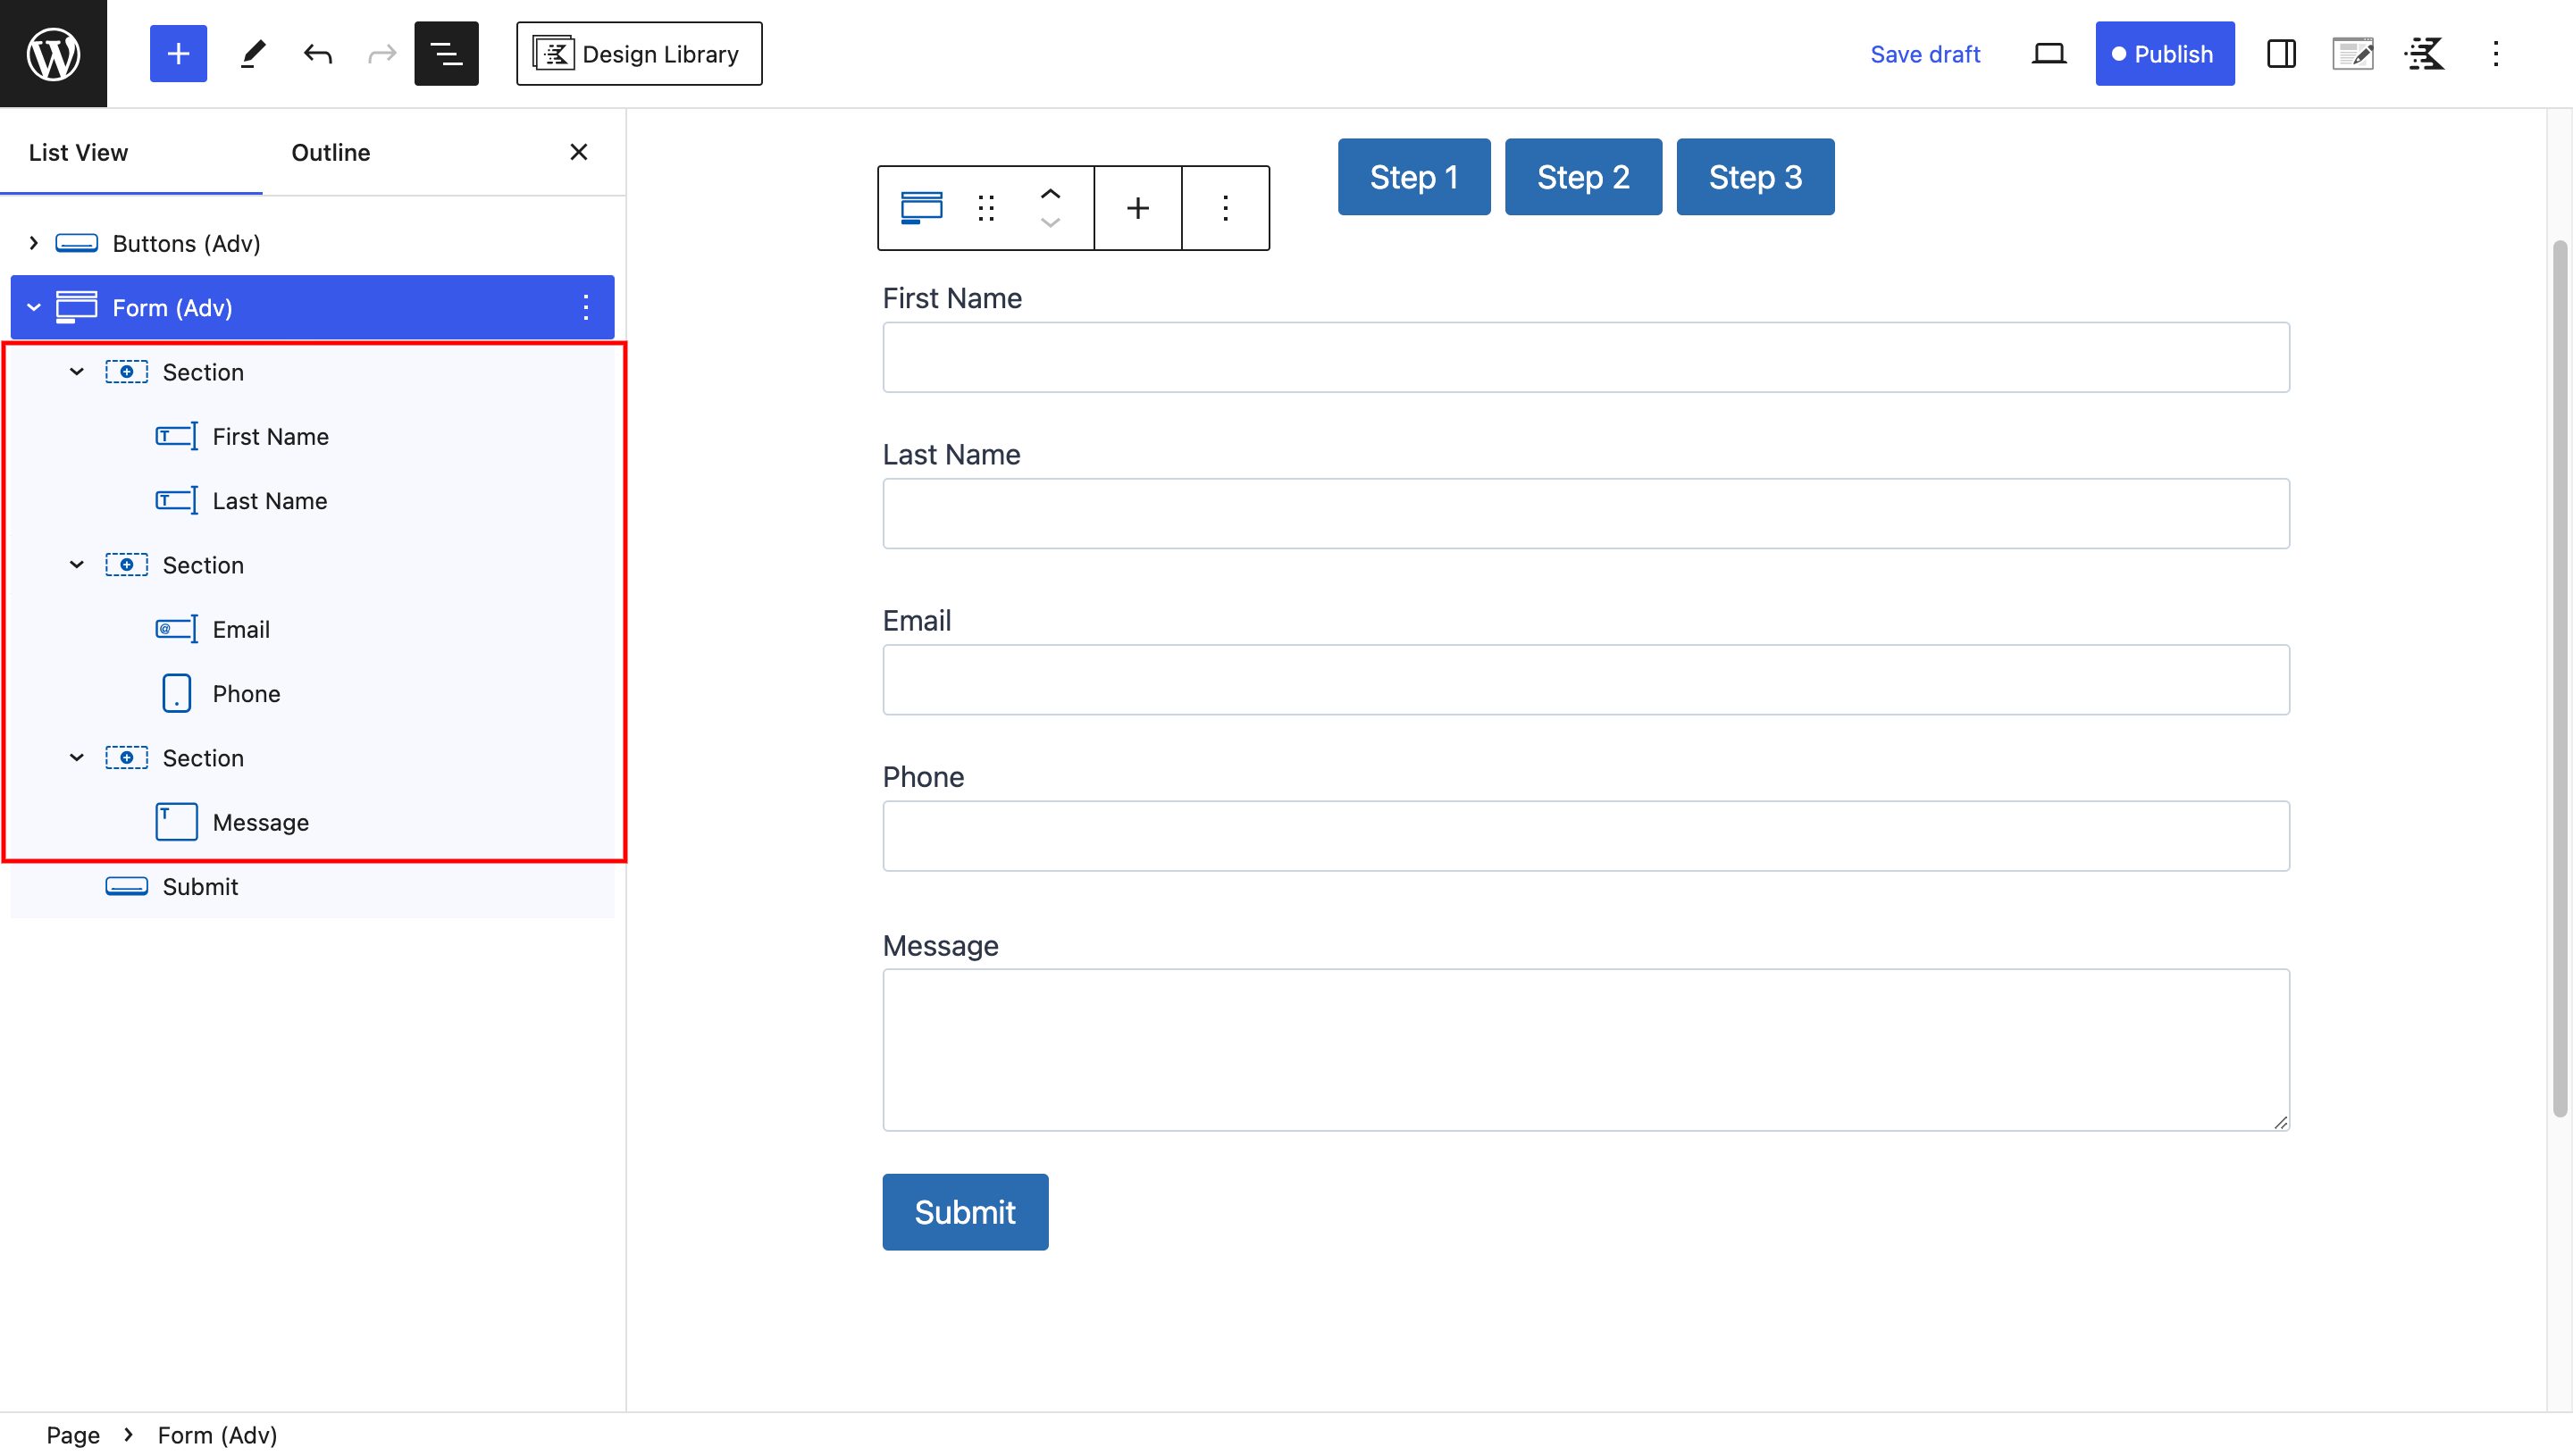
In the last section, place the submit button. This button will become visible once users complete all the form steps.
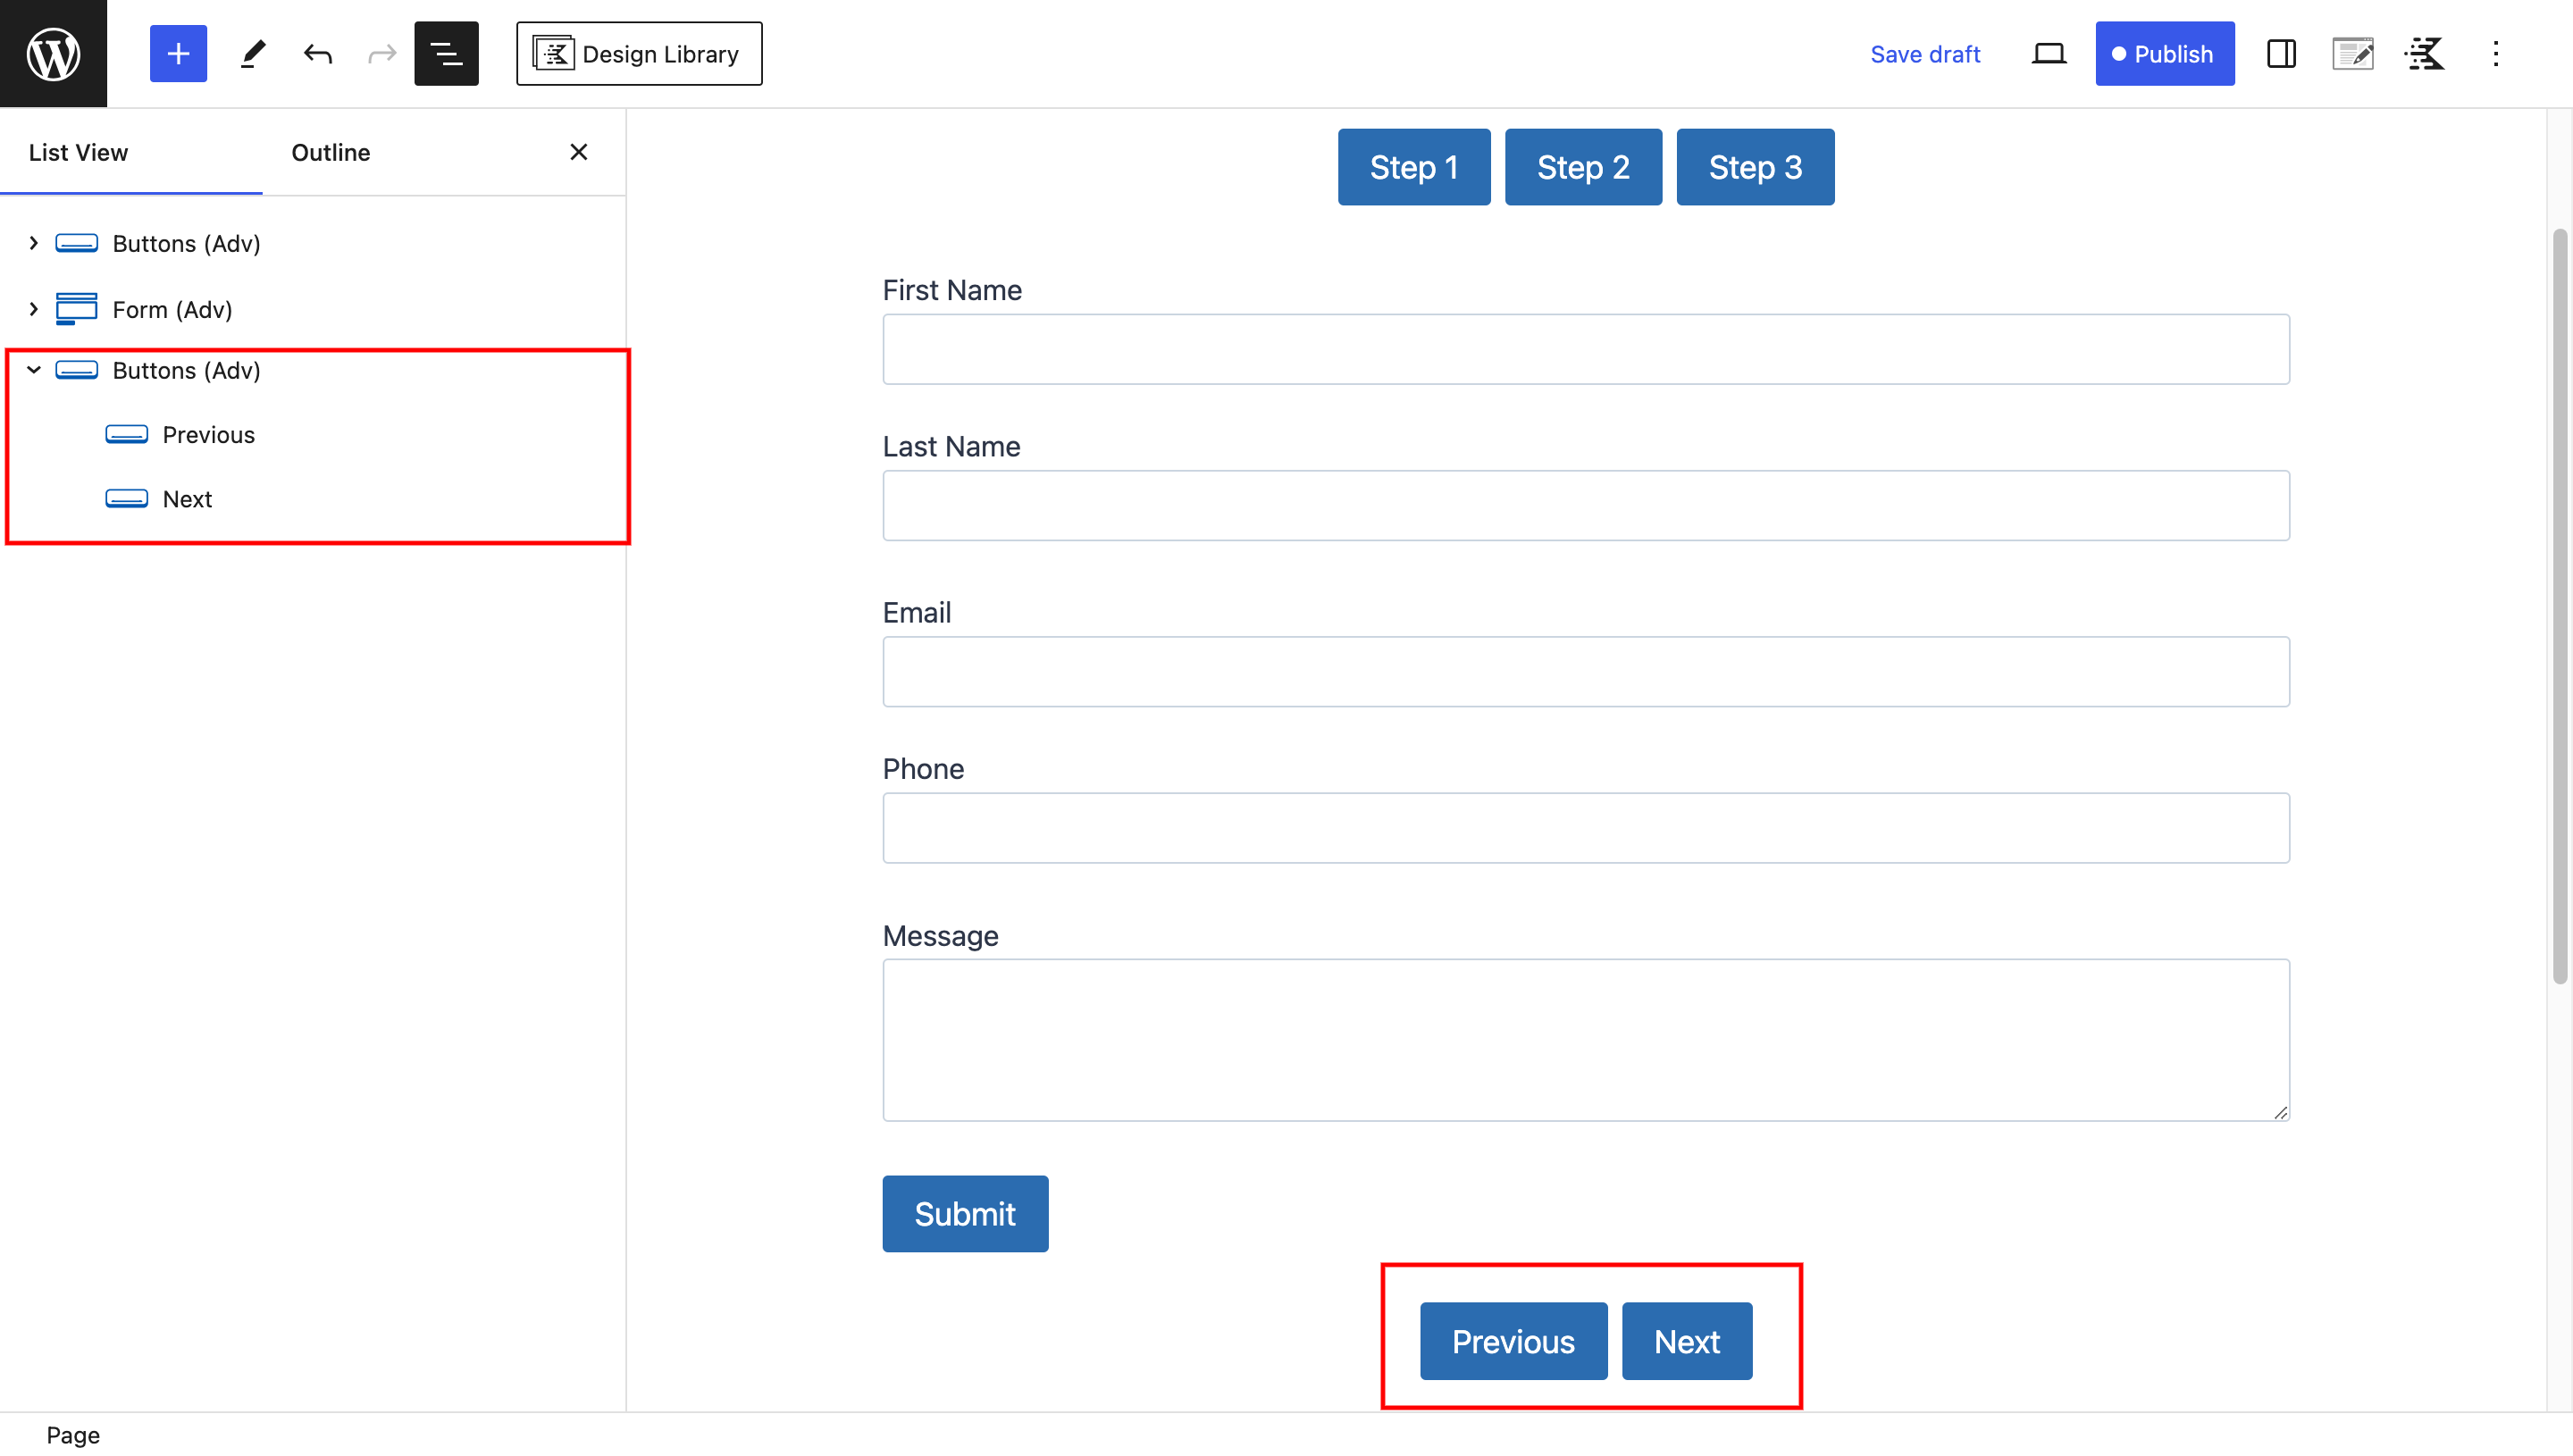
Make it easy to move between steps. Add two buttons: “Next” and “Back.” This helps people go forward and backward.
Transforming into Multi-Step: Adding Classes and JavaScript
Now comes the exciting part – transforming your form into a multi-step!
Adding Classes
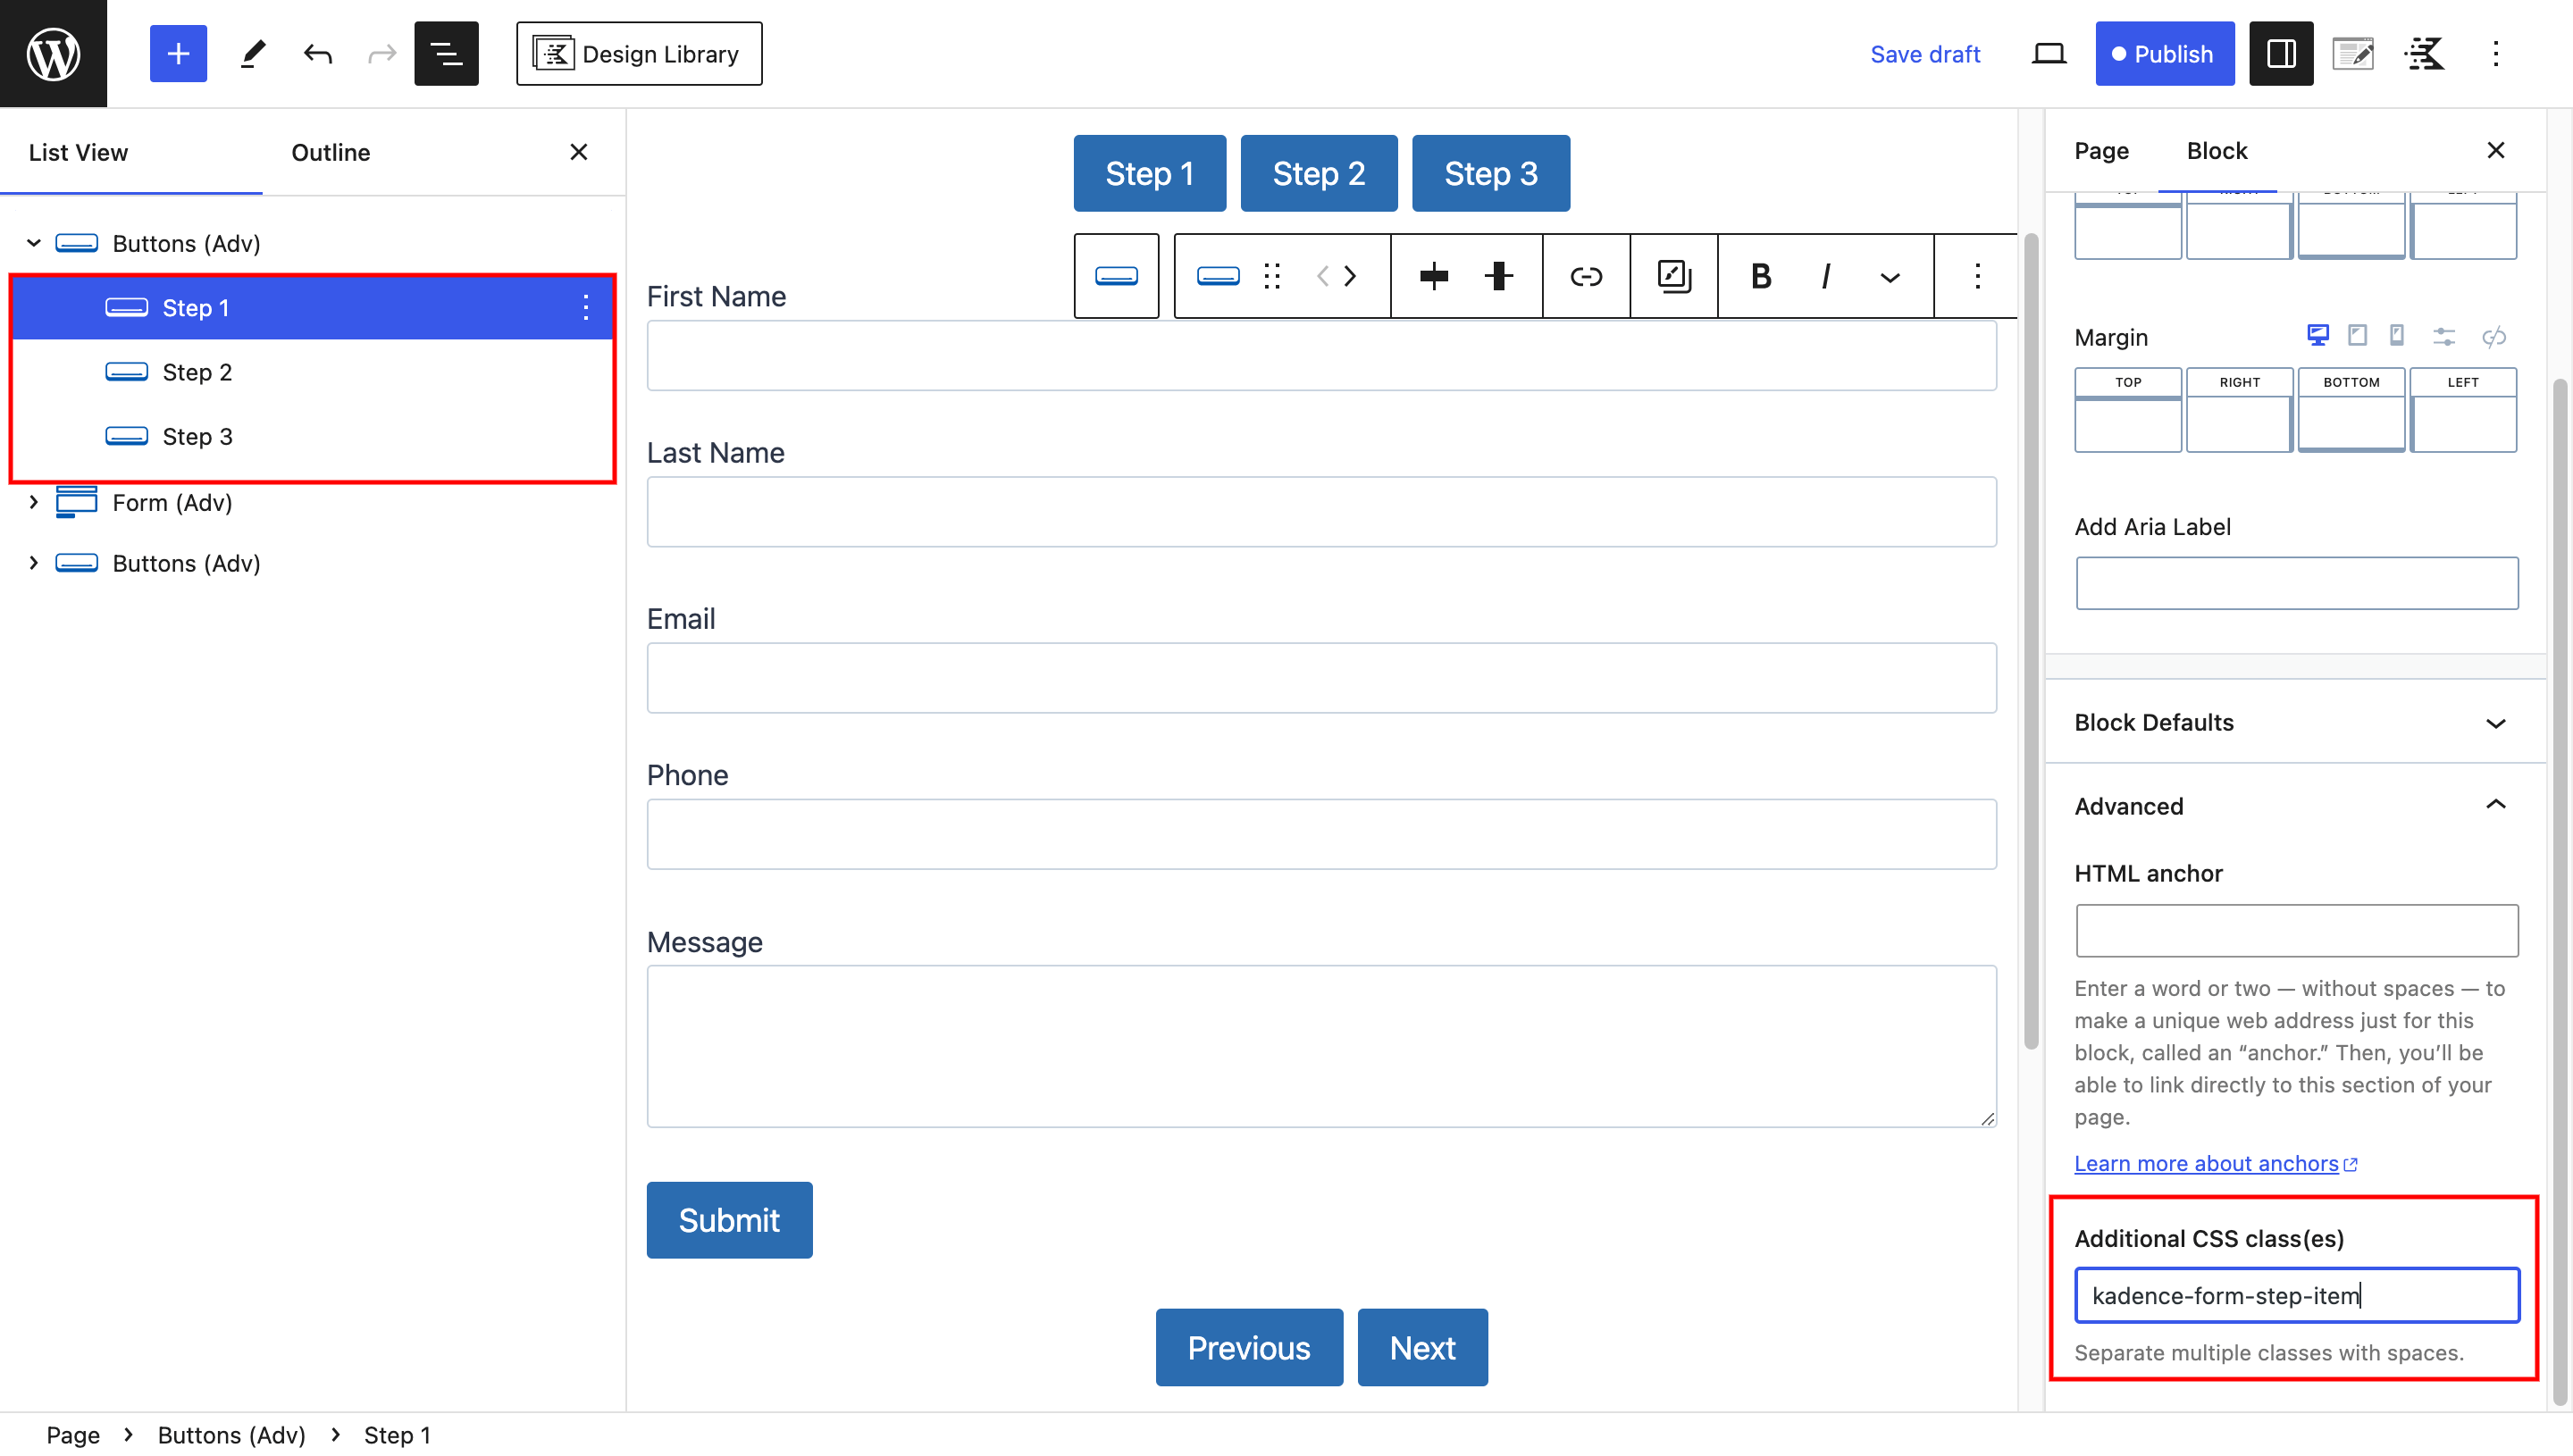
Begin by selecting the progress buttons at the top. Add the class name “kadence-form-step-item” to each of these buttons.
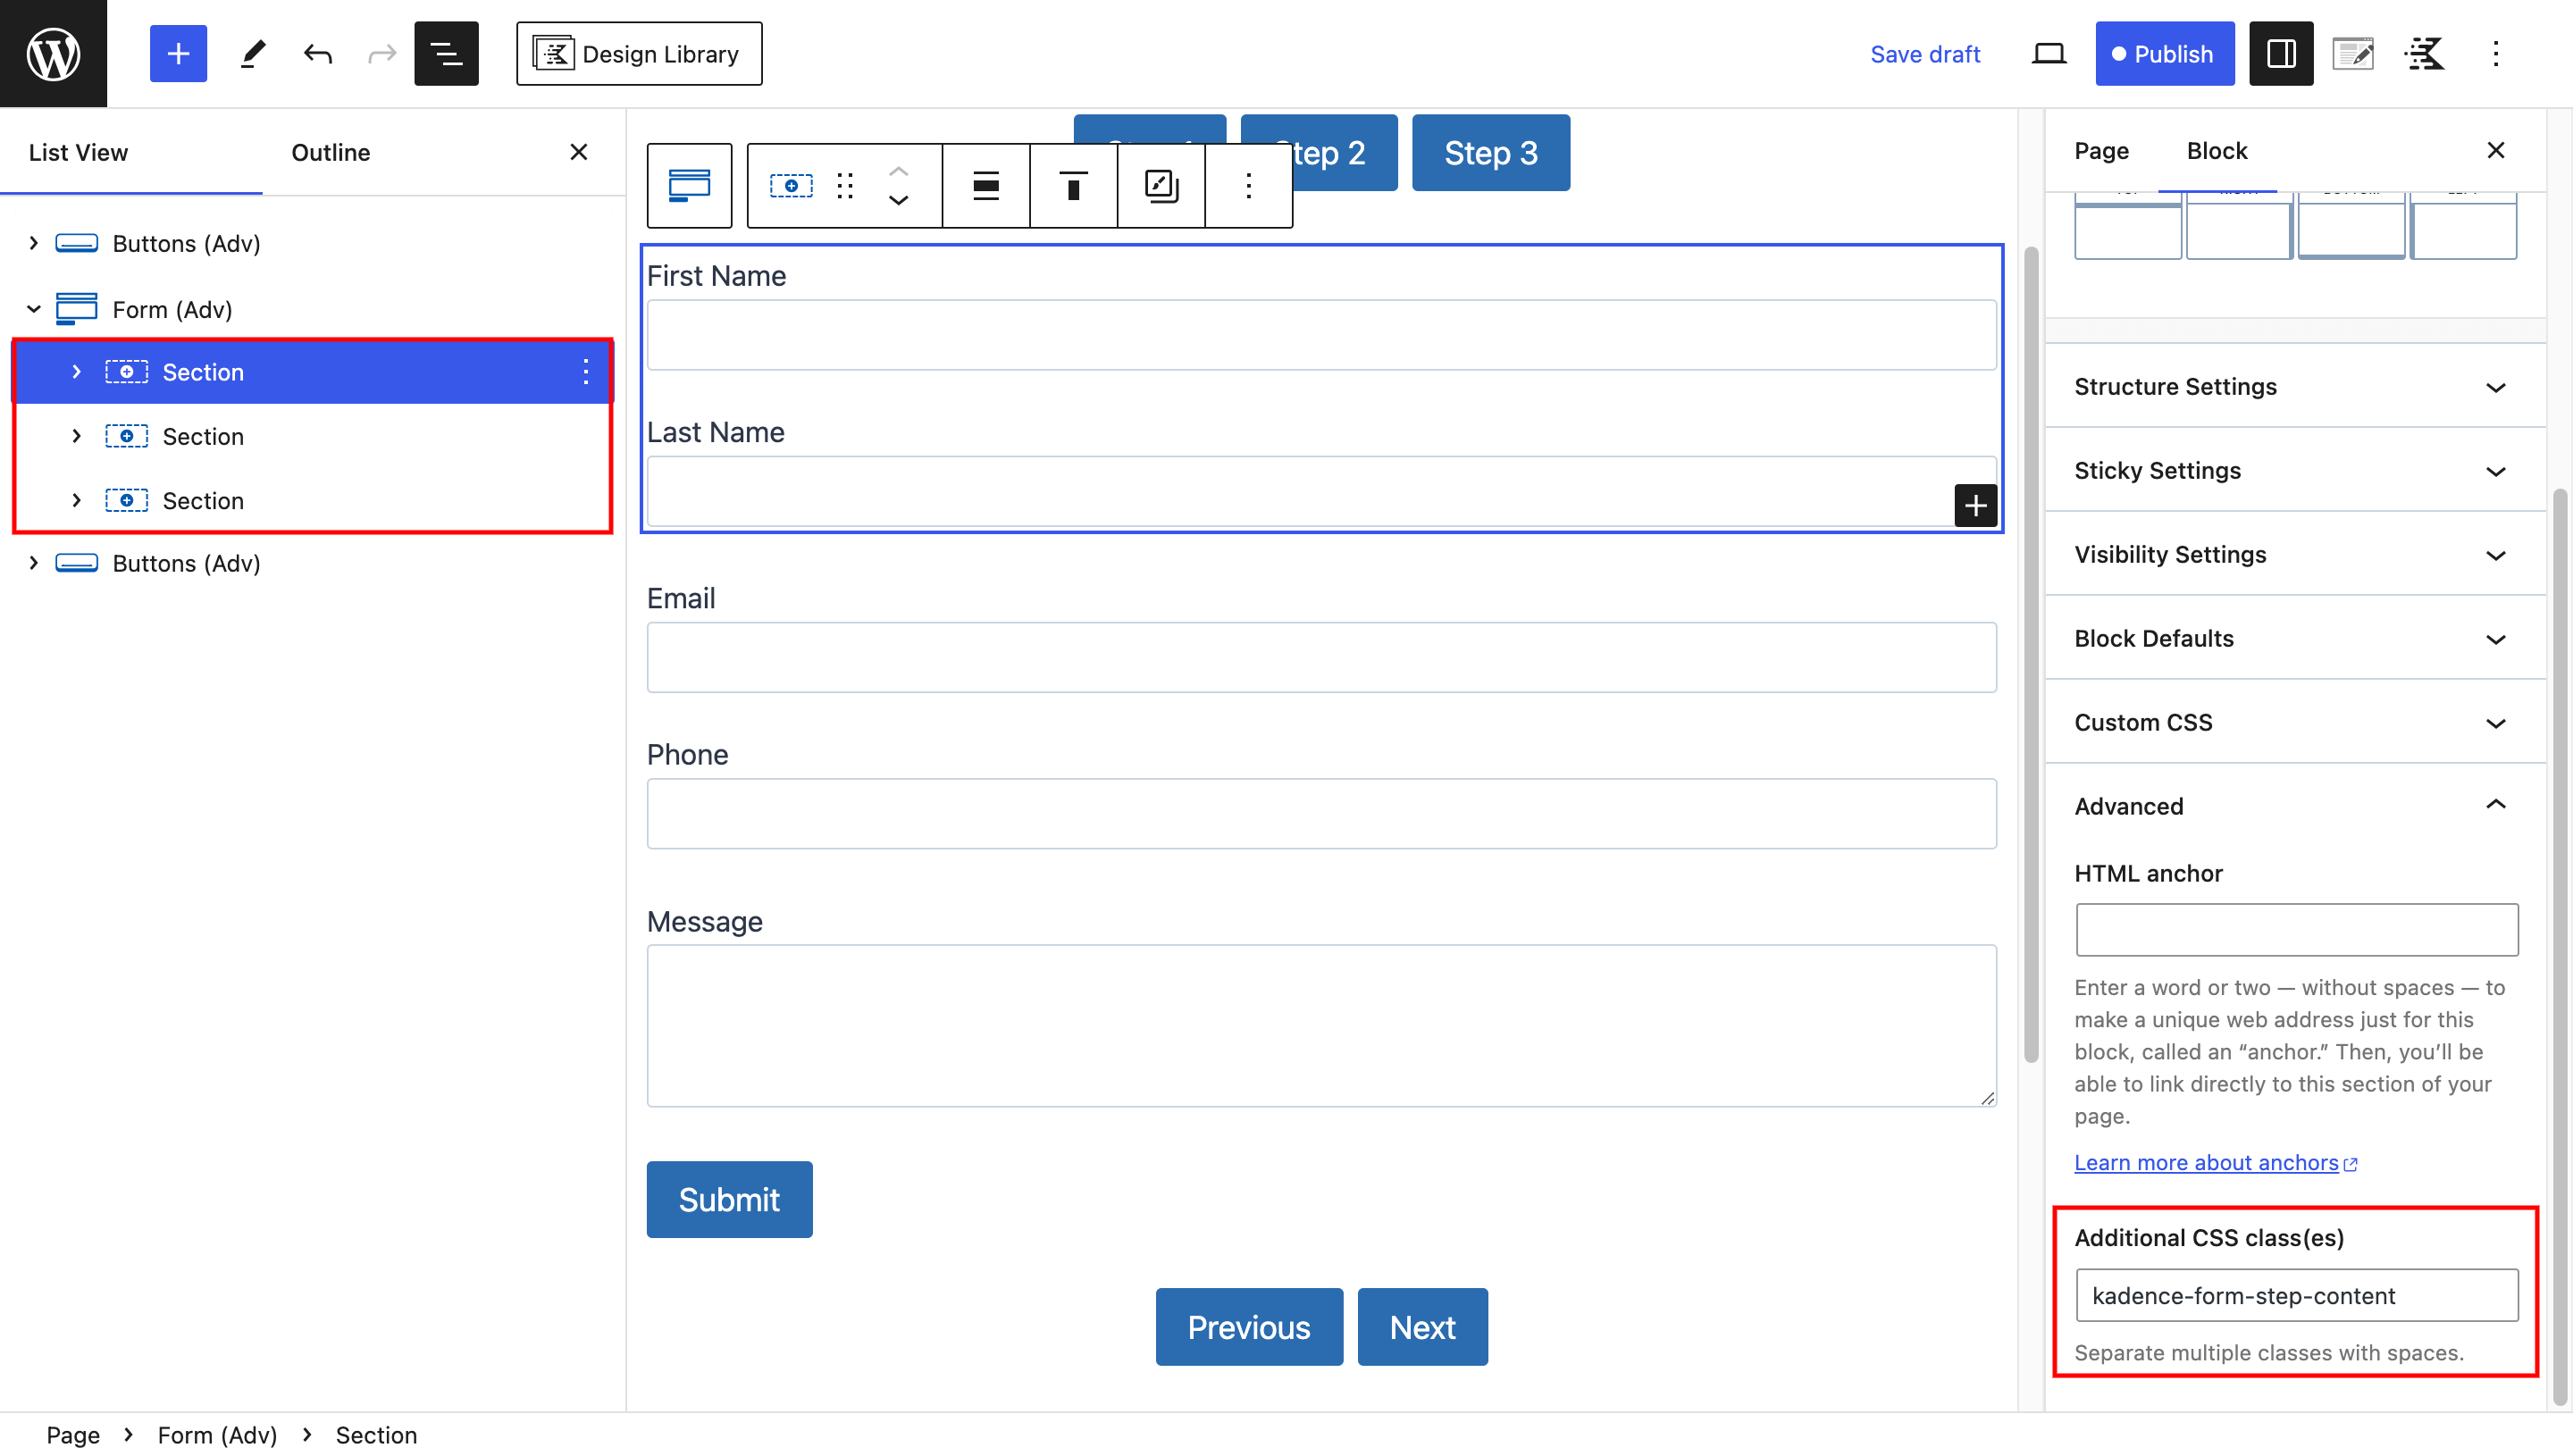
Next, select the step content sections within the form block and add the class name “kadence-form-step-content” to each section.
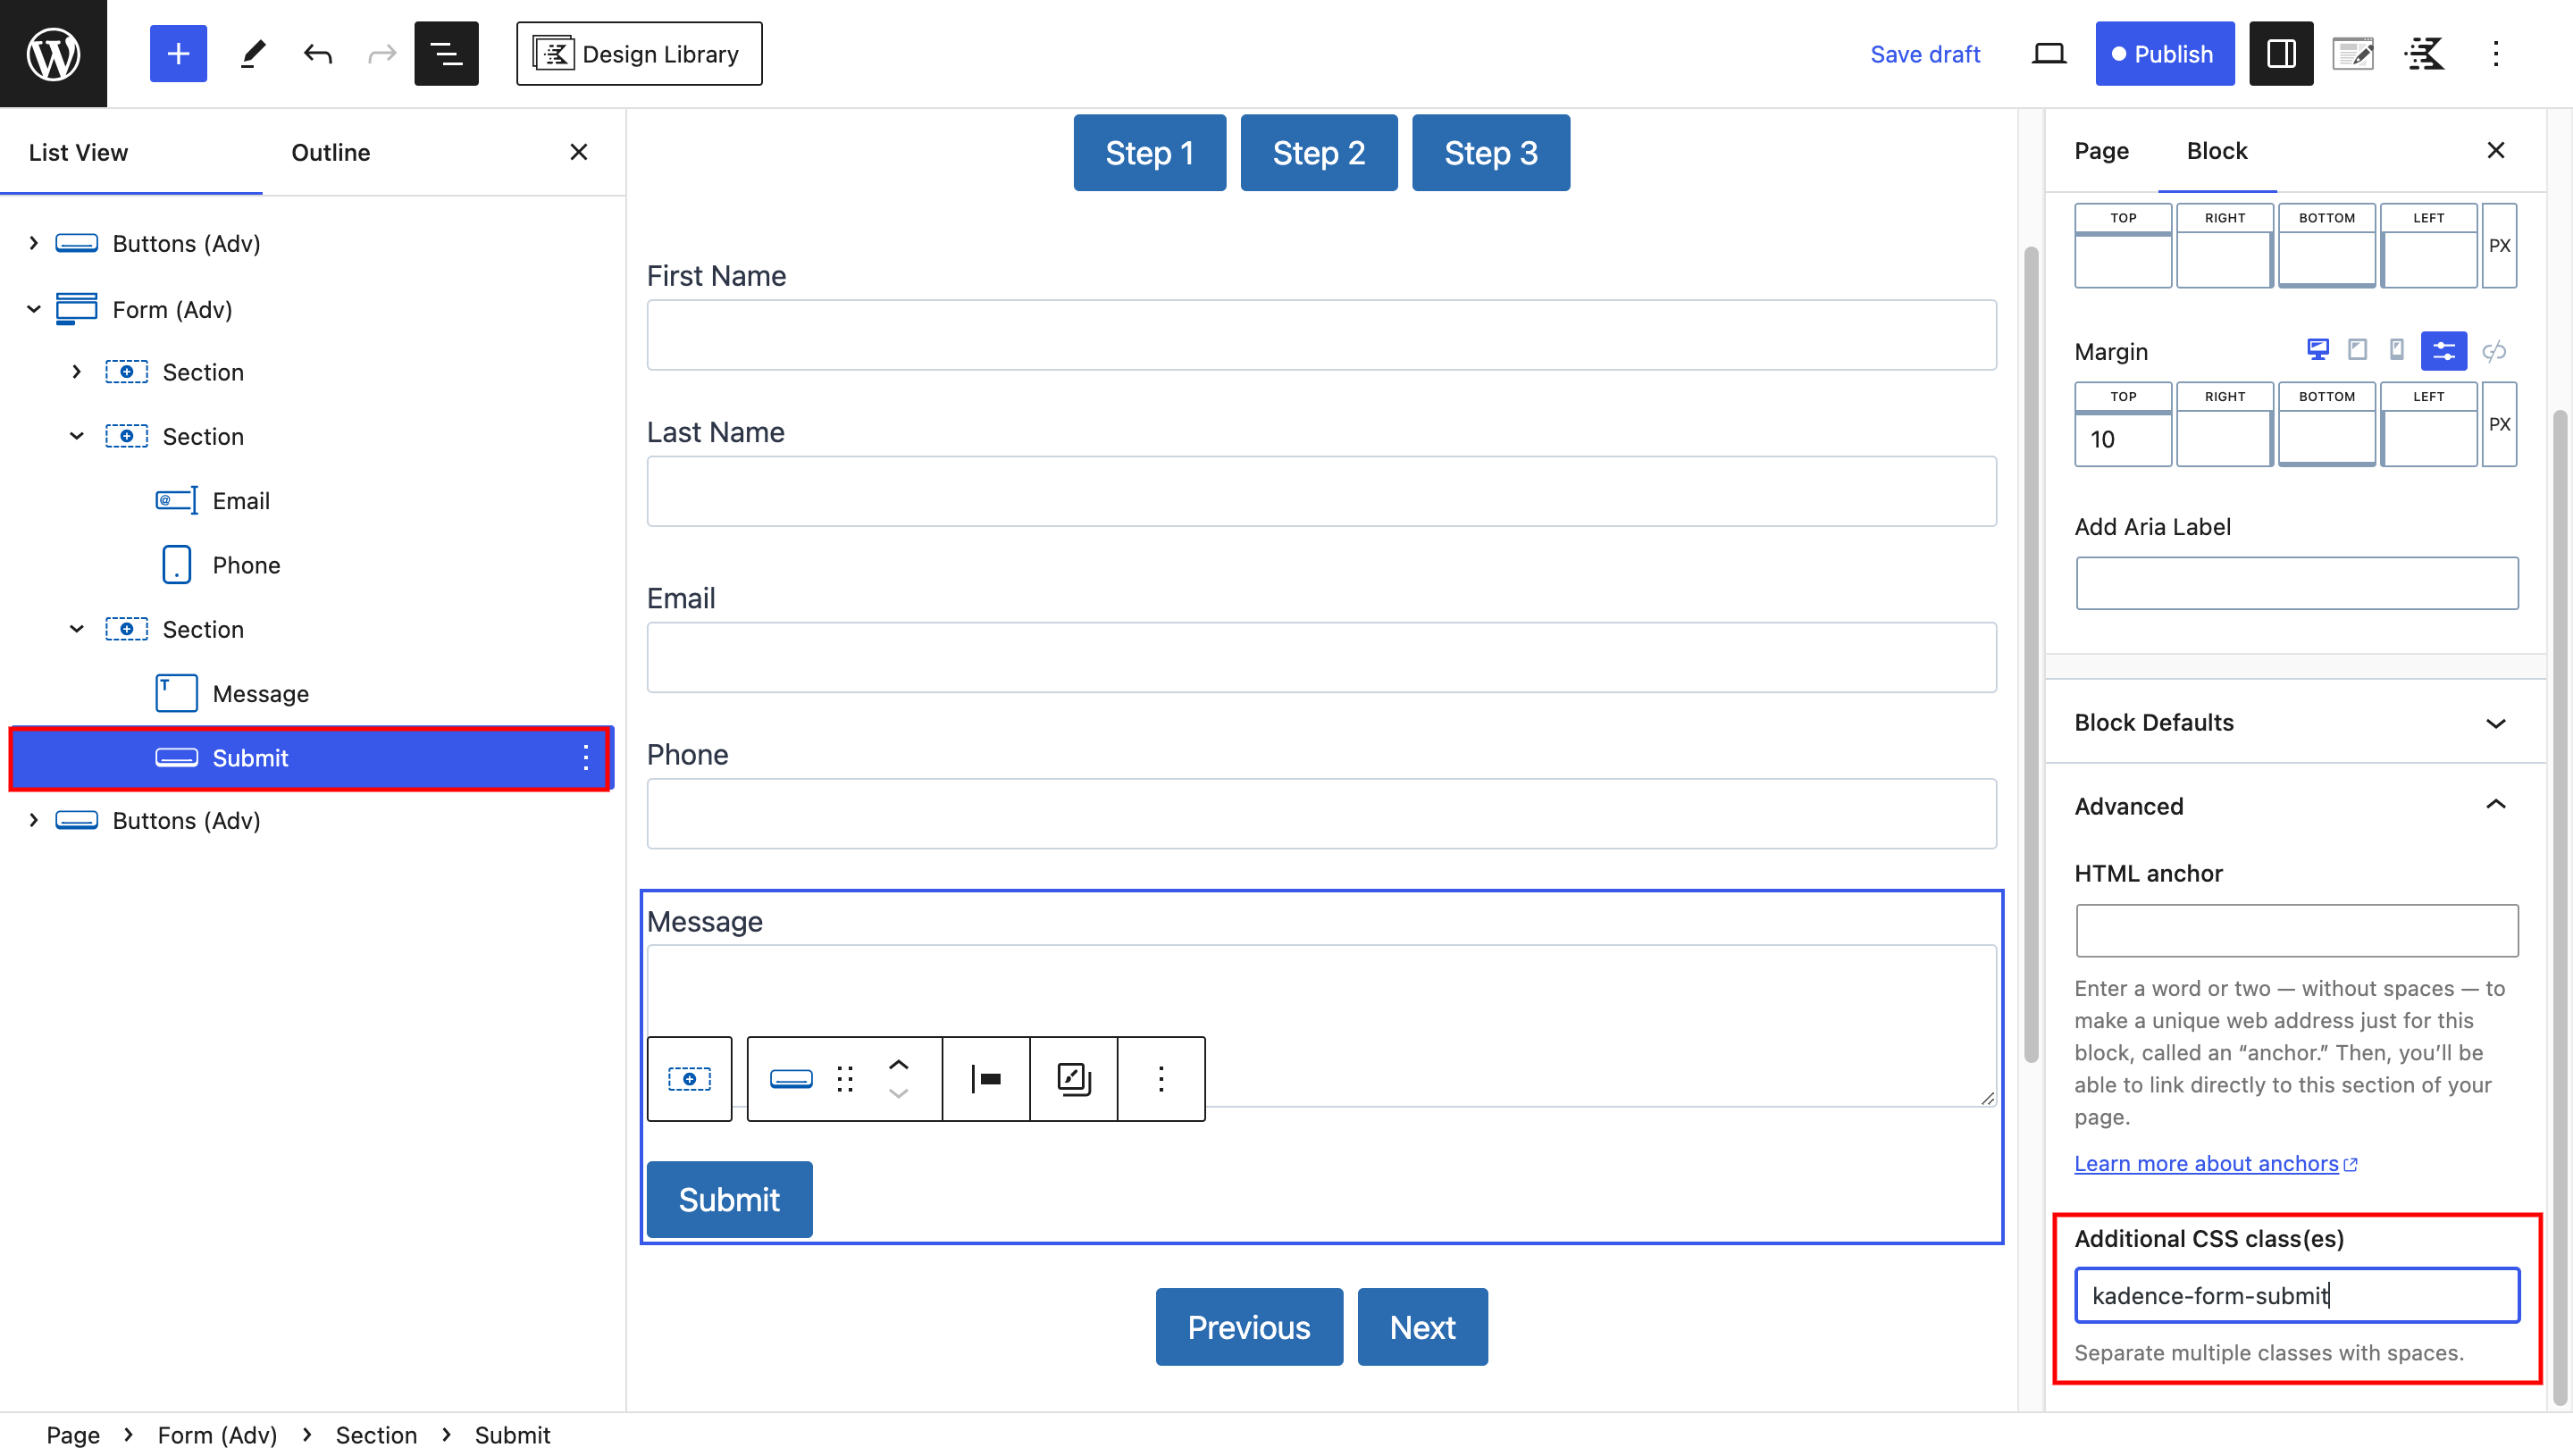
For the submit button, add the class name “kadence-form-submit”.
Within the next/previous button wrapper, apply the class name “kadence-form-buttons.”
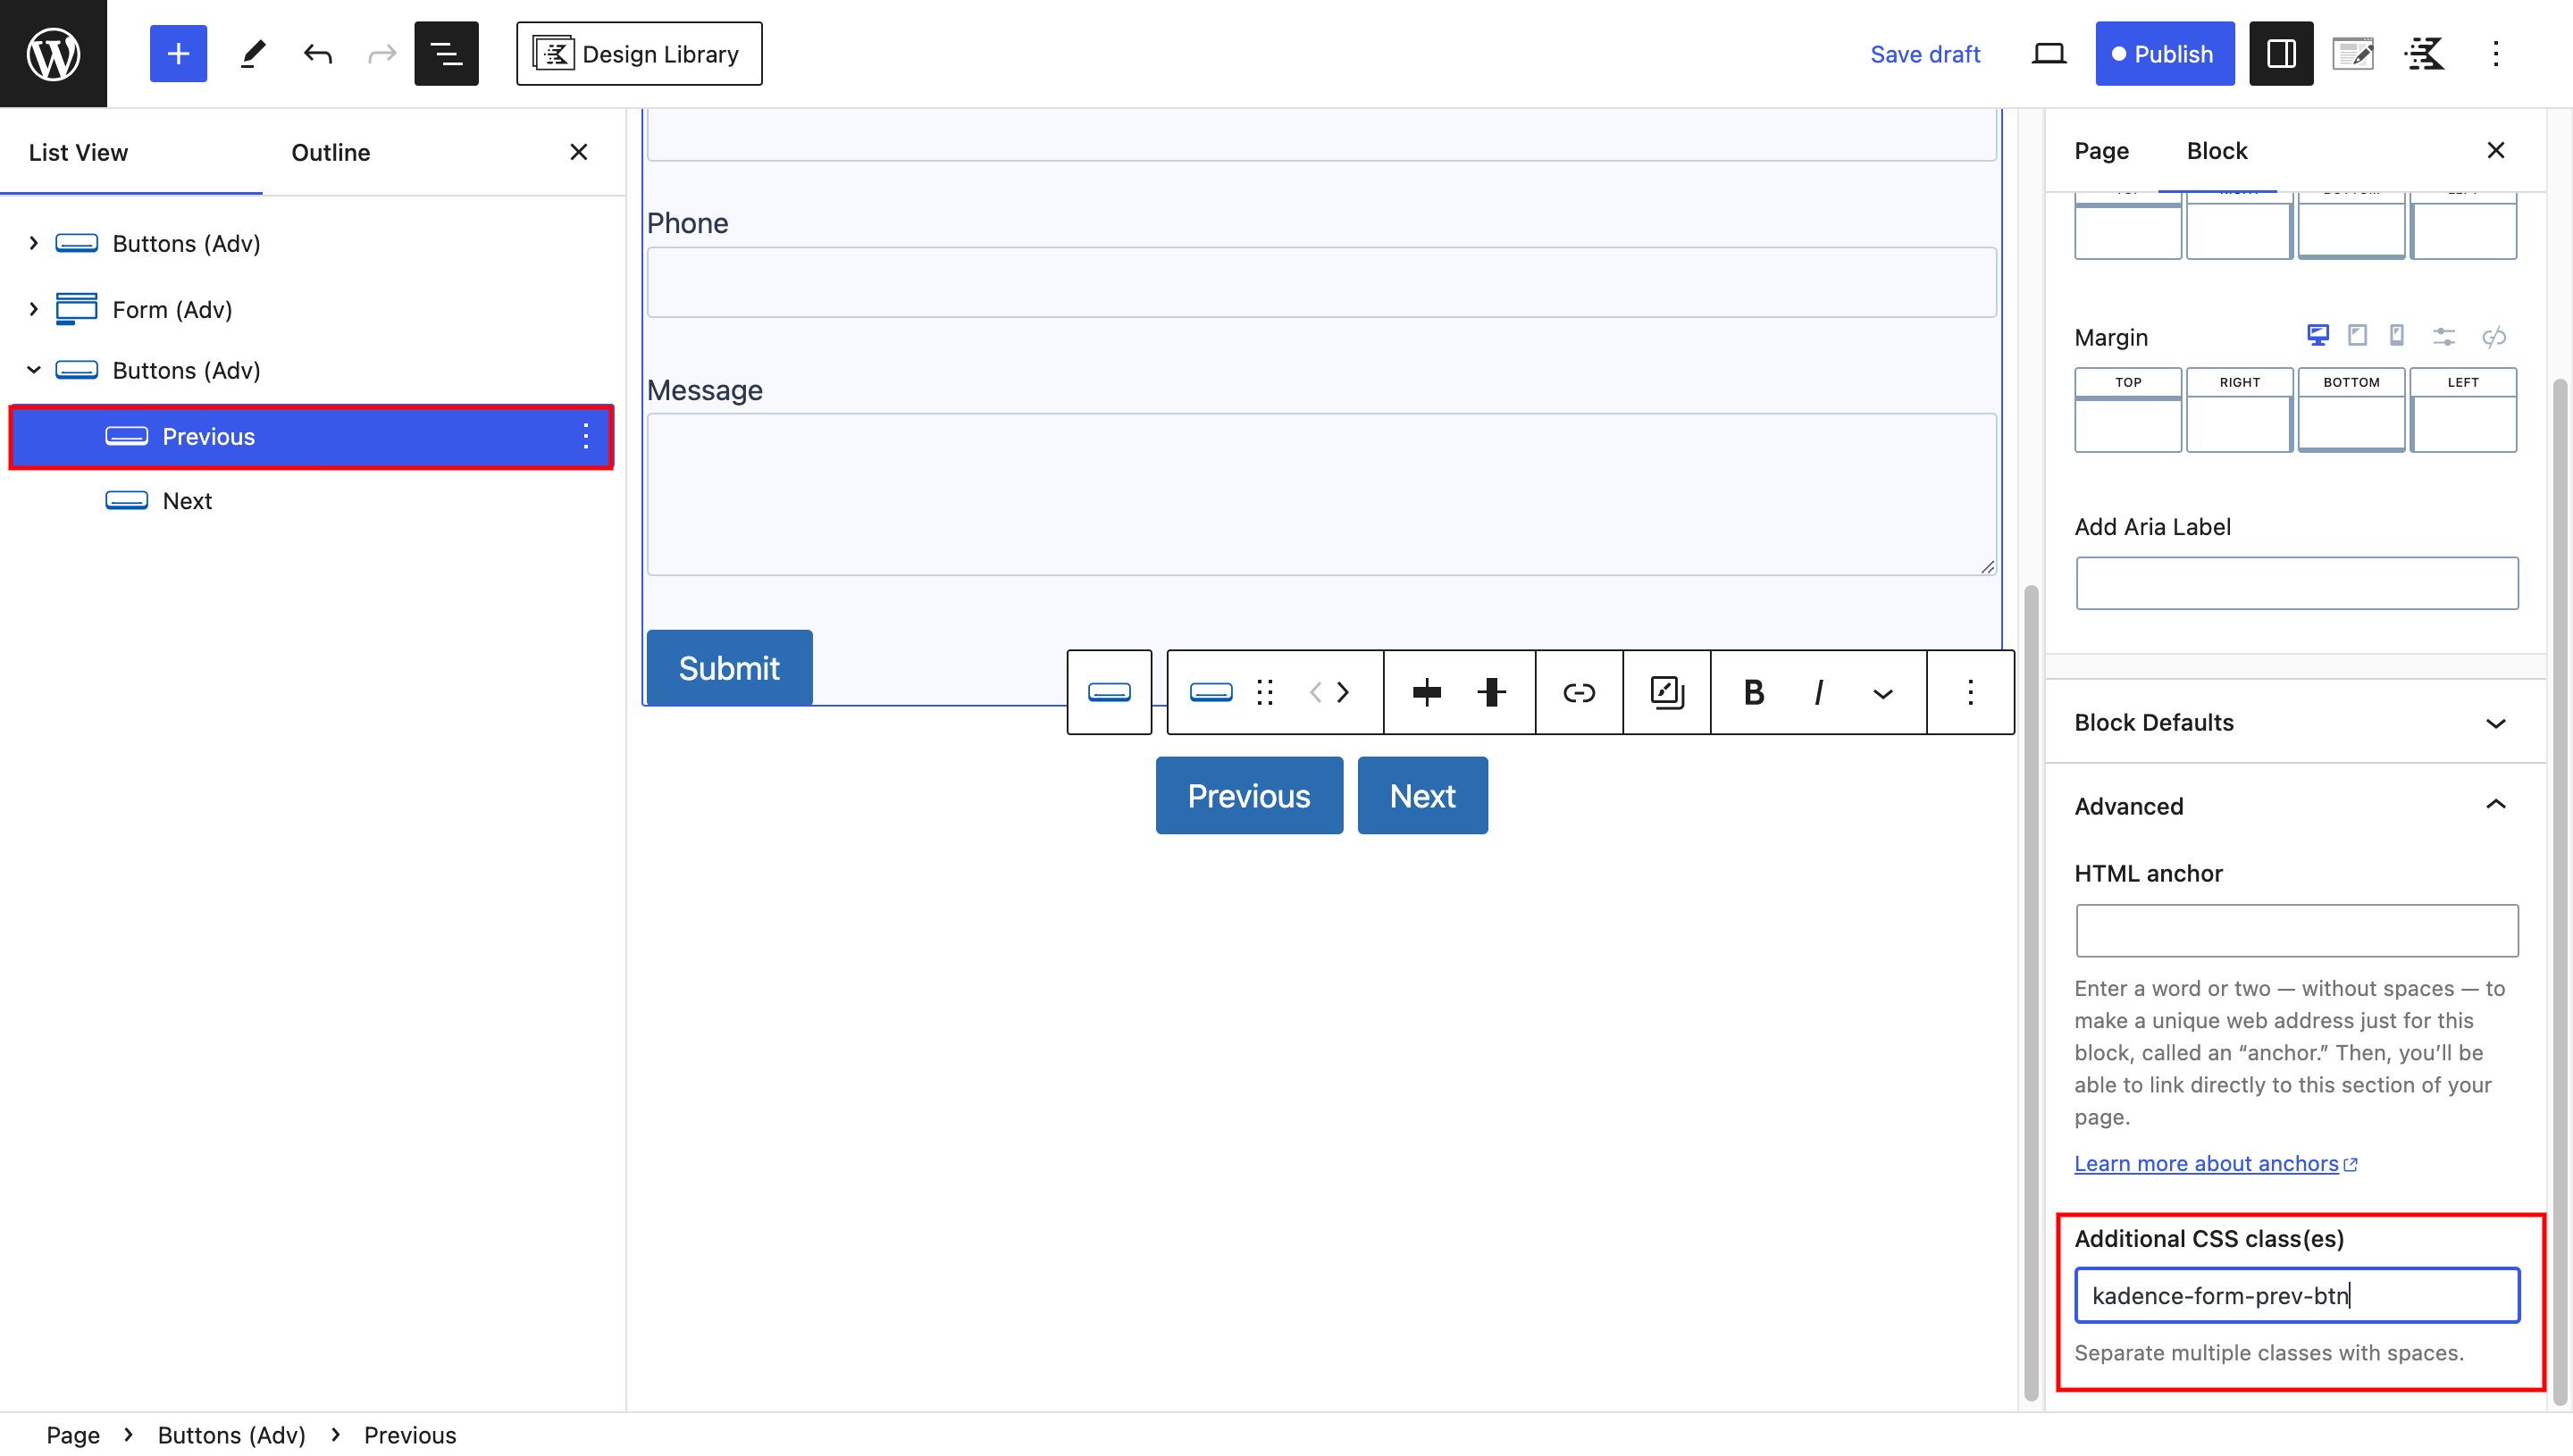
Inside this block, apply the class name “kadence-form-prev-btn” to the previous button.
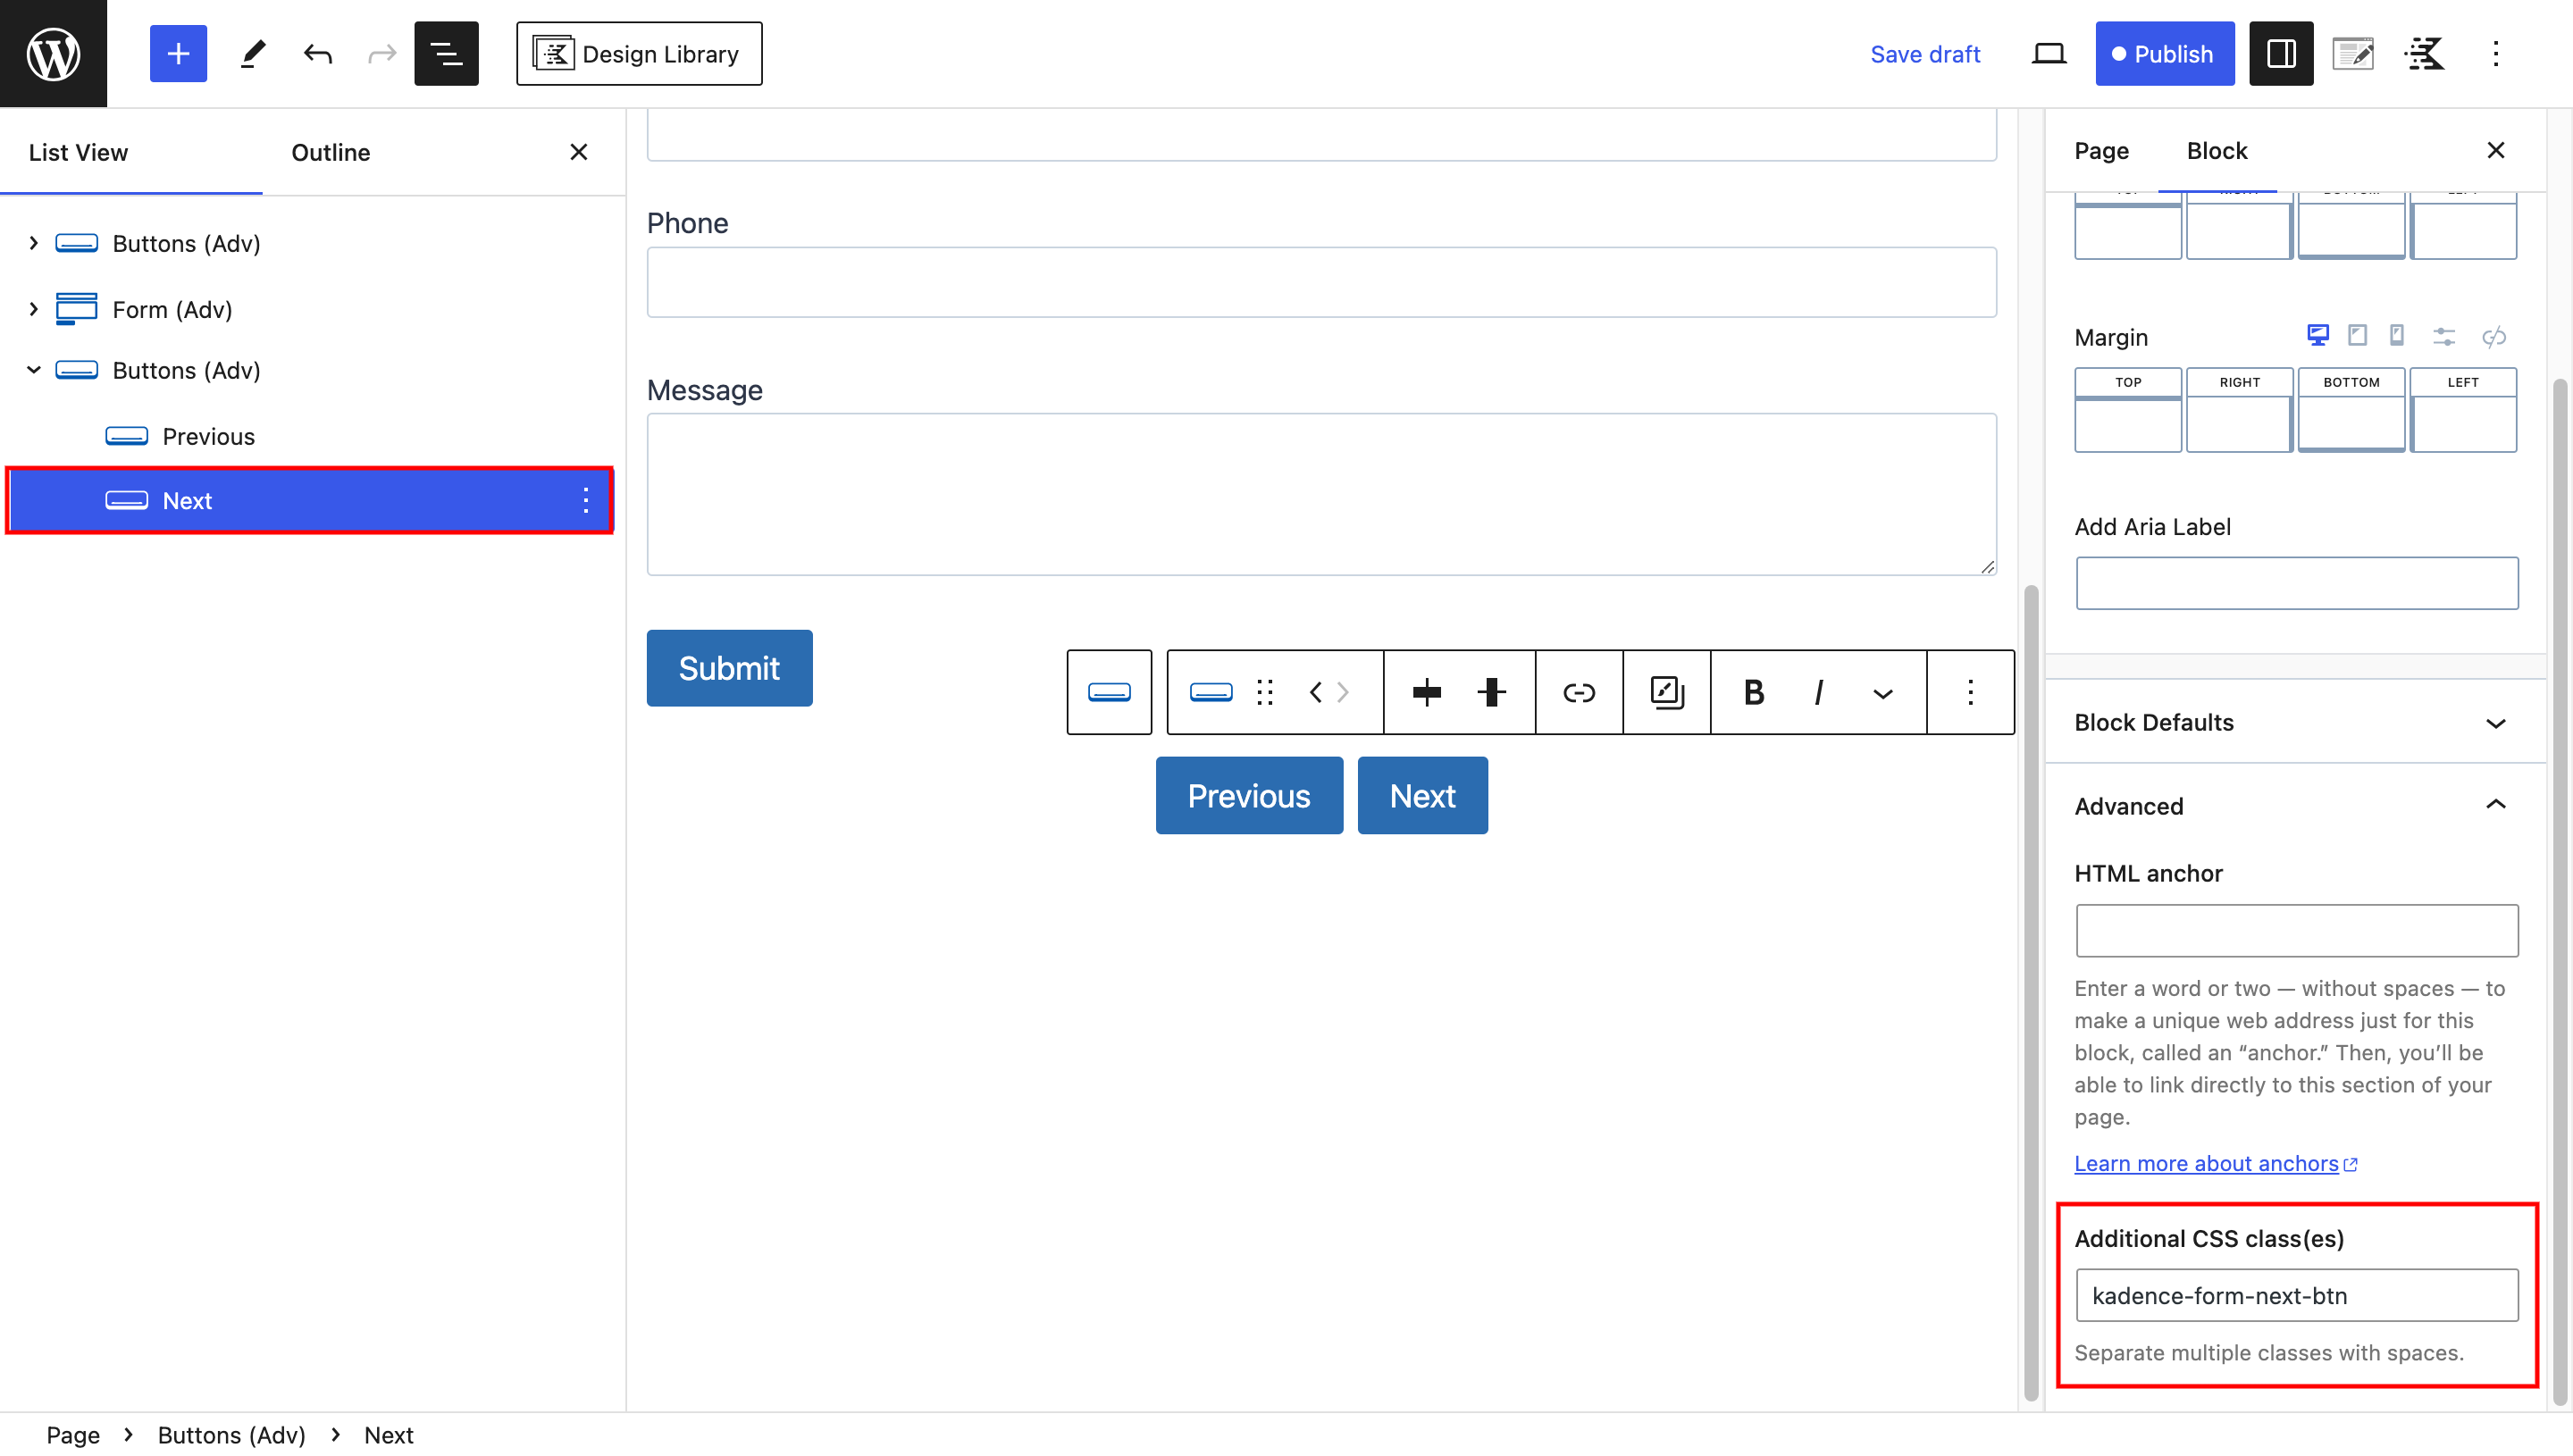
and “kadence-form-next-btn” to the next button.
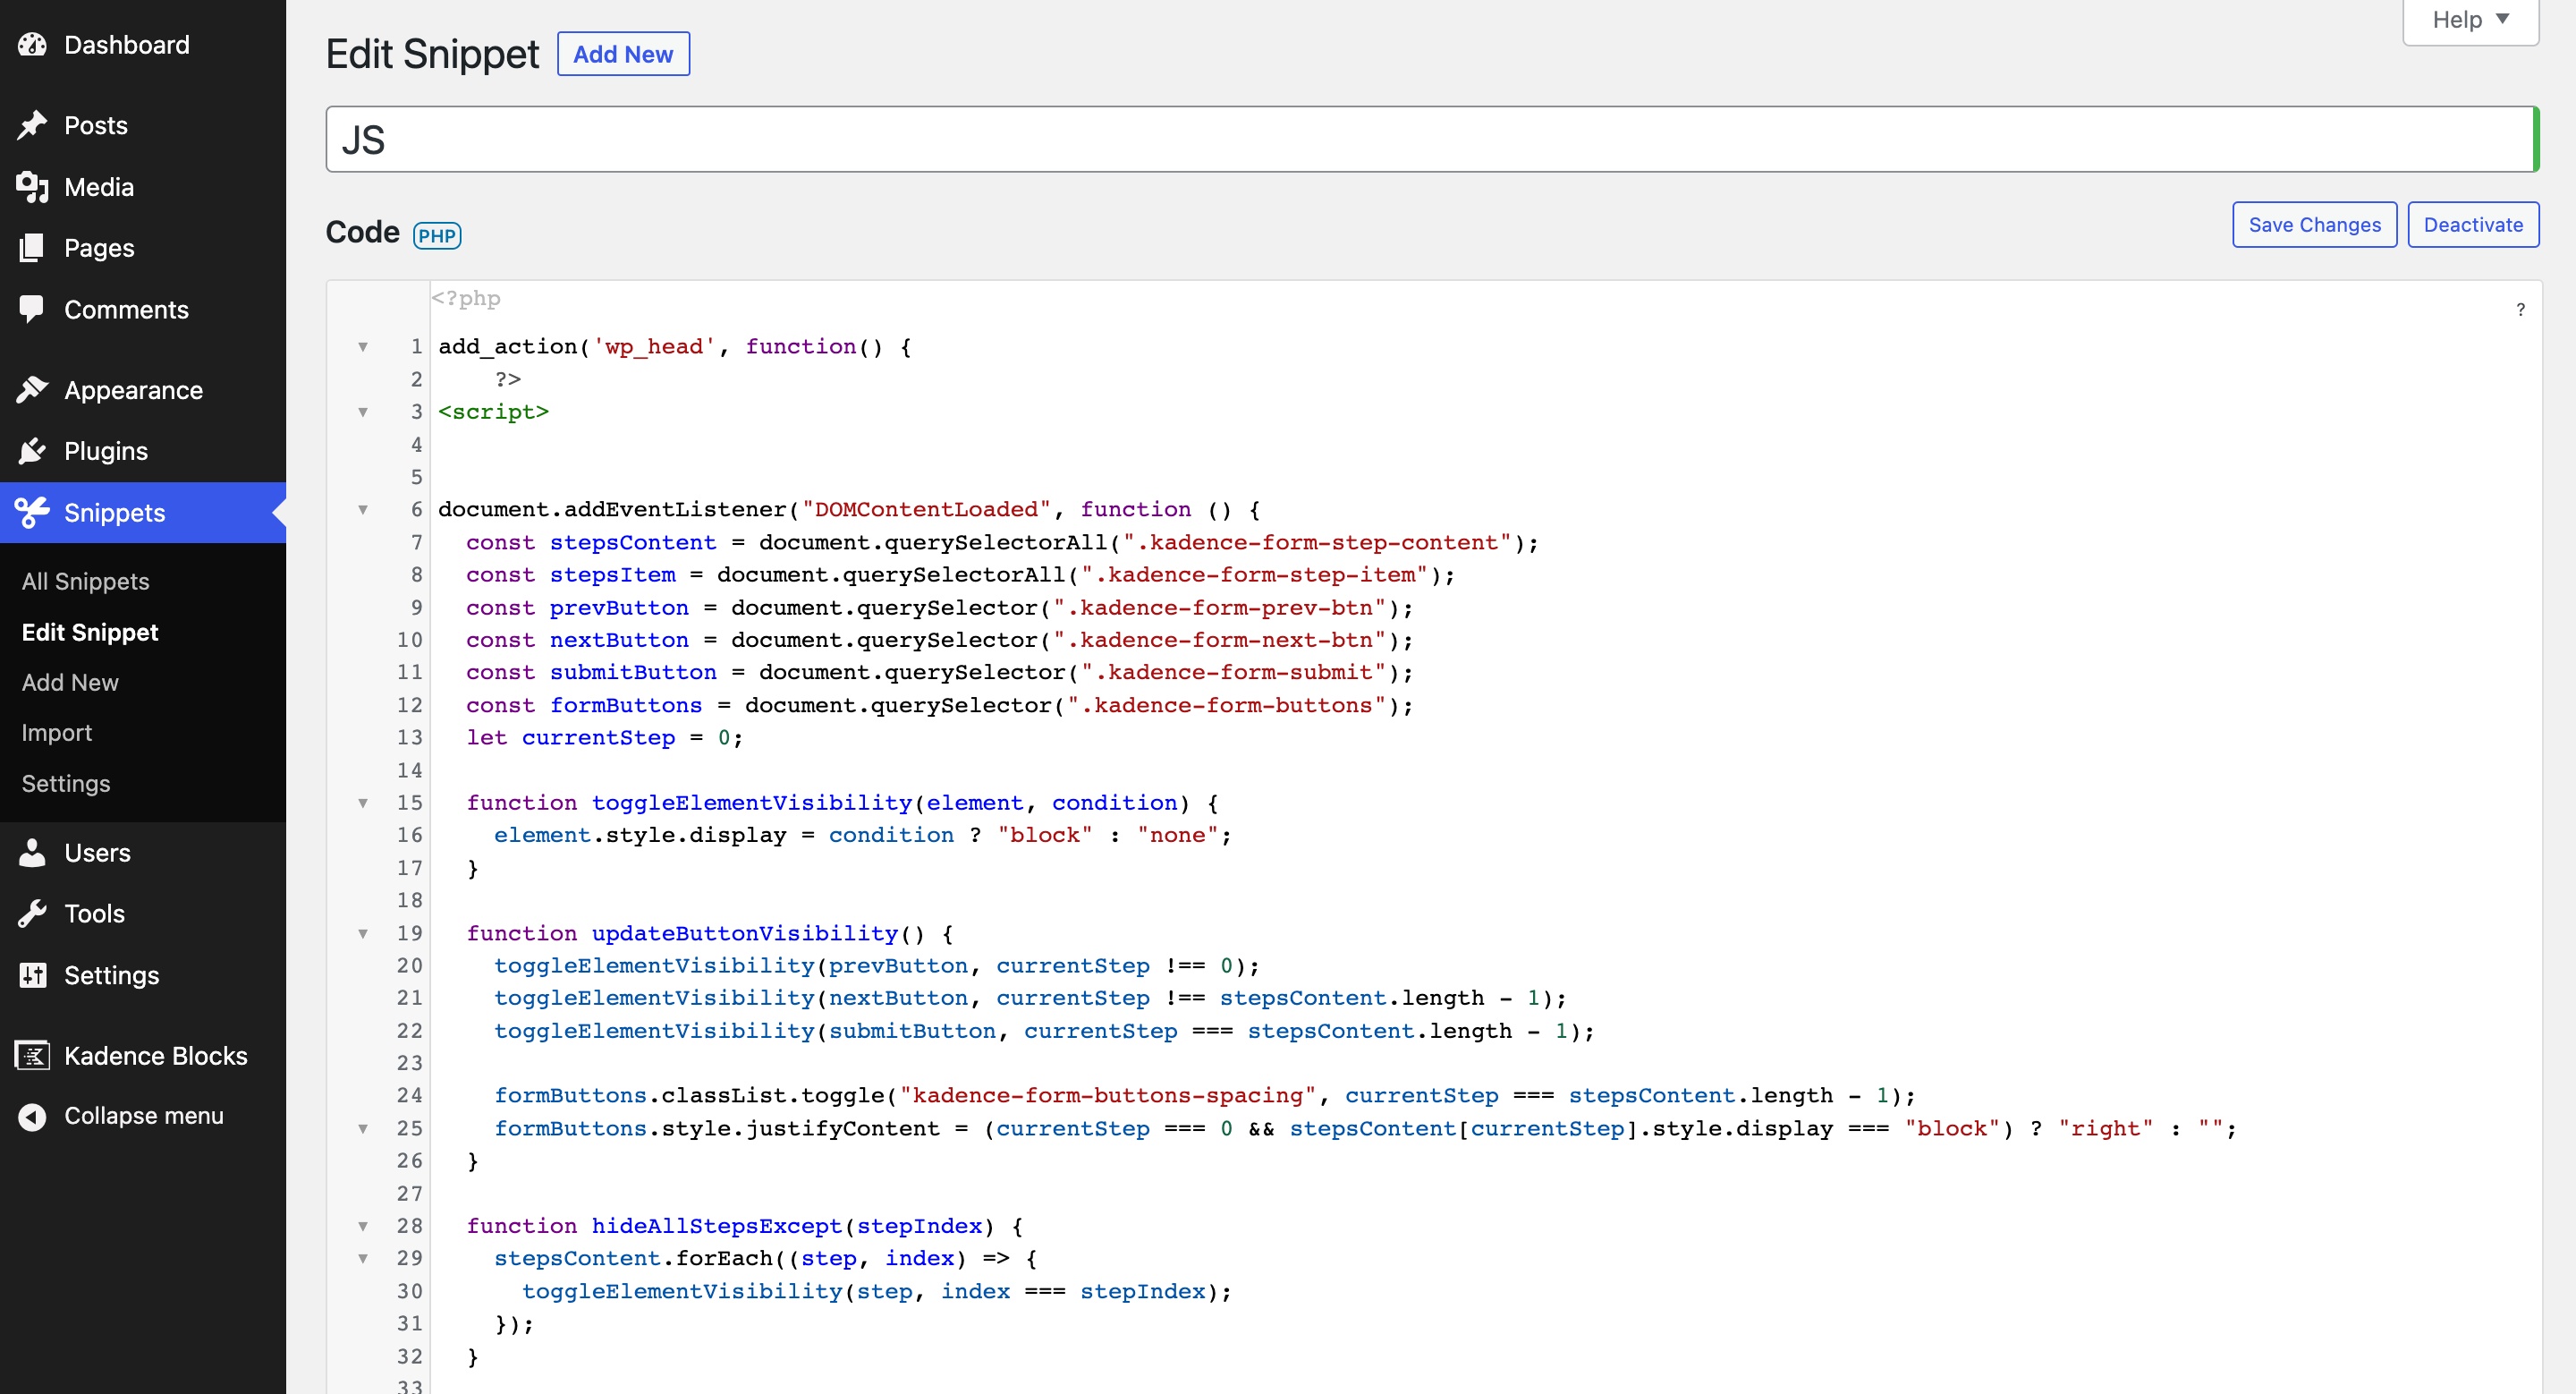
Adding JavaScript Code
To make your multi-step form fully functional, you’ll need to add a small snippet of JavaScript code. You can easily do this using a free WordPress plugin like “Code Snippets.”
Copy and paste the following CSS code.
document.addEventListener("DOMContentLoaded", function () {
  const stepsContent = document.querySelectorAll(".kadence-form-step-content");
  const stepsItem = document.querySelectorAll(".kadence-form-step-item");
  const prevButton = document.querySelector(".kadence-form-prev-btn");
  const nextButton = document.querySelector(".kadence-form-next-btn");
  const submitButton = document.querySelector(".kadence-form-submit");
  const formButtons = document.querySelector(".kadence-form-buttons");
  let currentStep = 0;

  function toggleElementVisibility(element, condition) {
    element.style.display = condition ? "block" : "none";
  }

  function updateButtonVisibility() {
    toggleElementVisibility(prevButton, currentStep !== 0);
    toggleElementVisibility(nextButton, currentStep !== stepsContent.length - 1);
    toggleElementVisibility(submitButton, currentStep === stepsContent.length - 1);

    formButtons.classList.toggle("kadence-form-buttons-spacing", currentStep === stepsContent.length - 1);
    formButtons.style.justifyContent = (currentStep === 0 && stepsContent[currentStep].style.display === "block") ? "right" : "";
  }

  function hideAllStepsExcept(stepIndex) {
    stepsContent.forEach((step, index) => {
      toggleElementVisibility(step, index === stepIndex);
    });
  }

  function updateStep(stepIndex) {
    stepsItem[currentStep].classList.remove("active-step-item");
    currentStep = stepIndex;
    stepsItem[currentStep].classList.add("active-step-item");
    hideAllStepsExcept(currentStep);
    updateButtonVisibility();
  }

  updateStep(currentStep);

  nextButton.addEventListener("click", () => {
    if (currentStep < stepsContent.length - 1) {
      updateStep(currentStep + 1);
    }
  });

  prevButton.addEventListener("click", () => {
    if (currentStep > 0) {
      updateStep(currentStep - 1);
    }
  });
});
Final Result
Voila! You’ve successfully converted your form into a captivating multi-step experience. Users will now navigate through your form one step at a time, enhancing their engagement and interaction. Make your form look nice with colors, fonts, and spacing as you like, or match it with your website branding.
Important Points to Consider:
This was purely an enjoyable experiment involving the Kadence Advance Form Block. Consequently, this tutorial omits certain steps that might be essential for enhancing the functionality of this multistep form. These steps include:
- Error Handling: The tutorial doesn’t delve into the process of displaying or managing form submission errors that could arise when a user clicks the submit button located in the final step.
- Step Buttons: The tutorial doesn’t address the process of making the top step buttons functional. They currently serve as placeholders and solely represent the active step.


Leave a Reply