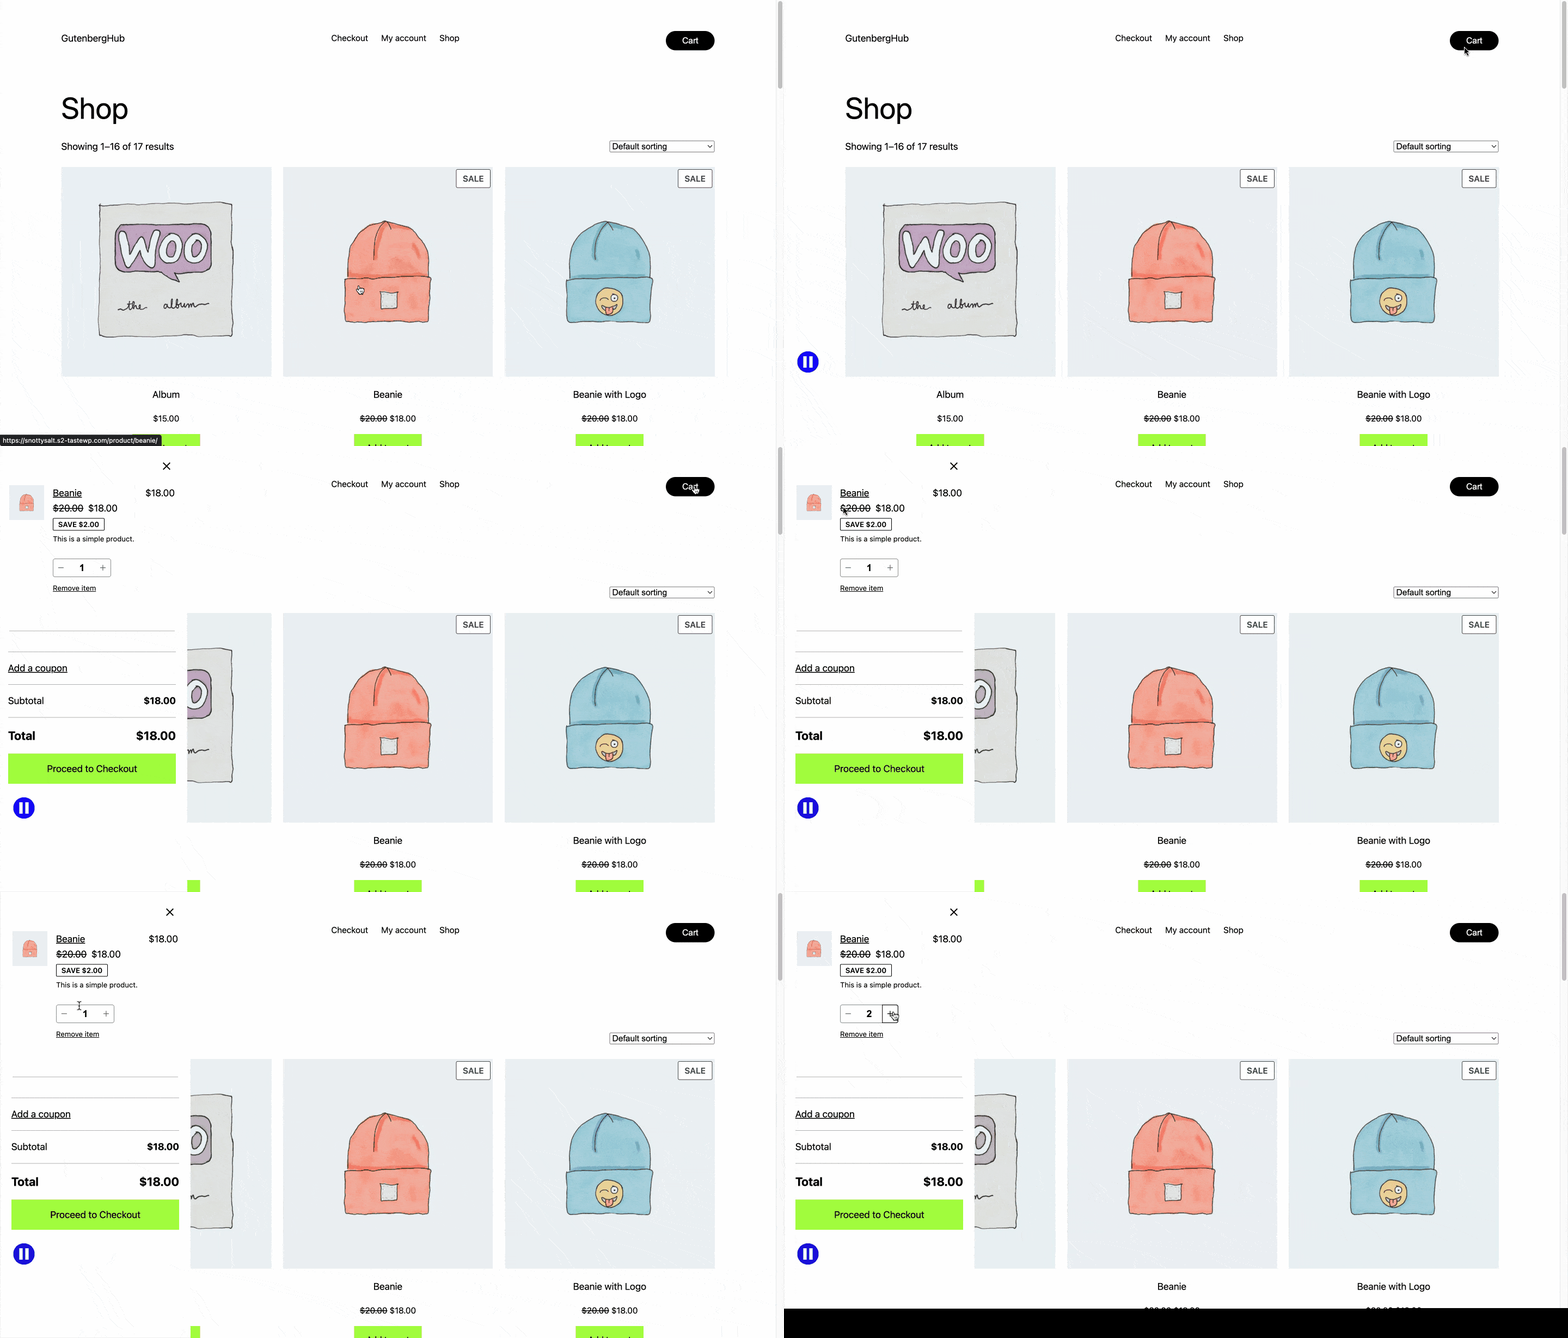
If you run an online store, it’s essential to make shopping easy and enjoyable for your customers. One way to do this is by adding sliding side cart. In this blog post, we’ll show you how to use an “Off-Canvas” plugin to achieve this on your WooCommerce website. This plugin, originally designed for off-canvas menu purposes, can also be used to display the cart. Let’s get started!
Step 1: Install and Activate the Off-Canvas Plugin
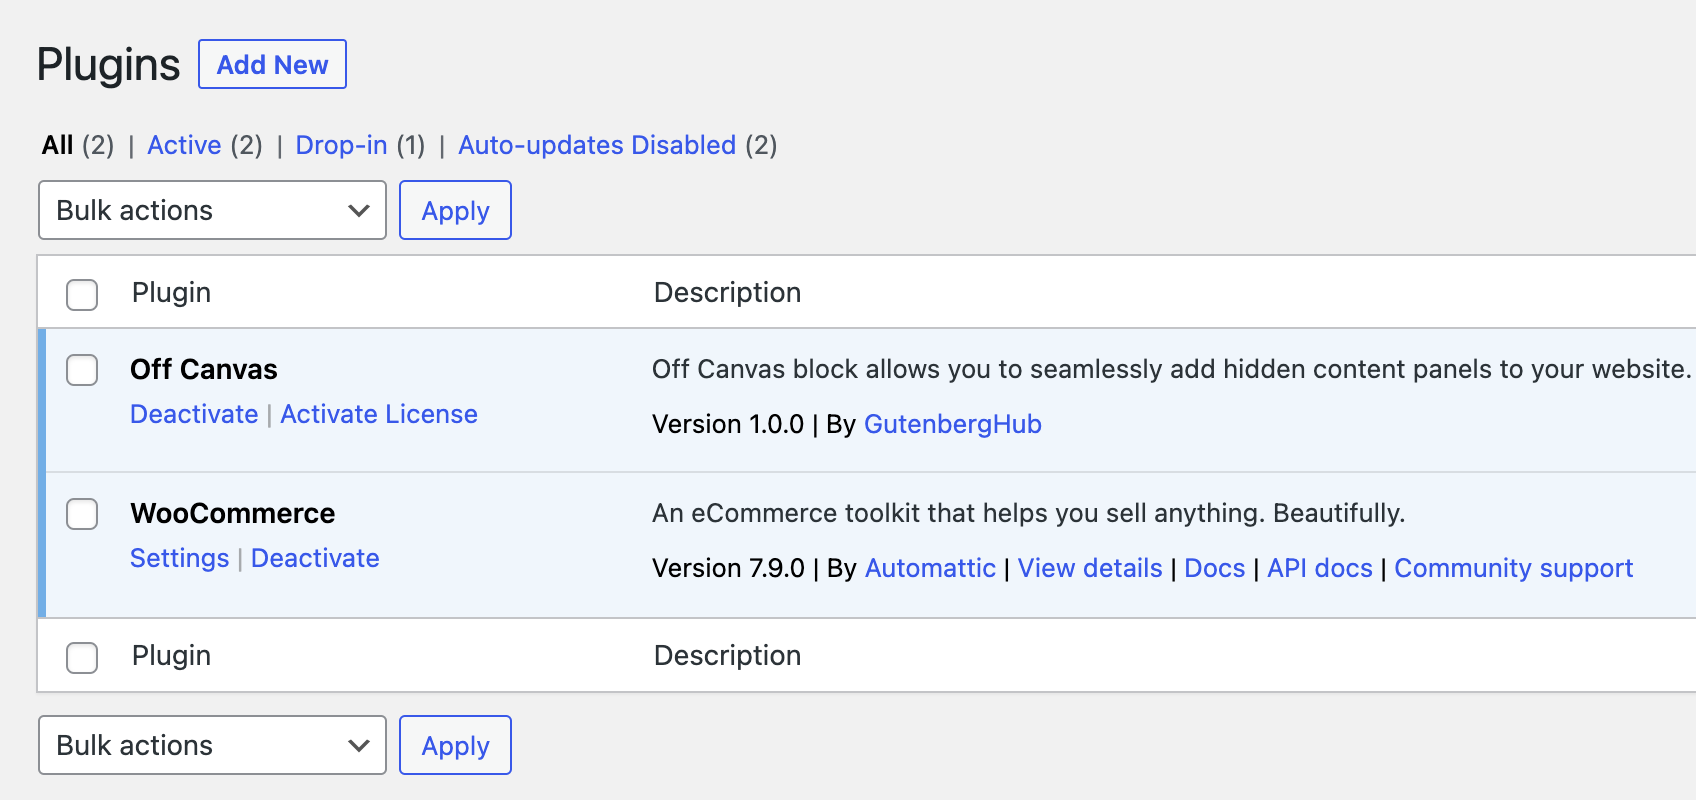
To get started, make sure you have the Off-Canvas plugin installed and activated on your WordPress website. If you haven’t installed it yet, you can learn more about its features and benefits from our website.
Step 2: Add the Off-Canvas Block to the Header
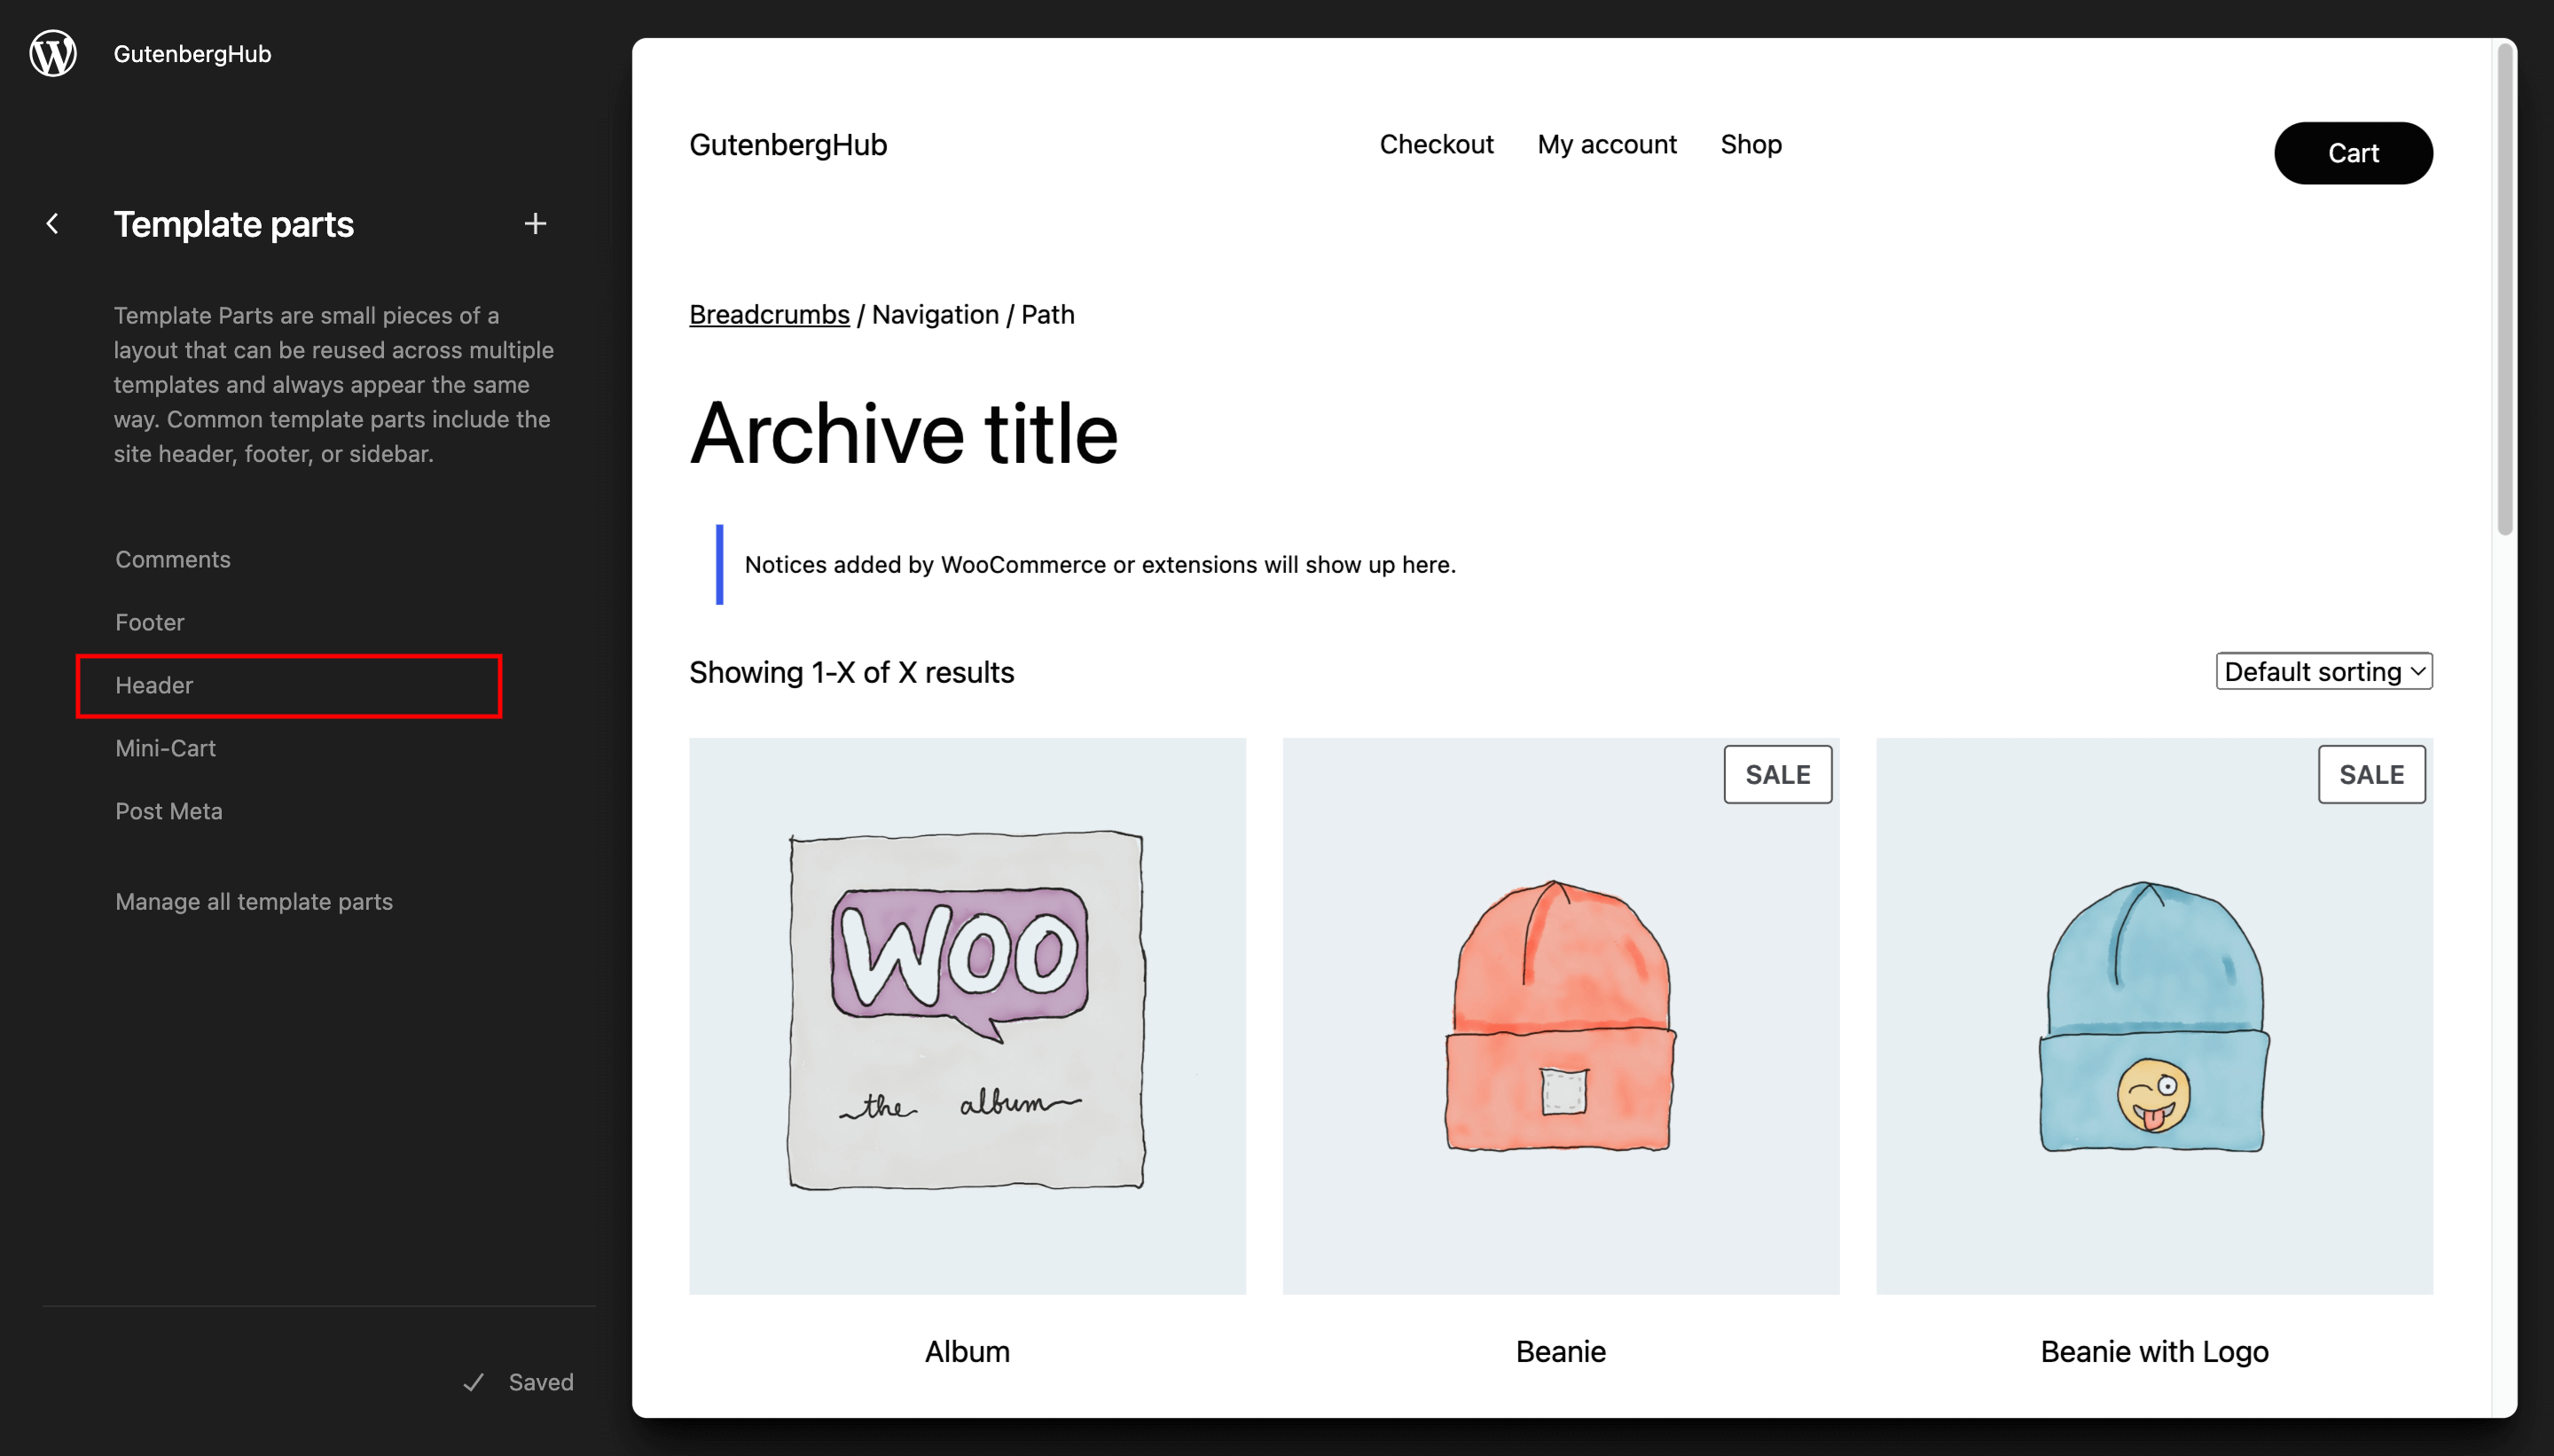
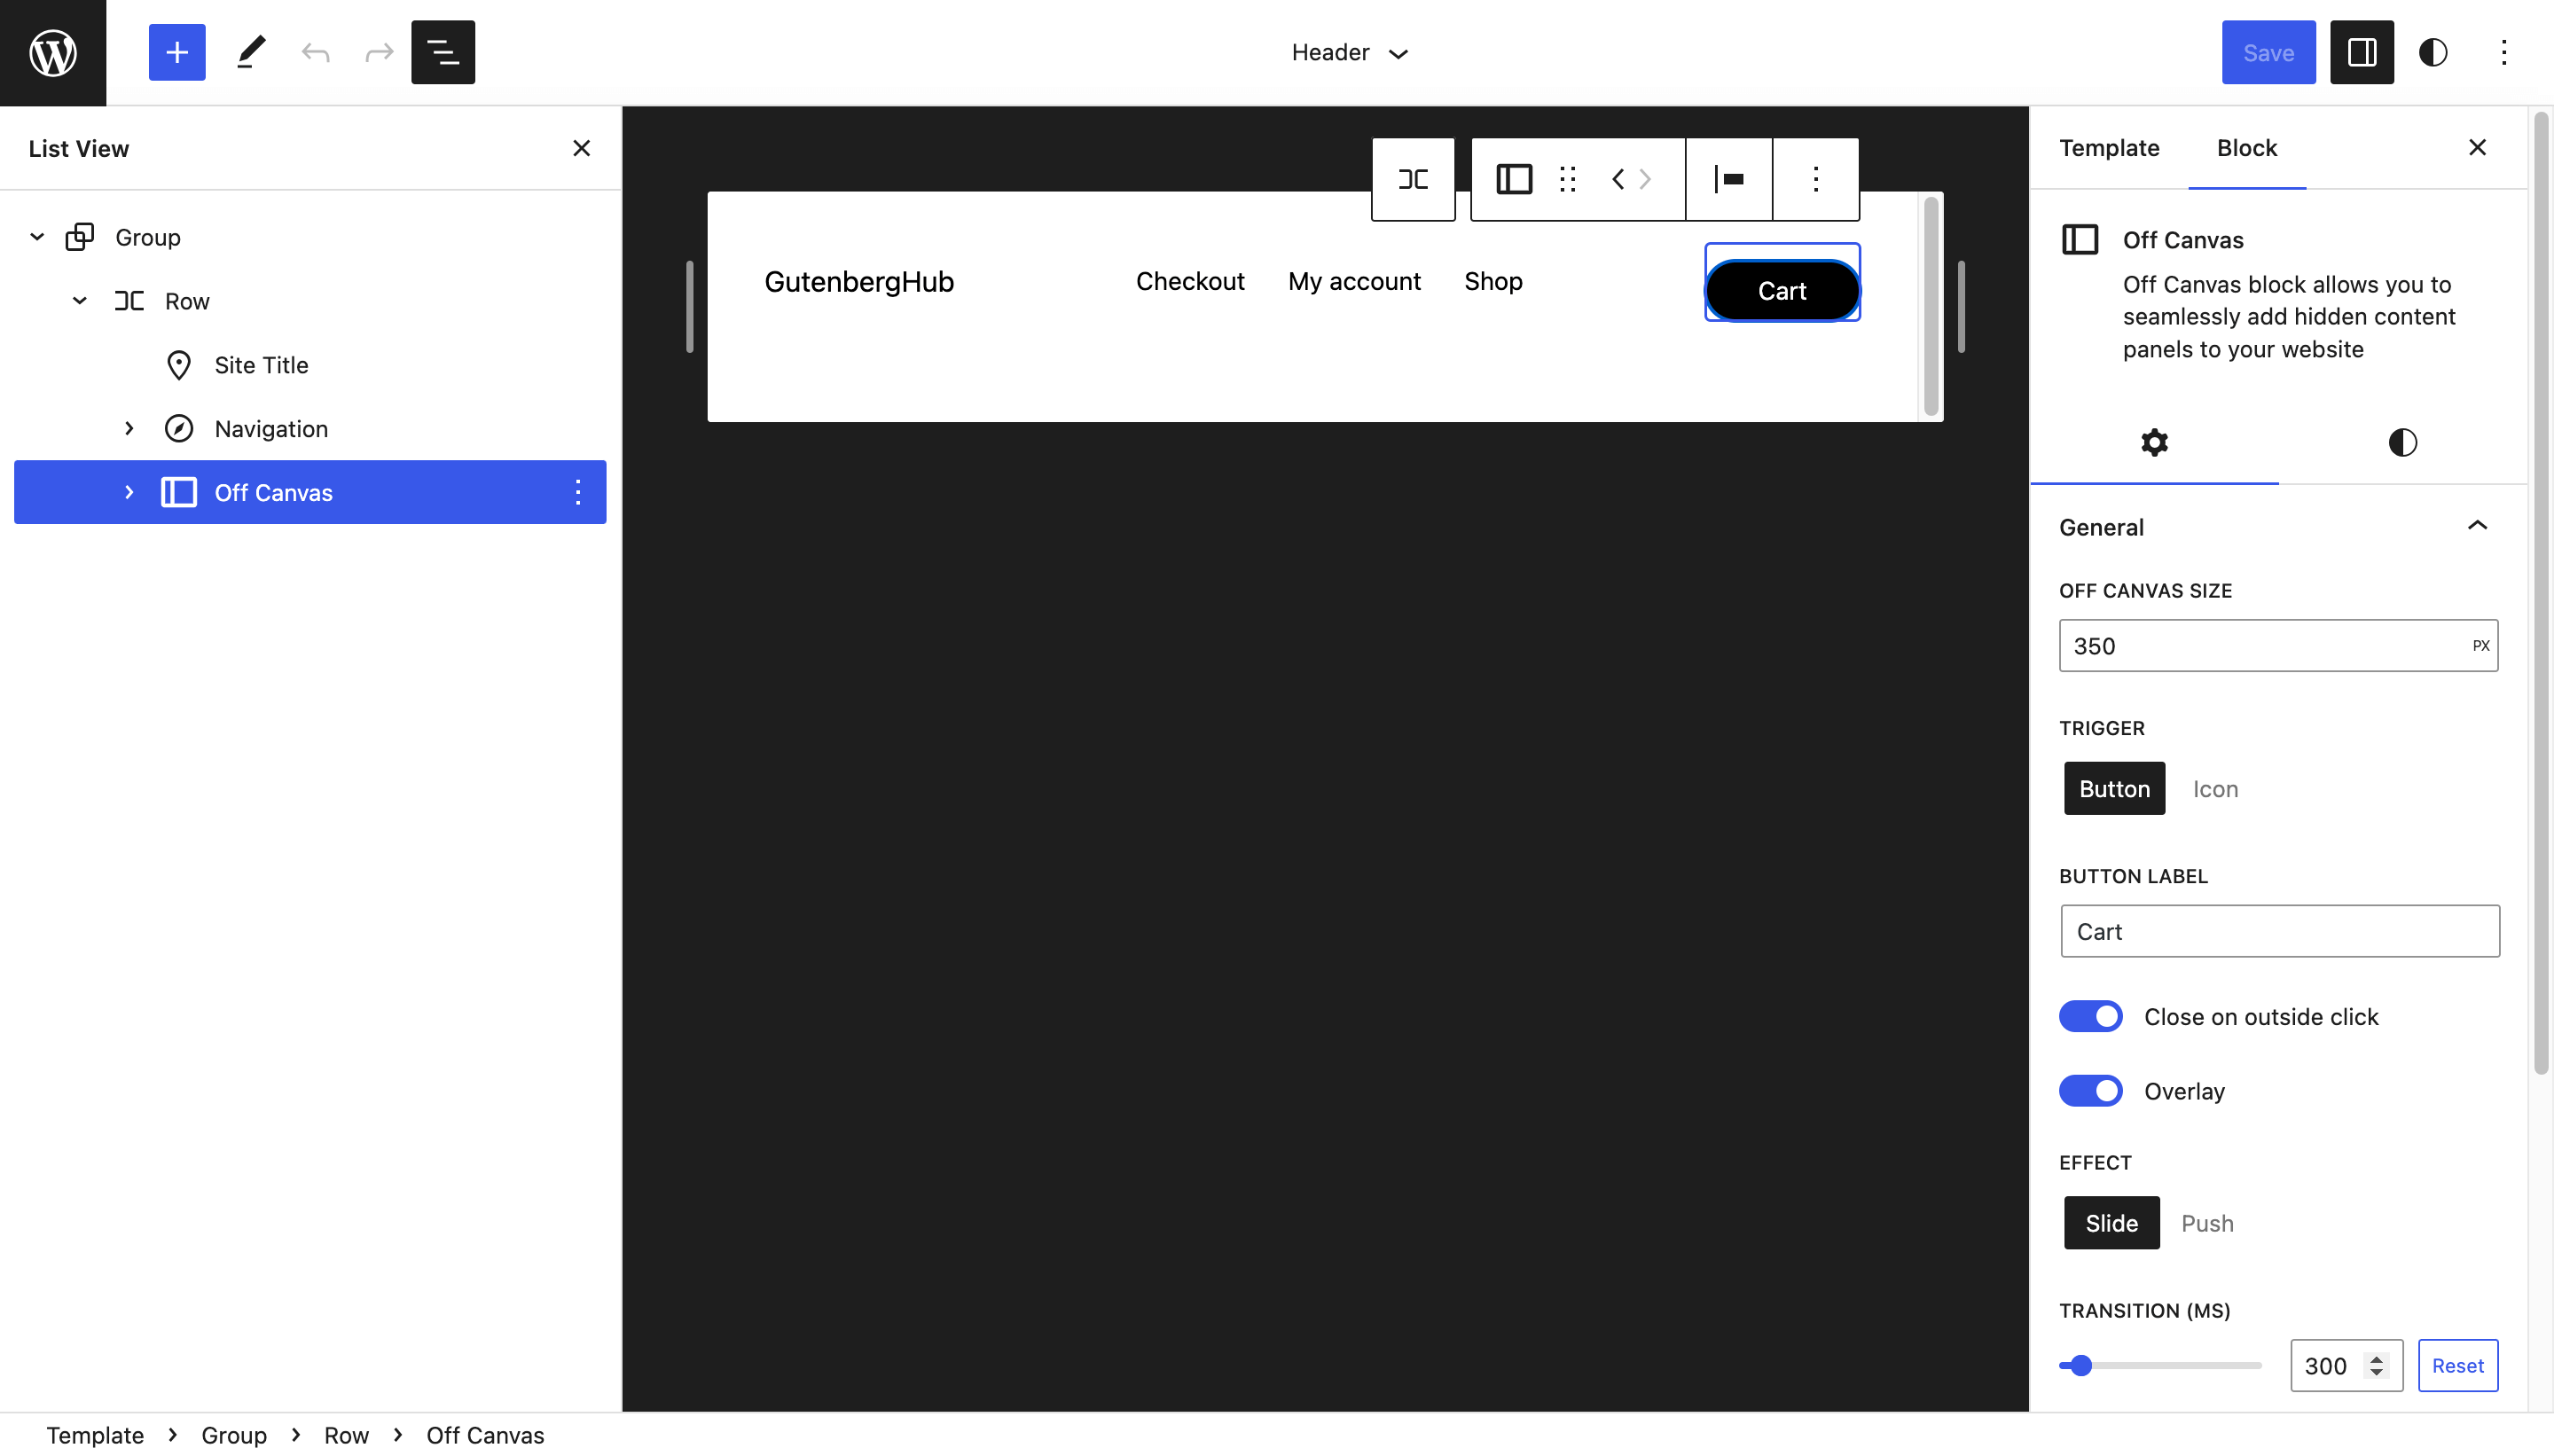
Once the Off-Canvas plugin is up and running, head to the Full Site Editing (FSE) section in your WordPress theme customization. Look for the header template part and easily add the Off-Canvas block beside the menu. This will create a designated space for displaying cart items.
Step 3: Utilize the WooCommerce Cart Block
Now, it’s time to incorporate the WooCommerce cart block into the Off-Canvas space. WooCommerce provides user-friendly blocks for various templates, including the cart. Take advantage of these built-in blocks to customize the cart display to suit your website’s design.
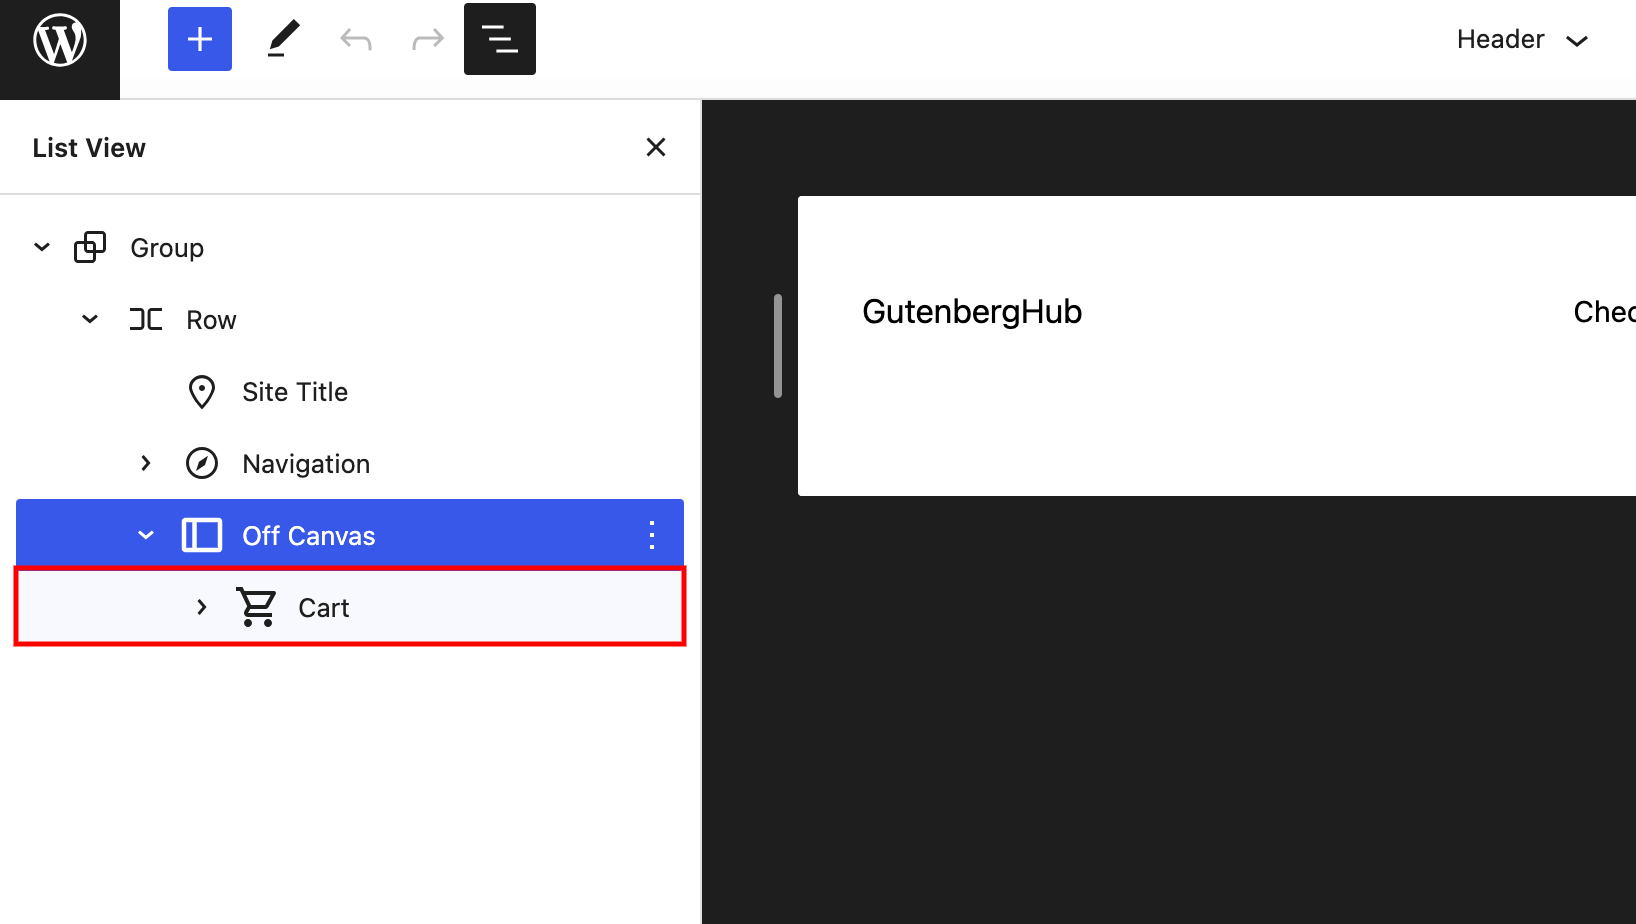
Step 4: Customize the Cart Display
With the WooCommerce cart block inside the Off-Canvas, you have the flexibility to further customize its appearance and functionality. Adjust the number of items shown, tweak the layout, or add your own custom CSS to match your website’s style perfectly.
That’s it! You’ve now set up a super cool Off-Canvas cart in WooCommerce. Your customers will love how easy it is to see and manage their cart items with just one click. This simple trick will make their shopping experience better, and they’ll keep coming back for more.

With the power of the Off-Canvas plugin and WooCommerce, you’ve created a shopping experience that rocks! So, sit back, relax, and enjoy the benefits of this awesome feature. Happy selling!


Leave a Reply